Bringing Photoshop Comps to Life With Fireworks
Photoshop or Fireworks? It’s the question that has thrown all kinds of designers and developers into a heated debate. Today we’ll use both applications to create a simple web graphic.
This tutorial is aimed at all those designers who would never dream of giving up Photoshop and know almost nothing about Fireworks. I’ll show you how to take your Photoshop graphics and add in some interactive features via Fireworks.
2 Million+ Digital Assets, With Unlimited Downloads
Get unlimited downloads of 2 million+ design resources, themes, templates, photos, graphics and more. Envato Elements starts at $16 per month, and is the best creative subscription we've ever seen.


Interactivity Should Affect Design
There are plenty of designers out there who stick to pure front-end design mockups. In other words, they fire up Photoshop, bust out the general look of a website and then pass it along to the developers.
Many argue that every designer should know how to code, but this debate is irrelevant to our topic today. The fact is that I’ve seen design offices in corporations all over the U.S. that operate with two distinct teams: the people who design in Photoshop and the people who bring those designs to life in the browser.
This article is for the former. You’re a design guy who doesn’t know a bit of code, but you know that your developer team encourages designs that are dynamic and interactive. You’d like to build your comps with these goals in mind but ultimately, you can only make vague suggestions and hope the developers share your vision.
Another common situation is the need to rapidly create a live mockup that you can show to a client. You may be perfectly capable of transforming your Photoshop work to a standards-compliant website, but want to make sure that your client is satisfied before proceeding.
In either of these cases, Adobe Fireworks is a perfect tool to add to your workflow to accomplish what you’re after. Using Fireworks, you can build interaction right into your designs and preview them as if they were a live page.
Why Fireworks?
Web designers everywhere are starting to realize that Fireworks is a really awesome tool for designing websites. There’s even a raging argument right now about whether web designers should ever even open Photoshop when they can build an entire site in Fireworks.
Despite these arguments, I realize that the web design community, for the most part, lives in Photoshop. Even I’m fairly new to Fireworks and am therefore much more prone to build a quick comp in Photoshop. For this reason, this tutorial will show you that you can use the two together in a synergistic fashion. We’ll create a basic graphic in Photoshop where you’re comfortable, then move it over to Fireworks to bring it to life.
Creating a Button in Photoshop
Instead of having your first Fireworks project be a complete website mockup, try starting with something small. The result will be a much less overwhelming transition from one app to the other. Today we’ll start your Fireworks education with a simple button graphic.
As I mentioned above, since your used to the Photoshop tool set, we’ll start there. You could easily do this entire object in Fireworks (the workflow would even be quite similar), but for now I want to focus on the idea that you don’t necessarily have to give up your favorite graphics application.
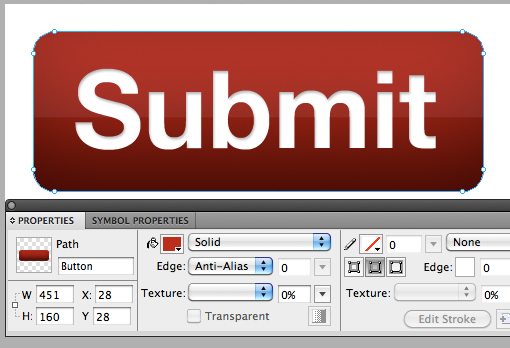
Create a new Photoshop document (any size is fine for this test) and create a vector rectangle like the one below. I filled the button with #005da5.

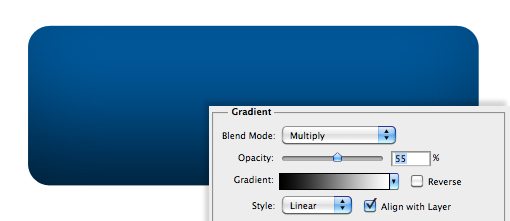
Next, go to your layer styles and add in a slight Gradient Overlay and an Inner Shadow. Just enough to make the button look a little less flat.
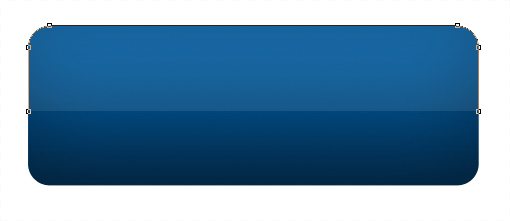
From here, duplicate the vector shape layer with your button and delete the points along the bottom edge using the Direct Selection Tool (A). Then move up the points along the side, fill the layer with white and reduce the opacity so that the effect is something like the image below.
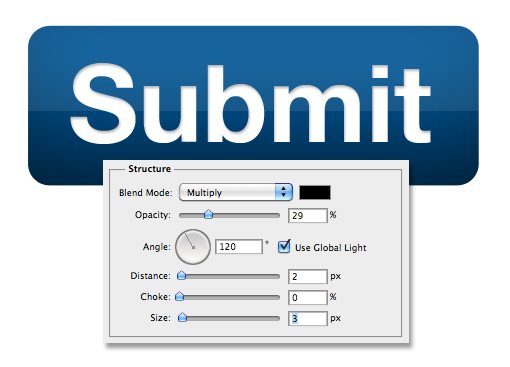
Finally, toss in some words and you’re ready to go. I used a typical bold sans-serif font with an Inner Shadow, the settings are shown below.
Now we have our horribly cliche glossy Photoshop button. From here we want to preview some interactivity. For instance, let’s say we want to show off a simple hover effect. Photoshop isn’t necessarily the best way to go about that and we don’t really need anything as intense as Dreamweaver, so where’s the middle ground? Fireworks to the rescue!
Importing into Fireworks
Before importing this document into Fireworks, make sure that your PSD is nice and cleaned up. Name all of your layers, group layers where necessary, etc. This will make everything a lot easier to keep track of down the road. Our little button only has a few layers so I simply named everything and saved the PSD to my project folder.
Fire up Fireworks and open the PSD you just saved. You don’t have to export/import in any special way, just use the plain old Open command. This will give you a few options that you can mess around with (I left them all alone), just be sure to select the option to maintain layer editablility over appearance.
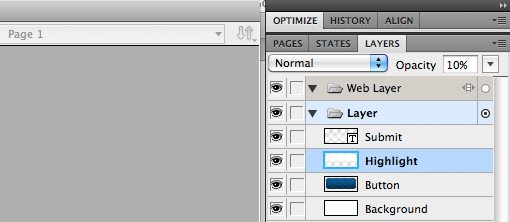
From here it’s important to investigate what Fireworks will and won’t transfer over properly. As you can see in the image below, my vector shapes, text and colors came over just fine, but the layer opacity on my highlight is at 100%. This is a bit annoying, but it’s easy enough to drop that back down to 10%.
Other than that, my little file survived the import perfectly. As you can see below, my layers each came over intact and even my layer effects are still editable.
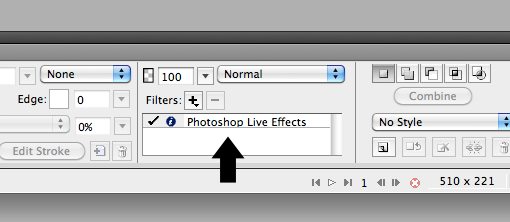
Note that layer effects appear in the Properties palette and have a very different interface than that in Photoshop. However, the same basic effects and controls are present.
Adding a New State
To add some interactivity to our button we’ll need to work with two Fireworks features that you may or may not be familiar with: Slices and States.
States are a bit like Photoshop Layer Comps, but more geared towards actual changes that an object is expected to go through. So for our button, we want the appearance to change when the user hovers over it. To accomplish this, we’ll create multiple states to reflect the different button iterations.
To do this, navigate to the States palette and duplicate the current state. Then name the original state “Normal” or “Default” and name the new state “Hover”.

From here, go to the Properties palette and change the fill color of the button to red. Again, this is pretty different than what you see in Photoshop but the process is self-explanatory. Click the swatch, pick a new color and you’re ready to go.
We now have two different states to work with: one red button and one blue button. By utilizing slices, we can link these states to a hover action without any code whatsoever.
Adding a Slice
Fireworks slices work very similar to those in Photoshop, only when they’re teamed up with states you get some almost Dreamweaver-like functionality.
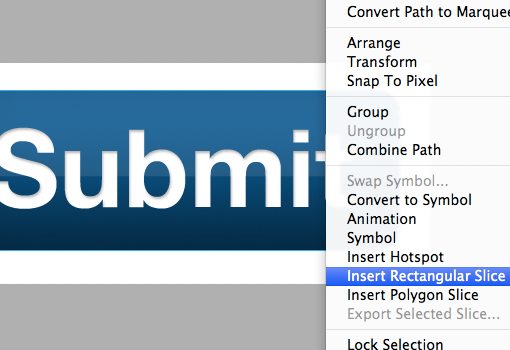
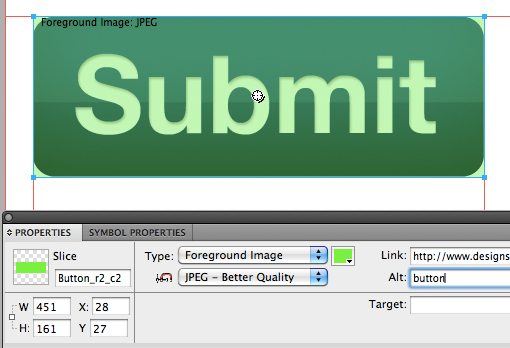
To add a slice, grab the selection tool and right-click on the blue button (make sure you don’t click on the highlight). From here, select the menu item “Insert Rectangular Slice” to create a slice that’s the same size as our button.
After this, a colored overlay should appear over the button. Look down in the Properties palette again to find options for the file compression of the slice, I chose “JPEG – Better Quality”. Here you can also add in a link and some alt text.
Implementing the Hover Effect
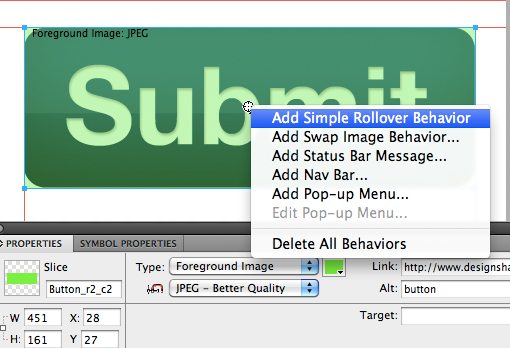
Notice the little circle in the center of the button in the screenshot above. Clicking on this will bring up a list of actions. From here, all you have to do is select “Add Simple Rollover Behavior” and that will automatically swap the state of the button when you hover over the image.
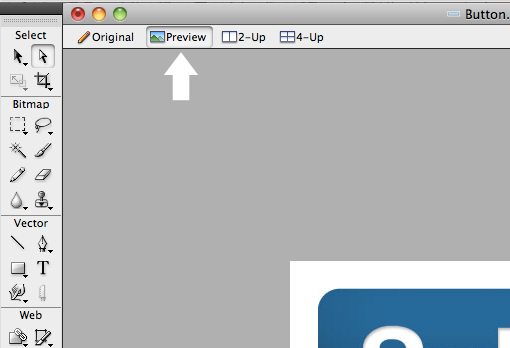
After you do this, you won’t really notice any difference in your document. To see the effect in action, click on the Preview button near the top of the window. This will allow you to interact with the button just as if it were in a web browser.
Exporting the Button to a Browser
Now, if you want to show your creation to someone else, you’ll likely want to bring it outside of Fireworks. One way to do this is to export your file as a web page. When you got to File>Export, choose the “HTML and Images option” show in the image below.
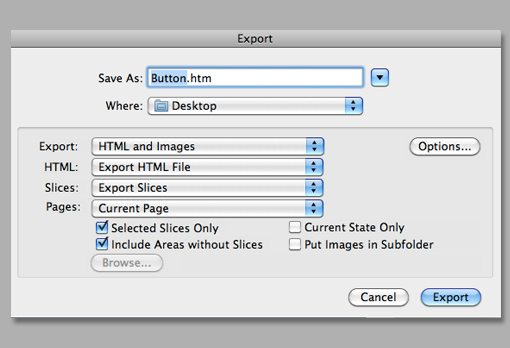
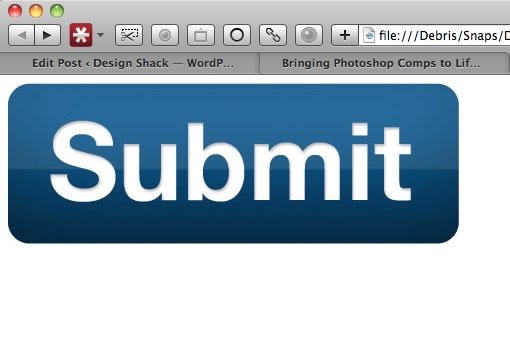
Note that if you’re creating an actual full site with multiple pages, you’ll want to select the “All Pages” option but for this small test we only need the current page. The result should be a folder of images and an “htm” or “html” file which you can upload to a server and share online. Notice that when you open it up in the browser, both the hover effect and the link we inserted work just like on a real website, which makes this a great tool for creating web comps very quickly.
Not Production Ready
If you’re a non-coder who suddenly thinks he struck gold, hold on a minute. Unfortunately, the output here is fine to look at, but no where near something that you would want to publish on an actual site. The result of our simple little project was a whole mess of JavaScript when in reality such a simple web element requires only a few lines of HTML and CSS.
Fireworks isn’t meant to be a full-blown WYSIWYG site builder. Consequently, the live web output just isn’t up to par and should only be used for preview purposes.
Conclusion
To sum up, Photoshop is awesome for building graphics, but when it comes to creating and previewing interaction, it comes up short. In these cases, Fireworks provides you with a much more powerful toolset.
This tutorial is for absolute Fireworks beginners and barely scratches the surface of the web tools and functionality that you have available to you. We’ll follow this up soon with a more in-depth look at how to use Fireworks to build some awesome full-blown website comps.