How to Make a Budget Wedding Website With Tumblr
Having a wedding website or blog is all the rage, and it can be a great way to keep your friends and family up-to-date with your wedding planning for the special day.
There are lots of services out there to help, but many are quite expensive or complicated. Today we’re taking a look at how you can build your own wedding website in a few simple steps, using the Wedding Tumblr theme.
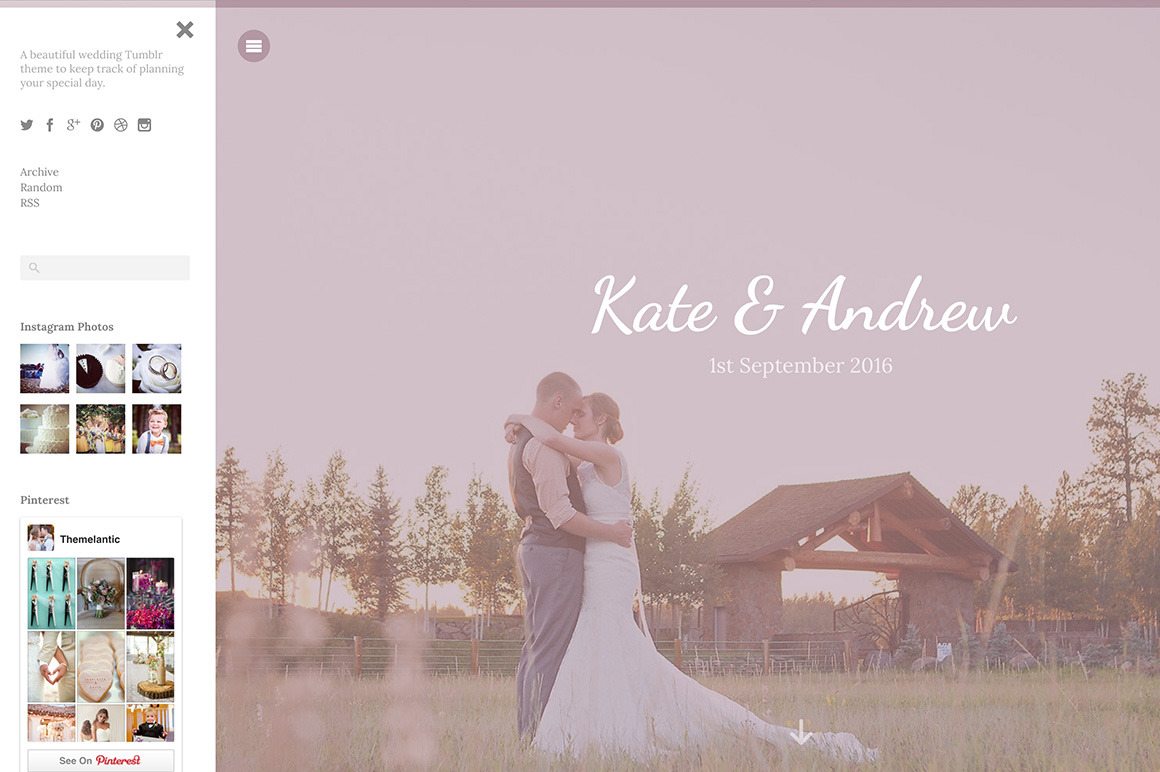
You’ll have a wedding website to be proud of, in no time at all (here’s an example). All for the price of a couple of wedding magazines!
2 Million+ Tumblr Themes, Web Templates & More With Unlimited Downloads
Download thousands of Tumblr themes and templates with a monthly Envato Elements membership. It starts at $16 per month, and gives you unlimited access to a growing library of over 2,000,000 Tumblr themes, templates, fonts, photos, graphics, and more.


Create a Tumblr Account
The first step is to set up your own Tumblr account. Head over to Tumblr’s registration page to get started. You’ll need to enter a username and password, then also choose a username. This will become the address of your wedding website (i.e. username.tumblr.com), so think carefully about what you’d like it to be!
You can always use your own website address later if you’d like, but having a good username is a decent starting point. Once you’re done, you’ll be logged into Tumblr and can head on to the next step.
Install the Wedding Tumblr Theme

There are hundreds of themes for Tumblr, but we’re using a specific wedding Tumblr theme today (called, appropriately, “Wedding“!). The next step is to buy and install the theme:
It costs $19, but that’s all you’ll have to pay. Everything else is completely free (so it’s great if you’re on a bit of a budget, and want to save a few dollars to spend on something else!). Click the “Purchase” button, then follow the steps to buy the theme. It’ll be automatically installed on your blog for you, then you’ll be good to go and start setting things up.
Choose Your Color Scheme
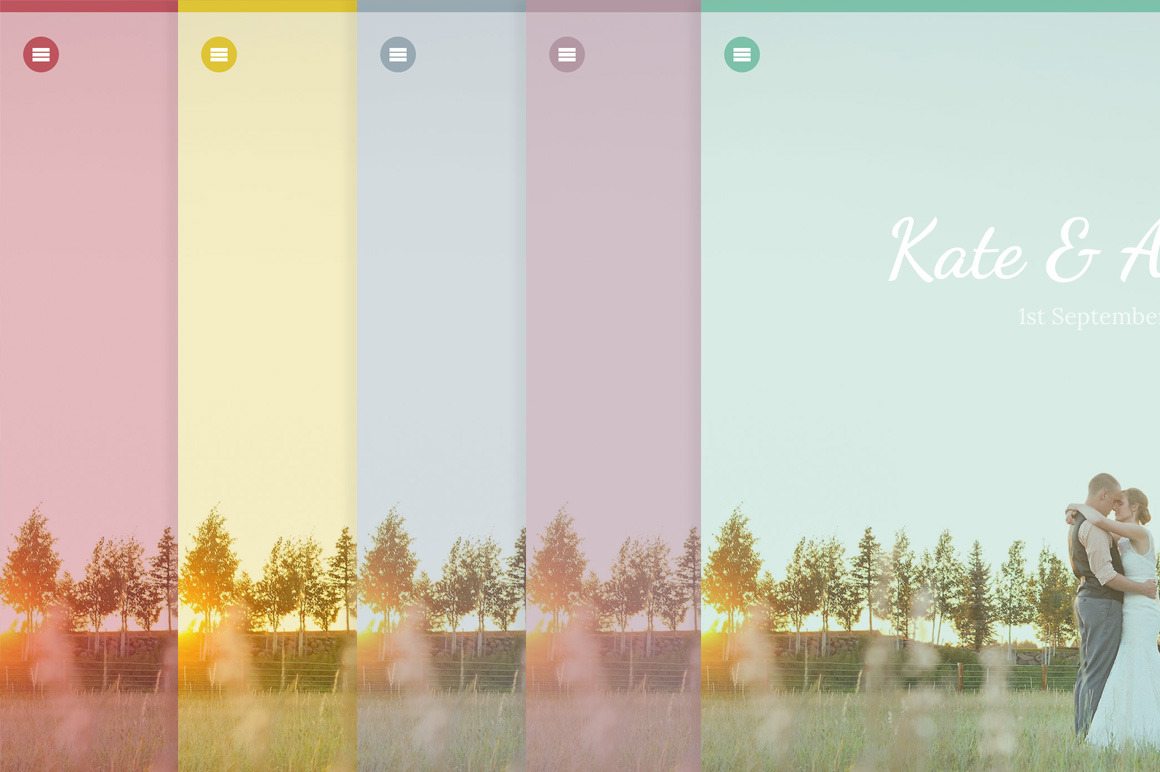
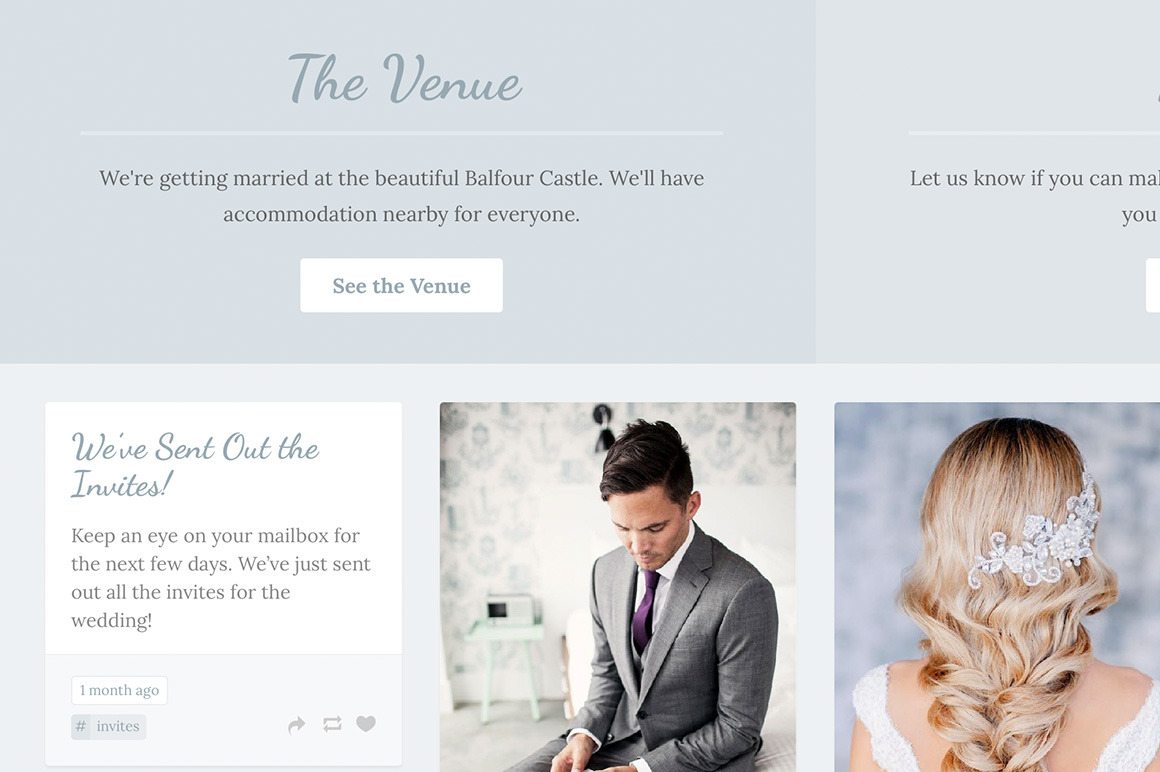
The first thing you’re going to want to change is the colour scheme — what good is a wedding website if it doesn’t match everything else! This theme comes with five different pre-built colour schemes, or you can customise it to match your own exactly:
- Click your “Account” icon in the top-right of Tumblr
- Choose “Edit Appearance” underneath your wedding blog
- Click the “Edit Theme” button
You’re now in the theme’s “Customise” page, which is where you can tweak all the options and settings. To choose one of the pre-built colour schemes, just change the “Colour Scheme” dropdown. Options include the default Rosebud, Skylark, Azure, Daisy, and more. Alternatively, you can tweak each colour option to your own setting, so everything matches your wedding scheme perfectly.
Add Your Wedding Details and Photo
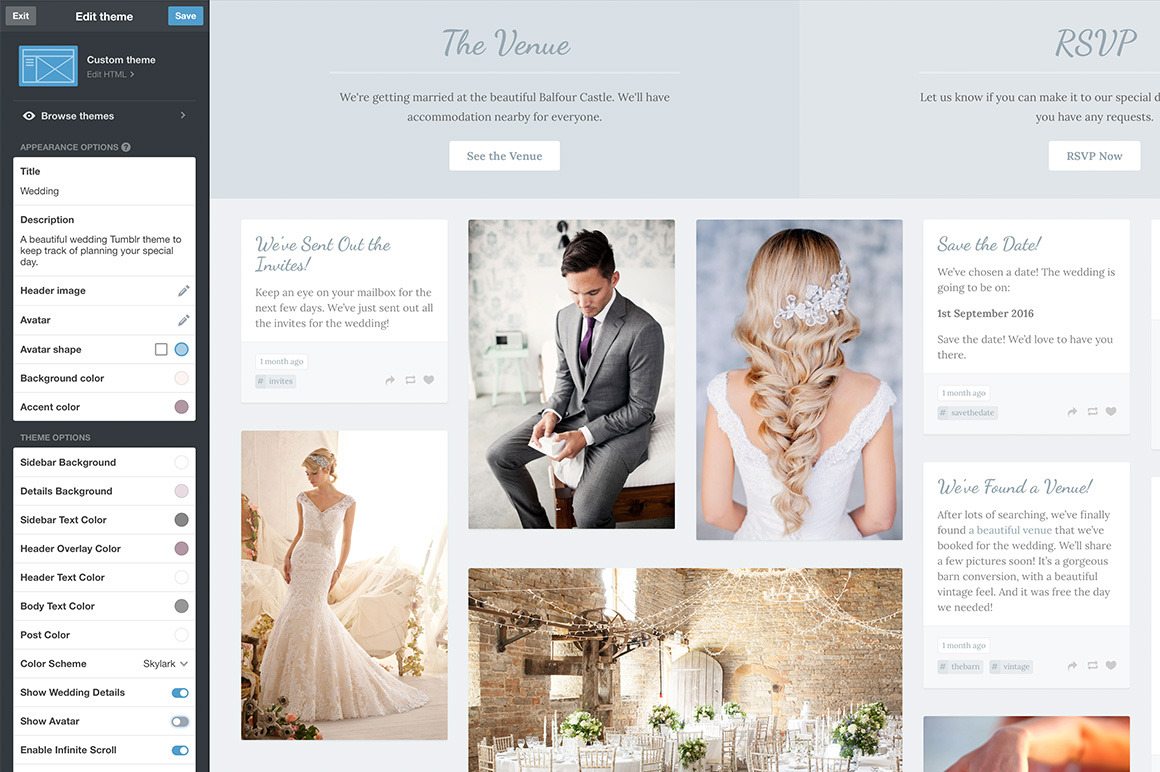
There are plenty of other options to explore on this settings page. Here are a few that you’ll want to add:
- Header Image: This should be a large photo, that will fill the background of the page before someone scrolls down. The bigger, the better!
- Names and Dates: Enter your names, and the date of your wedding, to change the main title that appears on the home screen.
- Box 1 / Box 2: You can choose your own text and link to appear in each of the two “wedding detail” boxes (or turn them off if you’d rather not use them). These are a great place to share details like the venue, accommodation, gift list, or anything else!
- Grid Layout: You can turn this on or off, depending on whether you’d like your blog to show up as a grid, or in a single column.
- Fonts: You can change the font that’s used in different parts of the page, choosing from anything in the Google Fonts library
Add Your Social Media Accounts
Last but not least, you should connect up any social media accounts you’d like to use. This could be your Twitter feed, Pinterest board (perfect for sharing your inspiration with your guests!), or Instagram feed for showcasing wedding photos. The settings to do this are all fairly straight-forward, and involve entering your username for each service, and a few other details. You’ll be up and running in no time.
Start Posting!
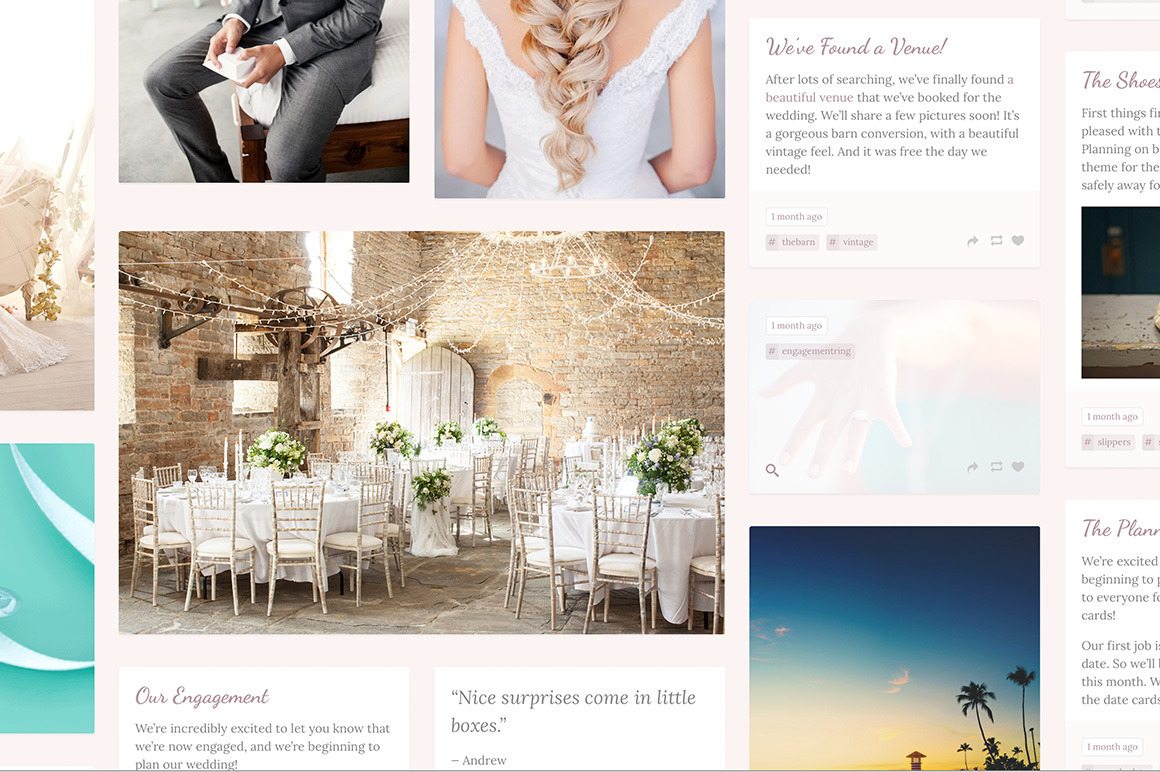
And, that’s it! The next step is just to get started with posting your own images, stories, videos, inspiration, and anything else you’d like to share! Guests can keep track of what you’re up to on their computer or phone (the theme looks good on either), and you can even keep your wedding website updated with photos from the day when you’re back from your honeymoon. Have fun!
Any Questions? Get Help!
The great thing about buying a theme on Tumblr is that you can get help during the setup if you need it! This particular theme is created by Themelantic, who offer to help you get everything set up just the way you need it (and explain anything you don’t understand right away). Much easier than being left on your own, trying to figure out why things aren’t going to plan.
Have fun setting up your wedding website, and enjoy the big day!