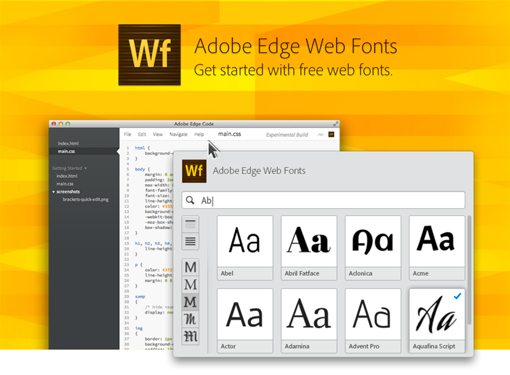
How to Use Adobe Edge Web Fonts on Your Site
Adobe recently launched a free web font service to complement Typekit, their amazing premium service. Adobe Edge Web Fonts currently gives you around 500 free font families that you can use on your site today with little effort. How great is that?
The process for implementing these fonts isn’t quite as straightforward as some of the other services that you might be used to, so today we’re going to dive in and take a look at how it all works.
Meet Edge Web Fonts
Launching Edge Web Fonts is a bit of a surprising move for Adobe. It gives Adobe fans a new reason to forgo purchasing a Typekit subscription. However, given the strength of free competitors such as Google Web Fonts, perhaps it was a necessary move.
The really weird part for me is how fragmented the idea seems at the moment. Edge Web Fonts actually uses Typekit to serve up the fonts, but it is not, as you might expect, simply a new free plan tacked onto Typekit. It’s currently more of a standalone service. This service is implemented right into some of Adobe’s apps, but is also available for use without those apps as long via a quick visit to the documentation.
Perhaps Adobe is using the “Edge” tools and services as a sort of “Google Labs” style playground, meaning that Edge Web Fonts could potentially graduate to actually become part of Typekit one day. But that’s all conjecture, for now, the two are conceptually distinct.
Implementation: Pick Your Poison
Edge Web Fonts is actually a pretty fantastic service in terms of selection. There are a ton of great fonts contributed by Adobe, Google (Competitor? Partner? Google always blurs this line) and others.
The question is, “how do you use it?” It’s a simple enough question, but the answer is a little bit more complicated. It’s not rocket science mind you, but there are a few different options that you should be aware of:
- Preview Tool – A little widget on the Edge Web Fonts site that helps you choose a font and grab the code.
- App Support – Some Adobe apps are integrating the service directly so you can access the full free font library with ease.
- Manual – You can use the documentation and write your own code to implement any of the fonts anywhere you want.
Ultimately, options are good, and we’ve got a number of them to choose from here. Let’s take a look at each up close.
Preview Tool
To use the preview tool, hit up the Adobe Edge Web Fonts page and scroll down to the bottom of the page. You should find the following tool in the left column:
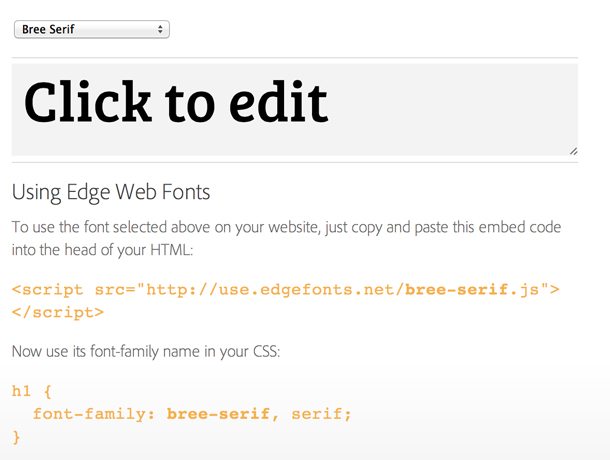
This little tool is simple, but handy. You simply choose a font from the drop down menu and the little preview box updates live with your selection. You can even customize the text in the preview:
As we saw in the screenshot above, your selection produces two text snippets that can be used to implement the font on your site. It starts with a JavaScript embed:
<!-- Toss into your HTML -->
<script src="http://use.edgefonts.net/kameron.js"></script>
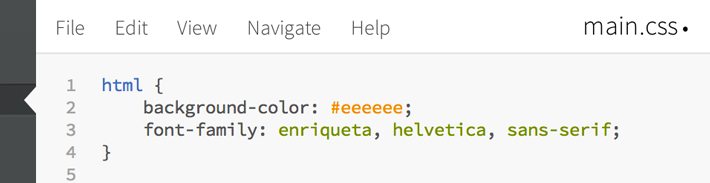
Then you jump over to your CSS and use the name of the font in your code just like you would with any native font.
<!-- Use the font name in your CSS just like normal -->
h1 {
  font-family: kameron, serif;
}
The Problem
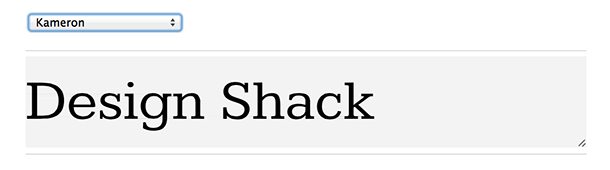
This is pretty dang easy, right? Choose font, grab code; done. I’m not sure it could get much simpler. Unfortunately, the thing that you run into with this tool is that it’s pretty laborious to actually choose a font, given that this is your method of doing so:

As you can see, you get one huge, plain text list. This means that you have to go through and select every option one at a time in order to see the preview. Obviously, this is not ideal!
App Support
Currently, app support is limited, but this will likely expand in the near future. Your two options at present are Edge Code (Brackets) and Muse.
I’m not a Muse fan, so let’s look at how app support works in Edge Code, which is actually shaping up to be a pretty cool text editor.
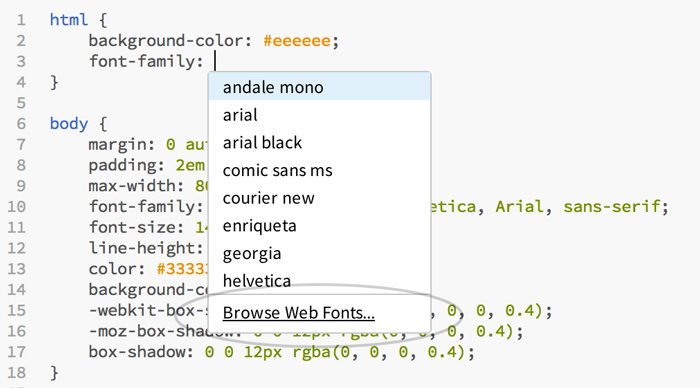
Web Fonts in Edge Code
To use Web Fonts in Edge Code, jump over to your CSS and begin to type out a font-family. This will pop up a context menu with a “Browse Web Fonts” option at the bottom:
Click on this item and you’ll get something that’s much better than the plain text list that we saw in the previous example. Here we see a grid of font previews similar to what you’d find on Google Web Fonts.
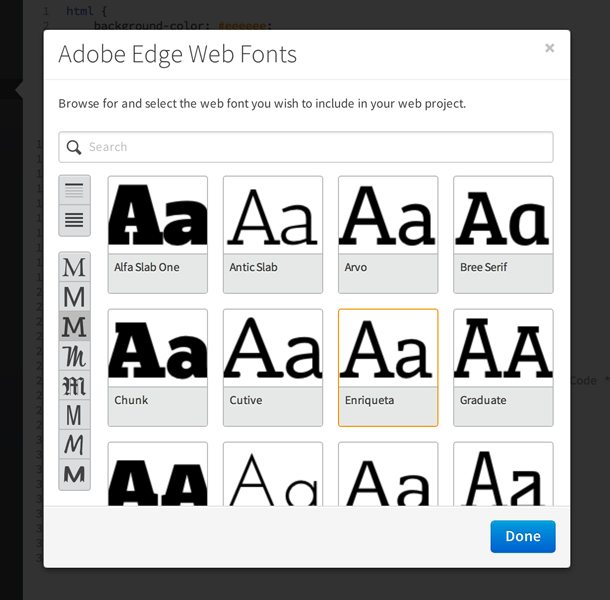
Here you can search the fonts, scroll through them manually or use the filters on the left. The two buttons at the top left allow you to choose between header and paragraph fonts and the eight buttons at the bottom allow you to filter by styles like slab serif and handwritten.
To choose a font, simply select it and hit the “Done” button. All this really does though is insert the font name into your CSS, then you can manually set some backup fonts.
The Problem
Though I love the in-app support for actually choosing a font, what happens when you make the choice is a little underwhelming. It’s nice that it inserts the name for you into the CSS, but this isn’t enough to actually implement the font on your site, you still need that HTML snippet from before. This is not automatically generated using the steps above, nor does there seem to be any clear way to do so from the HTML document.
Ultimately, in-app support is limited enough that you’ll still end up browsing through the full documentation for manual implementation.
Manual Implementation
Our final option is full on manual implementation, and Adobe has some thorough documentation to help you do just that.

The key to implementing fonts manually is understanding the syntax of the link in the embed code. Here’s an example from the documentation:
<!-- Manual Implementation Example -->
<script src="use.edgefonts.net/averia-libre:n4;bree-serif:n4:all.js"></script>
As you can see, there’s a lot going on here. What we’re doing is implementing multiple families and targeting specific variations therein. Here’s a little chart that I whipped up to help us dig through what’s happening in that link:
As you can see, there are three parts that we need to wrap our minds around. Let’s take a brief look at each.
family
This one is easy, simply toss in the name of the font that you’d like to use. This is technically all you need to make the custom font work. This alone will pull in the family as a whole. You can import multiple families with a semicolon as a separator.
<!-- Separate Families with a Semicolon -->
<script src="use.edgefonts.net/averia-libre;bree-serif.js"></script>
fvd
Some families come with multiple variations such as “Extra Light” or “Semibold.” You can selectively import these by using the “Font Variation Description” or fvd, which is denoted by a lowercase letter and a number.
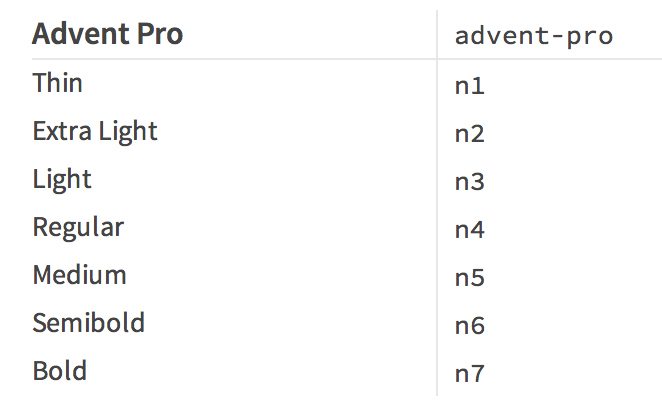
Using this chart found in the documentation, we can easily grab specific variations of the family instead of grabbing the entire thing, thereby saving some time on the loading stage. Here’s how it looks in action:
<!-- Separate FVDs with a comma -->
<script src="use.edgefonts.net/advent-pro:n4,n7.js"></script>
As you can see, you first type out the family, then insert a colon followed by the fvd codes, which are separated by commas.
subset
Subsets allow you some control over the size of the embedded font file by choosing whether or not you need all of the available glyphs. There are two options at the moment: default and all.
The “default” set contains your standard characters, and is typically all you will need. The “all” set is an expanded version that gives you everything the font has to offer, so any little extras and odd characters will be located here. Each font is different and may or may not actually contain the glyph you’re looking to implement.
If you want the “default” subset, you don’t have to bother typing anything extra. If you want the “all” subset, toss in a colon and the word “all”.
<!-- Add in the all subset with a colon -->
<script src="use.edgefonts.net/advent-pro:n4,n7:all.js"></script>
The Problem
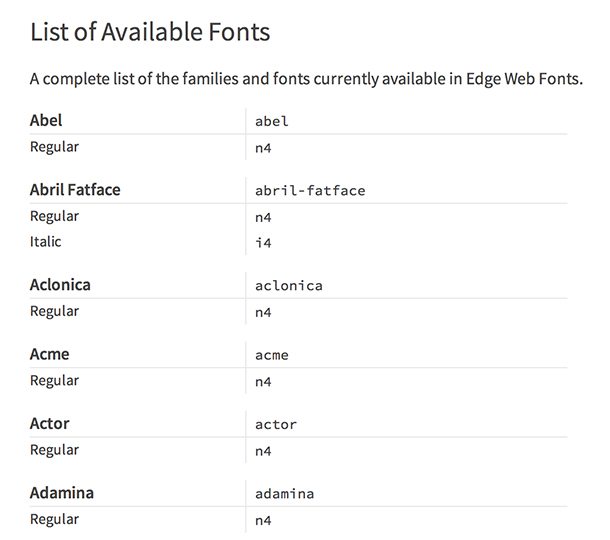
Obviously, the manual implantation method is the best because it gives you so much control over the font files that you’re embedding. The problem with this method though is that you don’t really have a good way to see what you’re getting into. The documentation merely offers one giant list of unformatted fonts and their options:
In order to preview a font, you’re going to have to test it out, use the in-app functionality, or the preview tool that we saw above.
Conclusion
Adobe Edge Web Fonts is an awesomely robust and expansive web font solution and I’m thrilled that Adobe has made it available free of charge.
There are a number of ways to go about implementing an Edge Web Font, each of which has its own list of pros and cons. Ultimately, I’d love to see a Typkit-like web app that helps you actually preview and browse the fonts without being forced into Edge Code or Muse. Without this, I’ll probably stick to Google Web Fonts most of the time.
What do you think? Is Adobe’s new free font service enough to make you think twice about turning to your typical web font solution? Why or why not?