How to Link to Specific Points in a Page and Animate the Scroll
You’ve seen it done before, you click a link in the navigation and it takes you not to another page but a specific point within the current page. How is this accomplished? With some extremely basic HTML that you can pick up in a few seconds!
To take it further, we’re also going to see how to animate the transition using a little jQuery.
Internal Linking: The Gist
As I explained in the intro, today we’re going to learn a basic trick and then see how to make it even better. When I was first learning web design, this was one of those things that I always told myself I needed to figure out but always put off learning, if you’re in the same boat, this article is for you.
Live Demo: Click Here
A Tale of Two Links
As you can probably guess, linking to an internal section in your page requires not one but two links. First, you want to add the link that will serve as the anchor to scroll to, then you create the standard clickable link like you normally would and direct it at the first link. Make sense? If not, don’t worry, it’s easier than you think.
For the first part, let’s say we’re putting a link in a footer that will scroll to the top of the page, a common practice on longer pages. To insert this link, we use some syntax that you might or might not be familiar with:
<a name="linktotop">Back To Top</a>
Notice that instead of the typical “a href”, we used “a name”. This is important and is a likely point to get tripped up on if you’re used to inserting links with the former. You can pick anything you want for the name, just remember that it’s best to use something descriptive like we’ve done here. Also, make sure you take note of the name that you use, because we’ll have to refer to it again in the next step.
Once you’ve got that link all ready to go, it’s time to insert the anchor. Essentially, if you want to scroll to a specific point in a page, you have to insert a bit of code at that point so that the link we just created knows where to go.
Since we want to link to the top of the page, we would insert this snippet at the top of our HTML.
<a href="#linktotop"></a>
There are a couple of important things to take note of here. First of all, we added a hashtag to the beginning of the link name. This doesn’t appear in the first link, but it’s necessary in the second. Also, the text portion of this link has been left blank. This is not necessary, but is in fact an option. More often than not you’ll probably be linking to an element that is already in your layout so there will be content here.
Building the Demo
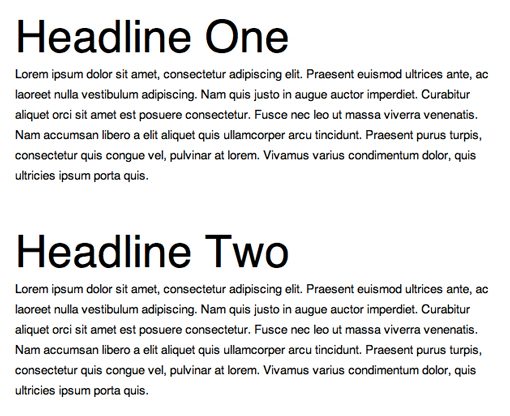
Now that you understand the syntax, it’s time to build a basic web page using what we’ve learned. Obviously, we’ll need to build a page that’s long enough to have to scroll. To this end, let’s start by tossing in some big blocks of text, each with its own headline.
<body>
 	<div id="container">
	    <div class="section">
	    	<h1>Headline One</h1>
	    	<p>Lorem ipsum dolor sit amet...</p>
	    </div>

	    <div class="section">
	    	<h1>Headline Two</h1>
	    	<p>Lorem ipsum dolor sit amet...</p>
	    </div>

	    <div class="section">
	    	<h1>Headline Three</h1>
	    	<p>Lorem ipsum dolor sit amet...</p>
	    </div>

	    <div class="section">
	    	<h1>Headline Four</h1>
	    	<p>Lorem ipsum dolor sit amet...</p>
	    </div>
    </div>
</body>
The four headlines should provide us with four potential places to scroll to so we’re perfectly set up! From here we want to add in the named links the the h1 items.
<div class="section">
	<h1><a name="headline1">Headline One</a></h1>
	<p>Lorem ipsum dolor sit amet...</p>
</div>

<div class="section">
	<h1><a name="headline2">Headline Two</a></h1>
	<p>Lorem ipsum dolor sit amet...</p>
</div>

<div class="section">
	<h1><a name="headline3">Headline Three</a></h1>
	<p>Lorem ipsum dolor sit amet...</p>
</div>

<div class="section">
	<h1><a name="headline4">Headline Four</a></h1>
	<p>Lorem ipsum dolor sit amet...</p>
</div>
Starting CSS
Now we toss in some basic styling for this text. All I’ve really done is styled the fonts and added a bit of margin to each section to spread them out nicely.
* {
	margin: 0;
	padding: 0;
}

#container {
	width: 600px;
	margin: 50px auto;
}

/*Text Sections*/
.section {
	margin: 50px 0;
}

.section h1 {
	font: 55px/65px Helvetica, sans-serif;
}

.section p {
	font: 15px/25px Helvetica, sans-serif;
}
Here’s what the resulting paragraphs look like. Super simple but they’ll get the job done for what we need.
Navigation and Header Image
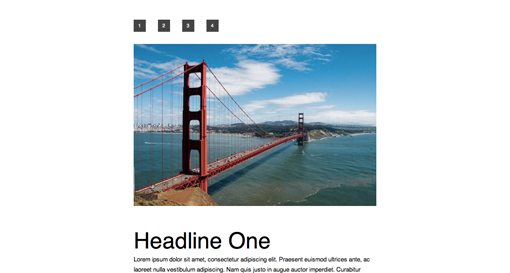
To navigate to the anchors, we’ll need to create a series of links in our html using the hashtag method at the beginning of this article. We’ll also throw in a placeholder image just to give us a little more scrolling room.
<div id="nav" class="clearfix">
	<a href="#headline1">1</a>
	<a href="#headline2">2</a>
	<a href="#headline3">3</a>
	<a href="#headline4">4</a>
</div>

<div id="bigPic">
	<img src="http://lorempixum.com/600/400/city/9" />
</div>
Here we’ve created the text links with simple numerals and inserted the anchors to the various sections of our HTML. Now we just have to apply a little more styling and we’ll be ready to go.
/*Navigation*/

#nav {
	font: 12px/30px Helvetica, sans-serif;
	text-align: center;
}

#nav a {
	background: #444;
	color: #fff;
	margin-right: 30px;
	width: 30px;
	height: 30px;
	float: left;
	text-decoration: none;
	-webkit-transition: all 0.5s ease;
}

#nav a:hover {
	background: #6fcbf3;
}

/*Image*/
#bigPic {
	margin-top: 30px;
}
Basically what I’ve done here is turned each link into a little box:
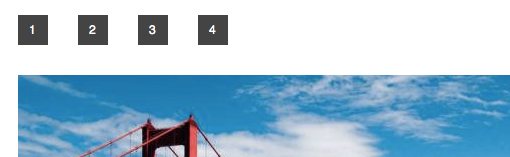
When you hover over one of the links, the background color transitions to blue. Notice that the line height on the text is set to the size of the box, this is a neat trick for centering the text vertically.
Clearing the Float
Since I wanted to turn the links into little boxes, I had to keep the display property set to block. This means to make the links line up horizontally, a float was necessary. There’s a lot of debate on how to clear floats these days, but a quick search revealed that the current favorite method seems to be the following from Pathfinder Software.
Feel free to disagree and implement your own float solutions. I won’t go any further into this so as to avoid distraction from the main purpose of this tutorial.
/* float clearing for IE6 */
* html .clearfix{
  height: 1%;
  overflow: visible;
}

/* float clearing for IE7 */
*+html .clearfix{
  min-height: 1%;
}

/* float clearing for everyone else */
.clearfix:after{
  clear: both;
  content: ".";
  display: block;
  height: 0;
  visibility: hidden;
  font-size: 0;
}
Finished Demo: Pure HTML/CSS
With that, our internal link demo is complete! Click any of the links in the navigation and they should take you to that point of the page. Notice that, for the anchors near the bottom of the page, the scroll just goes down as far as it can.
Live Demo: Click Here
Animating the Scroll
With HTML, anchor linking works, but the transition is pretty harsh. There’s no animation at all, the page just jumps right to the anchor upon clicking. What if we want to make this a more gradual effect so the user can plainly see that the page is scrolling down?
You could perform the entire linking and scrolling operation in JavaScript, but I think that’s a bad idea simply because you’re unnecessarily limiting the number of people that can use your site to those with JavaScript turned on. Instead, it’s much better to set the linking up in HTML exactly like we’ve done here and then add the animation effect for JavaScript users. The site will still work for anyone with JS turned off, they just won’t see the animation.
To accomplish this, we need three things. The first is of course jQuery because it’s amazing and makes everything easier. The second is an extremely handy little jQuery plugin from Ariel Flesler called ScrollTo and finally, you’ll need an offshoot of ScrollTo called LocalScroll.
This sounds complicated but it’s super simple. LocalScroll was built for the sole purpose of animating anchor link scrolling so it’s the perfect tool for the job. It’s also by far the easiest solution to implement that I was able to find! The first thing you need to do is download LocalScroll and insert it along with jQuery into your HTML (ScrollTo will be included in the download as well).
<script src="http://ajax.googleapis.com/ajax/libs/jquery/1.4/jquery.min.js" type="text/javascript"></script>
<script src="jquery.localscroll.js" type="text/javascript"></script>
<script src="jquery.scrollTo.js" type="text/javascript"></script>
Next we need to pass into it the parent element that contains the hashtag links. In our case the #nav div contains the links so we’ll insert that into the following snippet:
<script type="text/javascript">
$(document).ready(function() {
   $('#nav').localScroll({duration:800});
});
</script>
All you need to do to implement this in your own projects is change the target and, if you choose, specify a duration for the animation. That’s it! This one little block of text takes care of the animated scrolling effect for us.
Finished Demo: Animated with JavaScript
Here’s version two of our demo, this time with the JavaScript magic throw in. Compare it to the previous version to see how much nicer the effect feels with the transition.
Live Demo: Click Here
Conclusion
In closing, remember that linking to a scroll point within your page is easy with pure HTML. All you need to do is set up a named link that is attached to a specific spot and a clickable link that will get you there.
After that, if you want to make the transition more gradual, use jQuery and LocalScroll together. Be sure to specify both the parent container for your links and the duration of the animation.