8 Ways to Get the Selection You Want in Photoshop
Mastering different forms of selection creation is one of the fundamental aspects of becoming a Photoshop professional. If you don’t know half a dozen techniques or more to create a usable selection, your toolbox of skills is unnecessarily limited.
Today we’re going to take a quick look at eight popular methods for creating selections in Photoshop and where each is the most applicable.
Why All the Options?
Photoshop is a mammoth of an application that’s seemingly ripe with redundancy. For any given action, there’s always a handful of different ways to go about it! This is especially true of creating selections, which is an action that Photoshop excels at and has tons of features to support.
So why bother learning them all when you can just get really good at using one? Is it really necessary to know eight or more different ways to create a silly little selection?
The answer is a resounding “absolutely.” Every single method of creating a selection that you can come up with has particular strengths and weaknesses. Some methods are better suited for creating quick and dirty selections when you don’t need a lot of accuracy, others are better for creating precise, pixel perfect selections. Some methods work better when there’s a lot of contrast in the image to work with, others help when there’s almost none.
Let’s take a look at each of the major selection techniques and discuss what they are, how to use them and under what circumstances you should consider implementing them.
Marquee
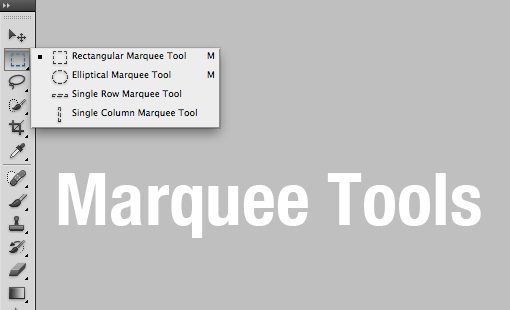
We’ll start with the most basic selection tool in Photoshop: the Marquee Tool. Odds are, you already know all about this one. With it, you can draw a box or circle to select a portion of your canvas. Not much to it right? Not so fast, let’s look at a few quick tips that you should know when working with the Marquee Tools.
Single Row/Column
Though you can switch to them directly via the keyboard, hidden in the submenu of the Marquee Tool are the Single Row and Single Column Marquee Tools. In all likelihood, you’ve probably never used these. However, they are extremely helpful and should be kept in mind when you’re trying to undertake the difficult task of making single pixel selections.
Keyboard Switching
When you’re working with any other tool in Photoshop, you can switch to the Marquee Tool with a quick “m”. This will typically bring up either the rectangular or elliptical version, depending on which you last used. This isn’t the end of the keyboard functionality though, “⇧M” will allow you to quickly switch between the rectangular and elliptical versions without venturing into the submenu.
Modification Shortcuts
These tools follow a standard that you’ll find repeated across the entire line of Adobe desktop publishing apps. When you hold Shift, the shape will be constrained to perfect proportions (a perfect circle or square). Holding Option (Alt) will allow you to start the shape from the center rather than the top left. Combining the two, “⇧⌥”, will give you a proportional shape that grows from the center.
Finally, it’s extremely useful to know that you can actually move the selection around while you’re still in the process of creating it. Simply hold Space and you can reposition the in-process selection.
Additional Options

When you’re using the Marquee Tools, there will be a strip of options above the canvas. These allow you create precisely sized selections, feather your selection and change the default behavior of the next selection action (add to, take away, etc.). The latter of these options can also be accomplished with your keyboard: Shift adds to a selection, Option subtracts, and Shift+Option intersects.
When to Use Them
The Marquee Tools are workhorses, you’ll use them all the time. However, they’re only for the most basic of selection tasks. Any time you need a slightly complex selection, it’s best to use one of the other methods. Don’t fall into the trap of using these simply because they’re the easiest, there are plenty of other options that are just as simple and work far better in certain scenarios.
Lasso
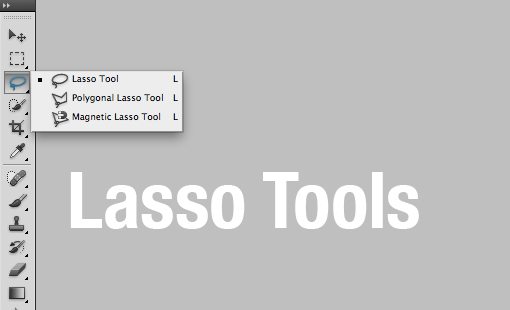
Slightly more complex than the Marquee Tools are the Lasso Tools, which give you much more freedom over the shape of your selection. There are three variations of the Lasso Tool: the Default Lasso Tool, Polygonal Lasso Tool and Magnetic Lasso Tool, which can be quickly cycled through via the “L” key.
Lasso Tool
The Lasso Tool is 100% freeform. Simply grab it and start drawing with your mouse or trackpad to make a selection. Obviously, the result is going to be rudimentary at best and even tends to be quite sloppy!
Polygonal Lasso Tool
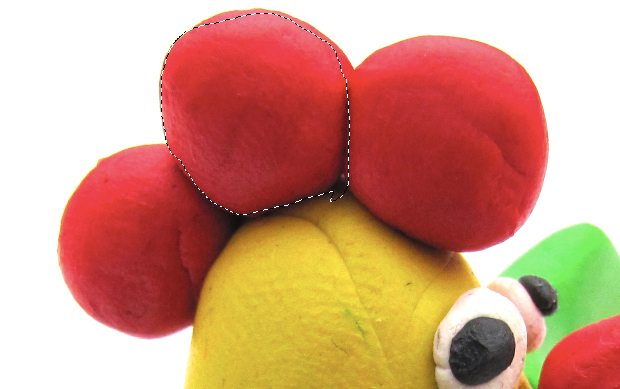
The Polygonal Lasso Tool allows you to click from point to point to gradually build a selection. Selections made with this tool are purely comprised of straight edges. If you don’t mind some tedious clicking, you can pull off a primitive curve, but for the most part you’ll definitely want to stick to hard edges.

Combining the Two
It’s pretty rare to find an area that can be selected with only straight lines. Fortunately, you can combine the use of the Lasso Tool and Polygonal Lasso Tool in one fluid workflow. Grab the Lasso Tool and hold down Option to draw straight lines with the Polygonal Lasso. Then, once you hit a curve, let off of Option and you’ll have the freeform Lasso. Once you’re done with the curve, hold down Option again to go back to making straight lines.
Magnetic Lasso Tool
The Magnetic Lasso Tool is a lot like a cross between the Polygonal Lasso Tool and the Magic Wand Tool. It allows you to build your selection incrementally, but in a fairly automatic fashion. Simply move your mouse along an edge and the MLT will give its best guess for outlining that edge. You can let the tool build your points automatically or manually click if there’s a specific point that you think needs to be dropped.

This tool comes with a few settings in the toolbar that let you adjust the width, contrast and frequency. If you don’t like the result you’re getting, try fiddling with these.
When to Use Them
The Lasso Tools represent your tedious selection tool set. They are in fact capable of making very complex and irregular selections, but the accuracy is in the mid range and highly depends on a steady mouse hand.
Use these tools when you need to make a general selection that doesn’t require a lot of accuracy. To be honest, I use the Polygonal Lasso for quick, hard edge selections and usually forgo the others completely in favor of another selection method. The freeform Lasso is much more fun and accurate if you have a drawing tablet so be sure to try that if you have one.
Magic Wand

Next up is our old friend the Magic Wand Tool. I’m going to be honest up front, this is a tool that is primarily used by users who are either new to Photoshop, lazy or inexperienced with other selection methods. Yes, that’s a blanket statement but historically this is a pretty awful tool that has led to decades of hideous selections.
Now, that being said, the recent edition of the “Refine Edge” command has pretty much saved the Magic Wand. In fact, Refine Edge is so good at repairing a poor selection, I even find myself reaching for the Magic Wand from time to time!
Everyone knows how to use this tool: click on an area and Photoshop will attempt to select that area based on color and contrast. The results are rarely as good as you want them to be but if you have truly solid color fields then it can work decently.
Settings
The key to using the Magic Wand Tool effectively (apart from using Refine Edge) is to familiarize yourself with the settings. Three of these are particularly important: Tolerance, Contiguous, and Sample All Layers.
The tolerance allows you to control the sensitivity of the color selection criteria. A higher tolerance will select more of the image, a lower tolerance will select less. Think of this setting as telling the accuracy with which Photoshop will match the pixel that you click on.
By default, the magic wand will make a selection of similar pixels that are actually connected to each other. In other words, only one area will be selected. Deselecting the “Contiguous” checkbox will cause the Magic Wand to ignore connections and instead select any pixels on the canvas that are close in color to the one that you clicked on while keeping your tolerance settings in mind. A non-contiguous Magic Wand Selection is very similar to a Color Range selection.
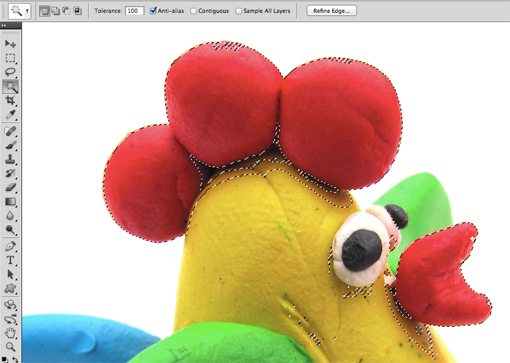
The last option allows you to choose whether the Magic Wand takes all layers into consideration or only the one that is currently selected.
When To Use It
As you can tell from the comments above, I’m not the biggest fan of this tool. For nearly every selection task, you can find another option that works just as well or better. There are some legitimate uses for it, but ultimately this should be considered to be your “quick and dirty” selection tool. The only real advantage here is speed, this tool is extremely fast so if you’re in a hurry and don’t mind having a selection that looks like it was made with a hacksaw, go for it.
Quick Selection
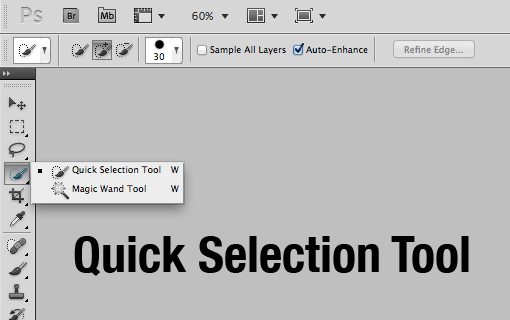
The Quick Selection Tool is somewhat of a newcomer to the Photoshop selection tool family. However, it’s already proved itself to be far more useful than the Magic Wand Tool. This tool works like a brush: select your brush size, hardness, and spacing, then start painting to create a selection.
Upon its debut, I expected to hate this tool and file it away in the “only amateurs use this” category. However, it blows me away every time I use it! It really seems to be capable of interpreting my actions and picking out what I’m trying to select in cases where the Magic Want would be completely ineffective.
For instance, in the image below, using the Magic Wand we would have to select the white portion and inverse the selection because using it on the multi-colored pinwheel would be quite tedious. However, with the Quick Selection Tool, I simply painted one broad stroke across the pinwheel and the resulting selection was remarkably accurate!

Your results can get even better if you select “Auto-Enhance” from the tool settings above the canvas. Once again, the results should be combined with “Refine Edge” for a truly accurate selection.
When To Use It
I recommend using the Quick Selection Tool any time you’re tempted to use the Magic Wand. It’s more intelligent, gives you more control and simply produces a better selection in most cases.
Color Range
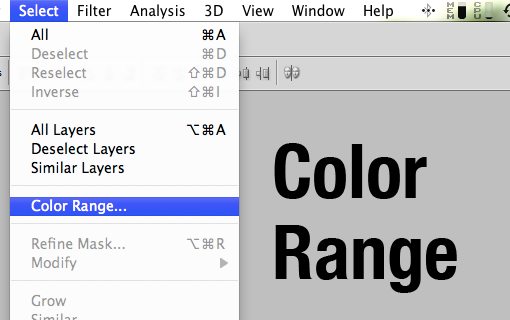
As I mentioned above, using the Color Range command is similar to a non-contiguous Magic Wand Selection. It allows you to quickly target not simply one color but a range of colors within your canvas.
With the Color Range window active, you use the eyedropper to target a specific color. Hold Shift to add to that selection and Option to subtract from it. The “Fuzziness” slider is like the Magic Wand’s “Tolerance” setting and allows you to adjust how accurate the color matching is.
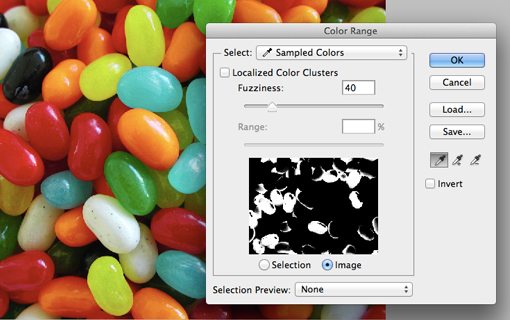
Below the sliders you get a little black and white preview of your selection. Just like in a mask, white represents selected portions and black represents deselected portions.
When To Use It
To use the Color Range Tool, you’ve really got to have some well defined portions from a color perspective. For instance, the photo of the jellybeans above seems like it would be perfect for this tool but in reality the lighting and shadows make for some widely varied tones that aren’t easily targeted with Color Range.
It’s certainly a powerful tool, but I find that it’s pretty rare to be working with an image that really makes the Color Range command worthwhile. Try it out on a few images and you’ll quickly get a feel for when it will and won’t work effectively.
Pen Tool
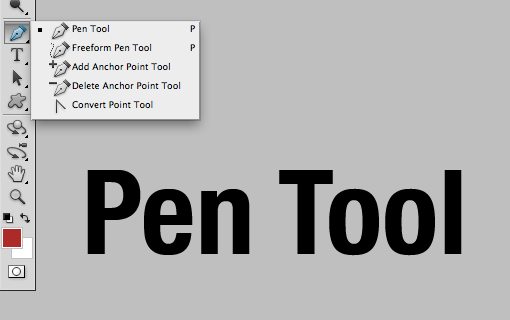
The Pen Tool is probably the most widely feared of the selection tools, it also happens to be one of my favorite. To be accurate, the tool is specifically for creating paths, which can then easily be converted to selections via a Command-Click.
The Pen Tool is difficult to master but once you really get the hang of it, there’s simply nothing that feels as accurate or flexible. The strength of the Pen Tool lies in creating smooth curves. These are hard to freehand and obviously impossible with the Polygonal Lasso.
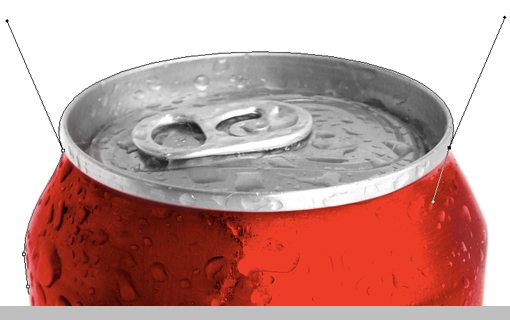
So why not just use the Quick Selection Tool? There are several reasons! First of all, you can be far more precise and intentional in your selection with the Pen Tool. Further, Pen Tool paths are vector and are therefore incredibly versatile, allowing for endless editing and scaling at any time. Also keep in mind that your eye can sense an edge much better than software so when there’s a lack of clear contrast, the Pen Tool will prove superior. Finally, paths can be saved with even flat files and therefore represent the best way to embed a selection into a file that doesn’t retain layers.
When To Use It
As long as you’re not working with a soft edge, the Pen Tool should be at or near the top of your list of go-to tools for creating professional quality selections. Having a saved vector path to work with is simply an unparalleled advantage.
I used to do a lot of work with grocery store product shots and the standard way for us to share images was a high resolution JPG with an embedded clipping path. This allowed us to keep file size small while also making it easy to remove the product from its background.
Masks
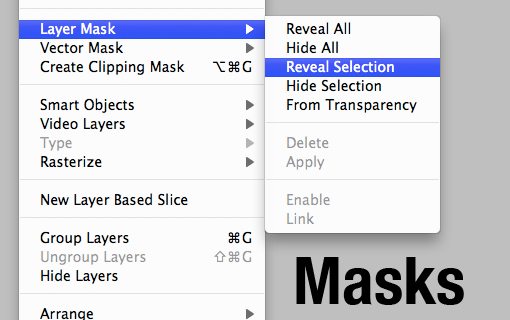
This one might confuse you a bit. After all, you typically create a selection and then convert it to a mask, meaning that the ultimate end is the mask, not the selection. However, this logic can easily be reversed, sometimes the best way to create a complex selection is create, refine and tweak a mask (Command-click on a Mask to turn it into a selection).
There are several benefits to using a mask to structure your selection. For starters, typical selections are lost as soon as you deselect everything, but masks stay with the layer and can even be saved with a layered file.
Masks give you a better balance of freedom and control over your selection than perhaps any other method (you can even combine them with the other methods). The reason for this is that you have the freedom to use Photoshop brushes and take advantage of the endless benefits therein. For instance, painting with a gray brush creates a diluted selection.
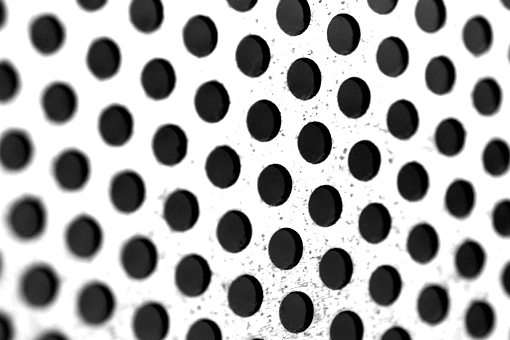
Another key advantage of masks is that you can use them to create soft selections. Almost all of the selection methods we’ve examined thus far are best used with hard edges, but what if you’re trying to create a blurry selection? From crafting a selection from a photo with a shallow depth of field to trying to select a shadow, there are tons of times when you need to work with soft edges and masks are the way to go about it.
When To Use Them
Use Masks when you need a high degree of accuracy in your selection but don’t necessarily require a vector path. Also, any time you need to create a selection that can be continually evolving and feature both soft and hard edges, masks are your best friend.
Leveraging Channels
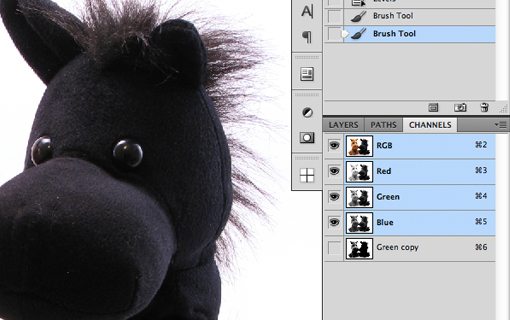
Creating truly complex selections and masks is a painstaking process that can take years to fully learn. One technique that will boost your talent in this area by leaps and bounds is getting the hang of using Channels as a means to create selections.
To do this, inspect your channels closely with the thought that white equals fully selected, black equals not selected and everything in between represents various levels of selection. Find the channel that most closely correlates to your desired selection and use it to your advantage.
For example, say we wanted to create a precise selection of the hair on the image above, an intimidating task! To begin, find the channel with the greatest amount of contrast and duplicate it. Then, find ways to increase the contrast even further: Levels adjustments, dodge and burn, brushing in black and white, etc.
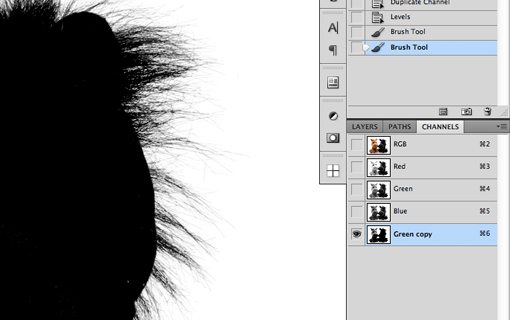
With enough work, you’ll end up with a super high contrast channel like the one below. From here you simply Command-click on the channel to create a selection. This often results in the opposite of what you want (we’ve selected the background, not the hair), so inverse the selection and you’re ready to go!

I’ve outlined this technique in detail in the our Complete Beginner’s Guide to Masking in Photoshop.
When To Use Them
Channels are incredibly useful tool. Any time you’re faced with creating a dauntingly complex selection, have a look at the channels and look for areas of contrast that you can manipulate. Utilizing this method, you’ll be able to create selections that impress even the pros!
Conclusion: Mix and Match
To sum up, there are a million ways to select something in Photoshop. This article was meant to help you become aware of the major methods of crafting a selection and when you should think about implementing each. Knowing the right tool for the job is vital in creating effective selections.
Keep in mind that this guide isn’t meant to get you to choose one method over another in every circumstance. Instead, you should be analyzing each scenario individually and deciding which combination of tools will get you closest to the result that you want.
Leave a comment below and tell us about your selection tendencies. Do you have a few favorite tools that you always use? Are there any that you hate? We want to know!