5 Tips and Tools for Designing a Stand-Out Presentation
Most people who need to create an exciting presentation are not design experts. Fortunately, there are a number of really neat tools and websites that can assist you in creating a captivating, professional look for your slides.
In this article, we’re going to take a look at five such tools. While I can’t promise that these tools alone will turn you into a design professional, they will certainly point you in the right direction.
Find the Perfect Keynote Template
Finding the perfect Keynote template can be tricky. At Envato Elements, you can explore thousands of high-quality Keynote templates, and many other design assets. It starts at $16 per month, and gives you unlimited access to a growing library of over 2,000,000 presentation templates, fonts, photos, graphics, and more.
Be Precise in Color Matching
Believe it or not, picking the right color matters when it comes to designing presentations. When you’re adding color to your slides it sometimes makes sense for colors to match exactly, instead of settling for an approximation. By using a “color grabber” tool such as Color Cop you can copy the exact color code from an image, text, etc., and apply that specific color to whatever you want on the slide.
Color Cop works by identifying and representing various hex color code formats. To use it, simply drag the tools eyedropper to any location on the screen and release. The hex color code for the selected color will then be automatically copied to the Color Cop clipboard (as seen in the image below). Then, all you have to do is select the new object that you want to color and type in the hex color code from the clipboard.
This tool can really come in handy when you are trying to match specific colors from an image (e.g., your company logo) to other elements on the slide. Instead of finding a color that’s similar, you can now replicate the exact color and create a more professional look. Trust me, your audience does notice when the colors on your slide are matching correctly. When your colors match properly you audience will pay more attention to your message instead of trying to figure out why your slide is slightly off.
Create a Solid Color Scheme with Adobe Kuler
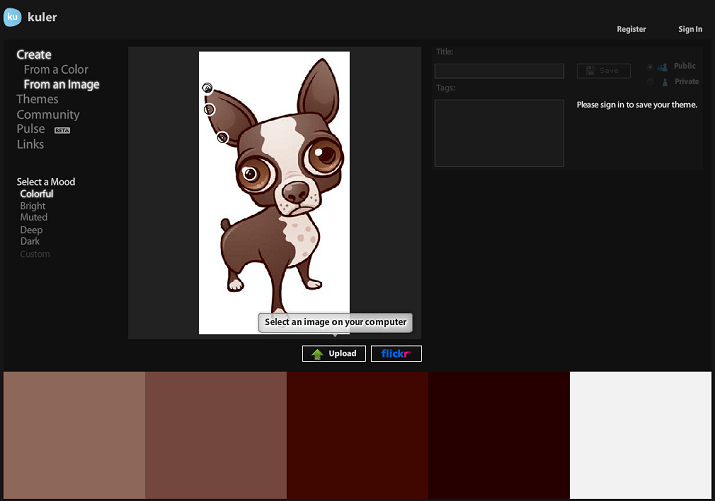
One of common issues with creating a good presentation revolves around choosing a powerful color theme that compliments the message of your presentation. If you’re not a designer, it can sometimes be difficult to coordinate a set of colors that all work together and complement each other. The solution to finding a sweet color theme is now simple thanks to the Adobe Kuler tool.
All you have to do is upload an image that has a color scheme that you like and then the Adobe Kuler tool will get to work and extract all the colors from that image. This will give you a set of coordinated colors that you can use to create a professional look for your slides. Now, your slides will appear as if you’re an experienced designer that carefully chose the perfect color scheme for your slides.
Also, if you want to create your own color scheme based off a particular color you like, you can do that too. Creating a scheme from a color begins with an initial presentation of a color wheel, color panels, and different sliders that represent the immediate color scheme. You have the option of changing that scheme through the adjustment of the bubbles which are connected to the center of the wheel.
This will allow you to adjust up to five different color hues simultaneously. You use the various sliders for fine tuning your adjustments. You’ll also have the option to choose which color mode you’d like to work in by selecting the sliders that you want to display.

Making Screenshots Interesting with Skitch
When you need to further illustrate a point in your presentation, sometimes that purpose can be served by including a screen shot. There are a lots of screen capture tools out there. However, imagine that you could not only take a screen shot but also annotate that capture in order to further illustrate your point.
Skitch is an easy to use screen capture tool that is designed to do just that. You can then either save the captured area as a JPG, BMP, TIFF, or PNG file. This tool can also effectively allow you to perform a large number of additions and modifications to your screen capture. This includes re-sizing, flipping, cropping, and rotating images as well as automatically archiving your images for use at a later time.
Choose a Unique Font at Font Squirrel
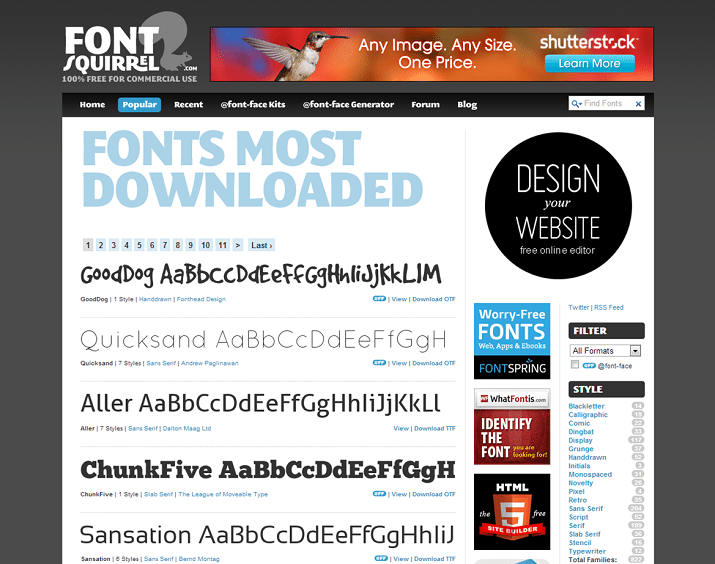
One of the limiting aspects of creating your presentation in PowerPoint is the lack of cool and impressive fonts that are available. Unfortunately, this can make your overall presentation seem generic and boring. Font Squirrel is a great place to download hundreds of attractive fonts to spice up your presentation and give it a more customized look.
Using new and exciting fonts is an excellent way to separate your presentation from others that use the same boring fonts that come standard with PowerPoint. All the fonts offered at Font Squirrel are free, and ready for instant download to your computer. Just make sure that whenever you download custom fonts for your presentation that you embed them into your presentation when saving your file. That way if you send your presentation to someone else the new fonts will show up properly.

Constructing a Presentation with MindMeister
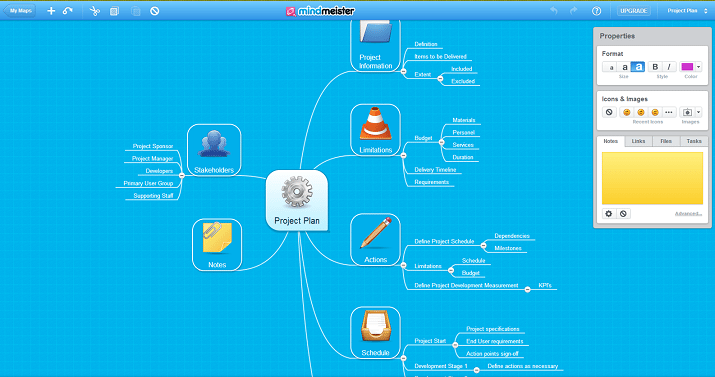
Getting started with the construction of your presentation can be a daunting affair. Rather than running into a situation where you find it difficult to arrange the logical order of the concepts you want to present, MindMeister can help you organize your thoughts by quickly and easily creating “mind maps” while adding notes to them using your arrow and insert keys.
You can also customize the items with the font size and colors of your choice. It even has a history function that you can use to look over your past mind maps for further inspiration when creating a similar presentation. Using this powerful tool will create an amazingly helpful mind map and present your ideas and thoughts in a visual way for better presentation coordination, understanding, and problem solving.
This can help you overcome potential “presentation blocks” that come from disjointed presentation points that are written with no logical sequence or progression. Remember, the presentations are all about telling great stories. MindMeister helps map out your story.

Conclusion
One of the things that will separate an ordinary presentation from an exceptional one is the ability to incorporate the right tools when designing that presentation. Fortunately, many of the best tools can be obtained without having to spend a lot of money or require a steep learning curve to effectively use them. With just a bit of time and effort, you can create effective and persuasive presentations that will definitely get your message across.
So, here’s my final question for you… After reading this post, do you plan on using some of these presentation enhancing tools? What are some of your favorite tools that you use when designing presentations? Share your comments below now!


