How to Make Engaging Presentations and Videos With DemoCreator
Today, video is without a doubt the most effective tool for commercial communication. According to reports, 85% of businesses utilize videos in their marketing campaigns.
Videos are the preferred format for everything from investor pitches to welcome videos, webinars to demonstrations, sales presentations to demos, and online lessons. Video marketing is clearly on the rise.
If you’re also looking for a way to easily make videos for your marketing needs, follow this guide to experience a handy method for visual message embedded presentations.
Why Make Presentation Video with Visual Message?
Presentations often make use of visual aids. There is a reason why it is said that a picture is worth a thousand words: they may help you make your point, keep your audience interested, and help you remember what you were trying to convey. Your slides will be more effectively broken up by adding one or two videos, which will keep your audience’s attention and engage with the main message. In this approach, people won’t have to work too hard to remember the information you provide them.
Visual aids provide you with the assistance you need to stand up and talk visually. They often take the form of a movie or something similar, like slides outlining your major points. They may also come in the shape of a handout, one of your presentation’s slides, a summary, the usage of a flip chart, or even an intriguing object you brought along to demonstrate a point to the audience.
When utilized effectively, visual aids may improve a presentation by increasing impact and increasing audience participation. They may also serve as a useful reminder of your intended message.
That’s why you need Wondershare DemoCreator, and the newly released DemoCreator 6, that can let you build an engaging visual presentation with just a few clicks.
Next, let’s jump into a guide on how to use it to create a visual presentation video and engage with your audience!
How to Make Engaging Presentation Video
To make an engaging presentation video, follow the steps below:
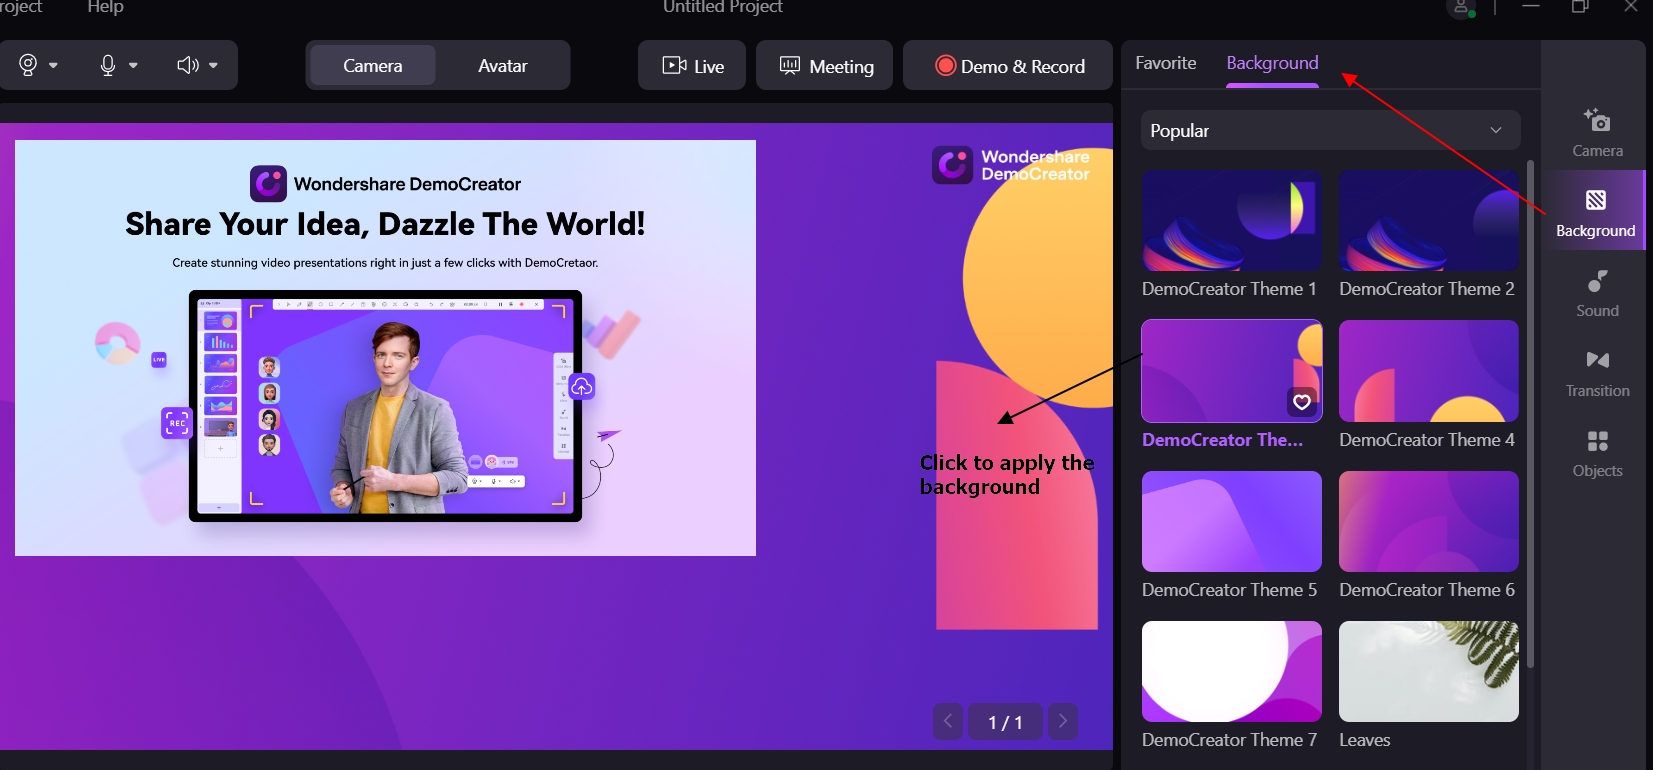
Add Background
Videos may be trimmed to a certain length, looped, or set to automatically play when they are added from the editor or imported from your computer. Alternatively, make the backdrop video. Place it beneath all the other information and stretch it to fill the full slide. The edit options are identical to those for a typical video.
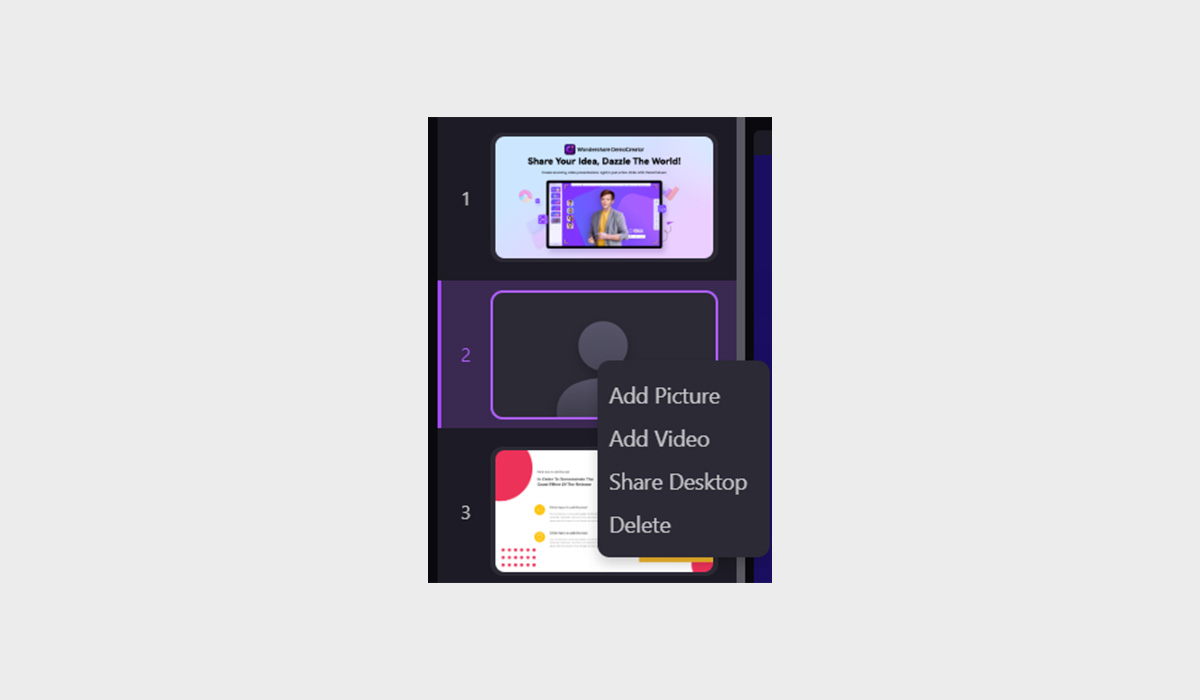
Add Video, PowerPoint, Image, White Board, or Text
It’s time to get organized now that your team is on board and you are aware of the goal of your video presentation. This is a very important step. In fact, it should go hand in hand with the initial phase of planning and strategizing for any visual project you develop. Start by placing all of the presentation’s materials in a folder on your desktop. Include all the brand assets, such as images, videos, audio bites, and graphics. Make a document containing all the textual material and a list of the audio’s content.
Add Voiceover
You may feel the need to work on animations, transitions, and audio at the same time as you work on your video presentation to ensure that everything flows together as smoothly as possible. All additional audio and video you provide to the presentation will be played after any background noise. Make sure they are balanced and coherent as a whole.
Use Demo and Record
You must next produce a demo so that you can evaluate your progress. Record your speech in order to alter it afterward for that.
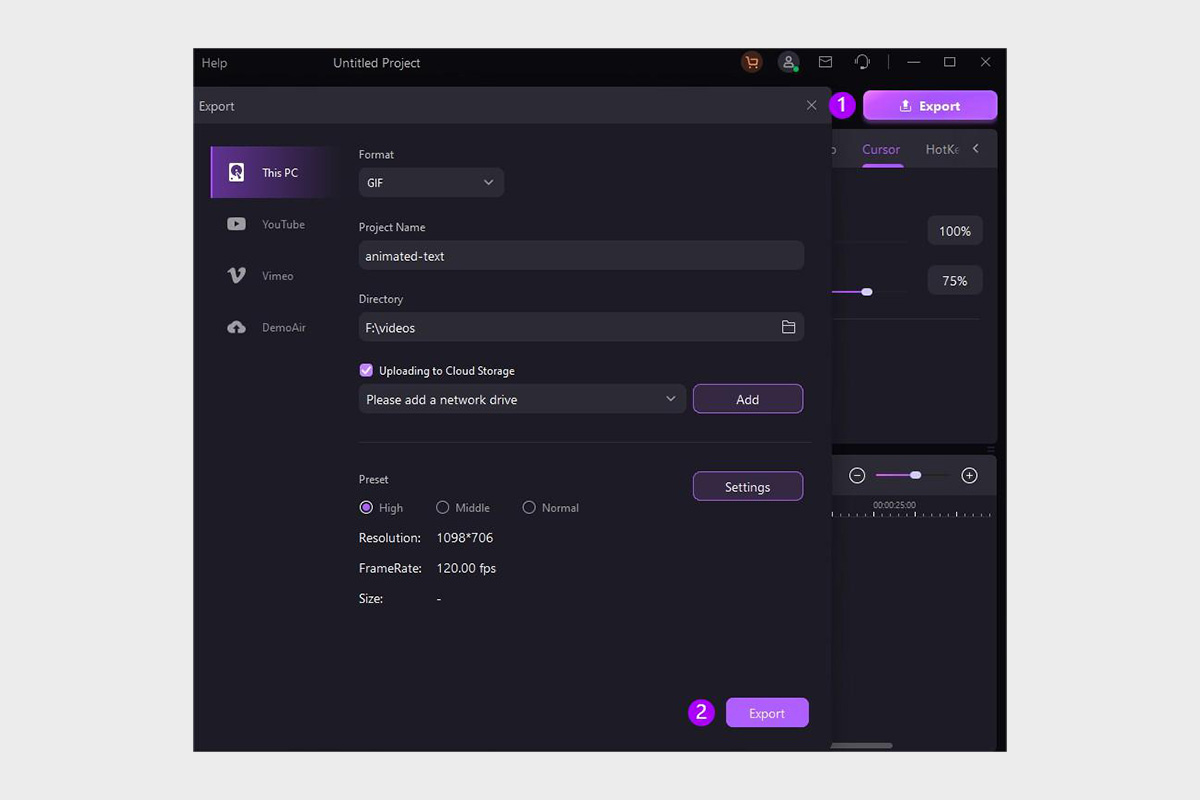
Export or Edit Video
It’s time to check everything over to make sure it’s flawless. First, check your writing to catch any errors in grammar or spelling. To remain true to the brand and preserve the visual hierarchy, make sure that all of the content is in the appropriate font and size. It’s time to show your video presentation to the people who will be watching it. Choose the MP4 file selection after clicking the Export button.
Different Presentation Backgrounds
You’re going to give a presentation soon. Now is the time to begin organizing your material on a PPT template. Choose the ideal template depending on the content, audience, and theme. You can quickly build the finest presentation possible with this.
Solid Color or Gradient Color
In this background template, a gradient is a transition between two or more colors. Depending on the separation between those hues, a gradient may be delicate or striking. You may add elegance, depth, brightness, texture, and intrigue to your designs by using gradient colors. PowerPoint elements, such as shapes, lines, and backgrounds, may all employ gradients.
Metaverse
A network of 3D virtual worlds called Metaverse is centered on fostering social ties. The metaverse combines augmented, virtual, and physical reality. It brings online interactions closer to in-person ones. It manifests A cutting-edge presenting style using 3D forms to create the illusion of virtual reality.
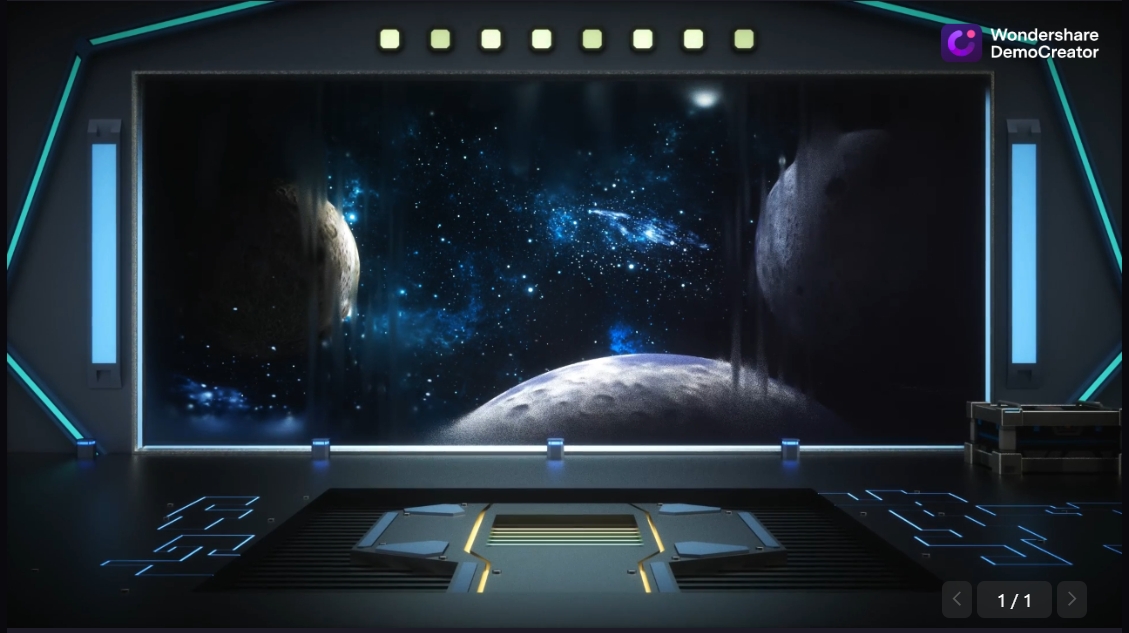
These presentation’s futuristic themes and all of its visual components may be entirely customized. Users may modify PowerPoint presentations to showcase their business endeavors, ideas, and metaverse-related information.
Classic Indoor
Everything is aesthetically appealing and simple to read thanks to clear backdrops and large headline fonts. This pursuit of elegance, which is ideal for presentations pertaining to business, sales, or marketing, heavily relies on the color scheme.
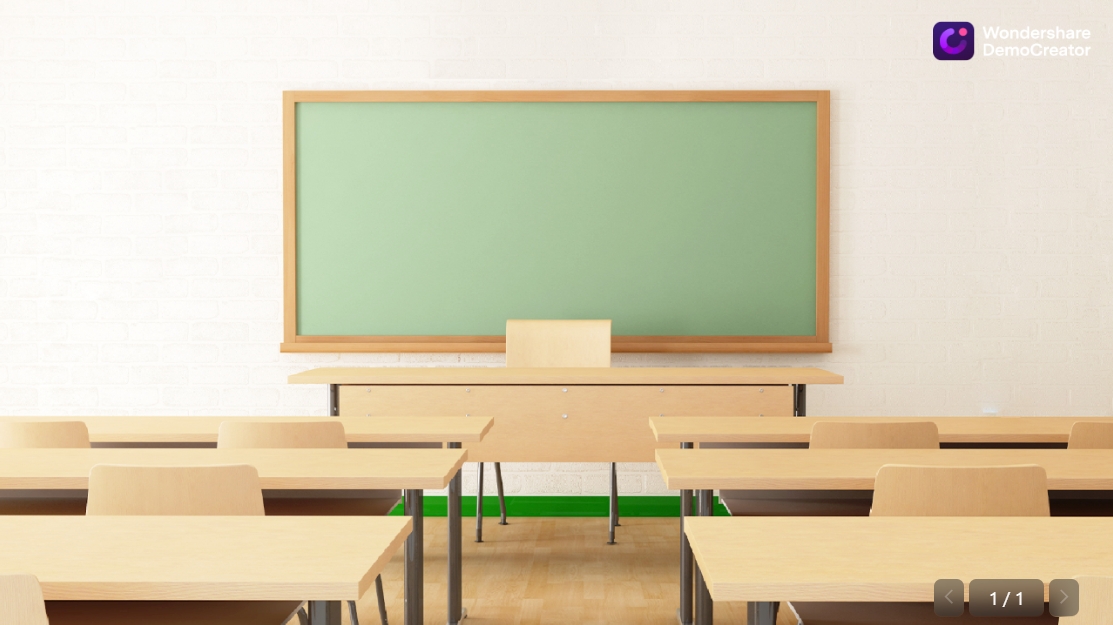
Use this template to create a new presentation and examine how presentation style impacts how your audience understands your content. Your work will be balanced by its square lines and geometric forms. You may create a vibrant and appealing message by using some images.
Impressionistic Canvas Series
For the Canvas lovers, bright symbols and drawings are used in this onboarding presentation to make the content more interesting. This is crucial when speaking to newbies since they probably have knowledge overload on their first day.
Candy Land Series
In Candy Land Series backgrounds, you can utilize the Candy Lands of different tools. Such as vegetables that are coveted since sugar is the town’s primary food supply.
Golden Sunset View
With this background, you can use the background with a lonesome guy sailing and a brilliant sunset on the water in the ppt slide’s photo. You may easily make a PowerPoint presentation on water sports, hobbies, and marine life.
How To Present with DemoCreator
The Wondershare DemoCreator video editor comes after the screen recorder. This indicates that, as soon as your screen recording is complete, you have been pointed in the direction of a potent screen recorder that is available for you to polish your adequate material like an expert. The video editor offers a wide range of capabilities:
How to Import PPT to Present
You may upload as many recorded videos as you like using Wondershare DemoCreator’s video editor. More than 50 distinct file kinds may be imported. Work with the photos, sounds, and videos that you like most. The finest thing is that all three of the fundamental material types—videos, audio, and images—can be added in a huge variety of formats. This program allows you to enter practically any file, and you may choose between MP4 and MOV as your output format, making your material universally compatible.
How to Import Images
You can Import Image to the software by clicking on the ‘+’ button to the lower left corner of the software interface. This will let you select the images from the PC and afterward, allow you to add the Images to the DemoCreator.
How to Import Videos to Present
In addition to Images, you can also import videos. For videos, select the Add Videos option from the list and select your videos from the Files to add to the software.
How to Use Record & Demo Video
You can also use the Demo and Record feature of DemoCreator. Here’s how to use it:
1. Add Pointer
After you launch the Record and Demo from the main UI, go to the pointer feature to add pointers inside your presentation.
2. Add Pen
Also, you can use the real-time Pen feature to write on the presentation slides.
3. Add Text
You may offer your viewers a better understanding of your recorded videos by adding your unique titles to your recordings using the DemoCreator video editor.
4. Add Whiteboard
You may use the Whiteboard effect to replace certain scenes in your recording if you are using the camera to record and want to alter your experience. You may easily and successfully add a range of items to your recorded video footage with the DemoCreator video editor.
5. Add Sounds Effects
Although, DemoCreator also has a microphone recording feature. Don’t worry about the noises being jumbled up since it keeps everything segregated for subsequent alterations. The soundtracks may be combined or changed separately.
6. Add Favorite Transitions
You may include a large variety of transitions into your PowerPoint recording directly inside your timeline with Wondershare DemoCreator. The final slideshow movie you produce will be greatly impacted by these transition effects. The Transition button on your program interface allows you to add them.
How to Add Camera Effect
Once you’ve finished recording the PowerPoint screen using Wondershare DemoCreator, you may use the program’s built-in screen recorder. Here, you may do a lot of magical editing that will transform your uninteresting tape into a gorgeous and expert video that everyone will want to watch.
With the helpful effect menu located on the left wall of this program interface, you can easily apply a number of built-in effects to your films as follows:
Open Camera Menu
In the first step, open up the Camera menu from the Demo & Record interface. This will open up Camera settings where you can customize the Frame, Mirroring as well as Background settings as shown below:

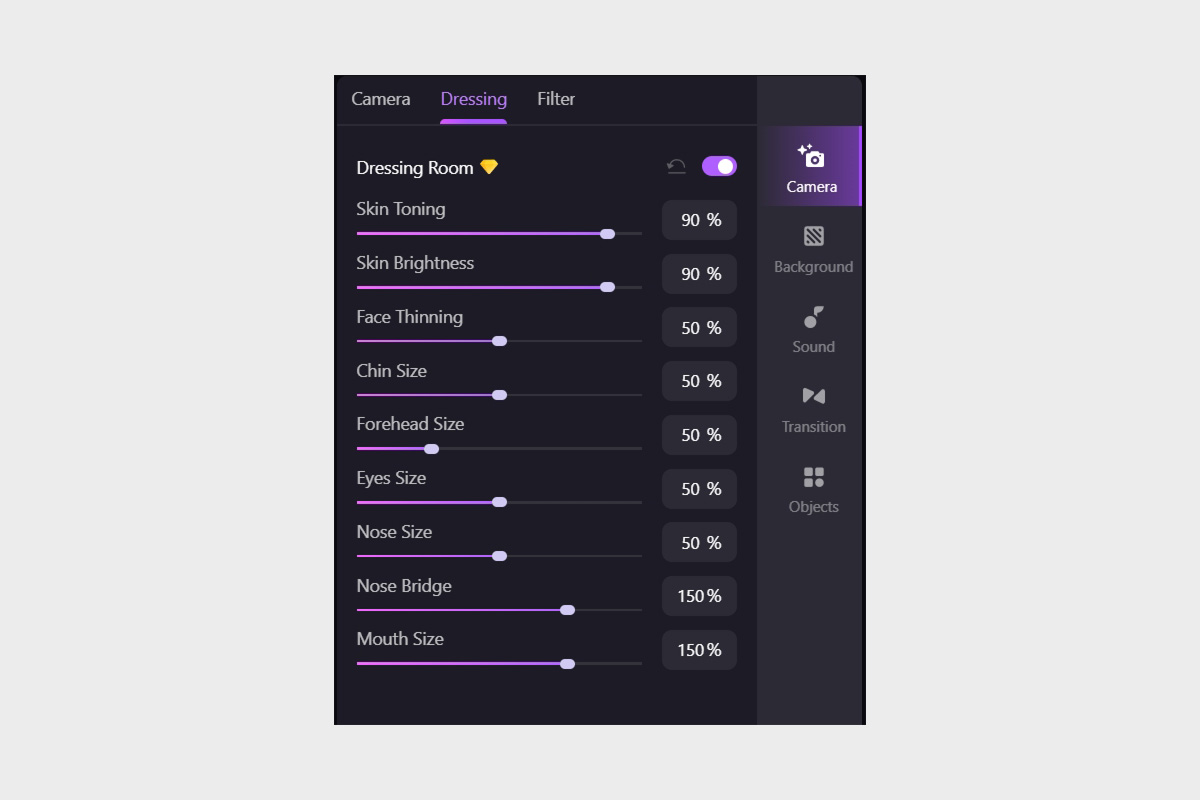
Set up Camera Dressing
You can also apply Dressing of your Camera screen. To do that, click on the Dressing tab from the Camera menu and setup the Dressing Room features as shown below:
Choose the Filter
In the Filter tab of Camera, you can pick your favorite filter to apply to live Recordings. Here is the filters list inside the Camera menu:
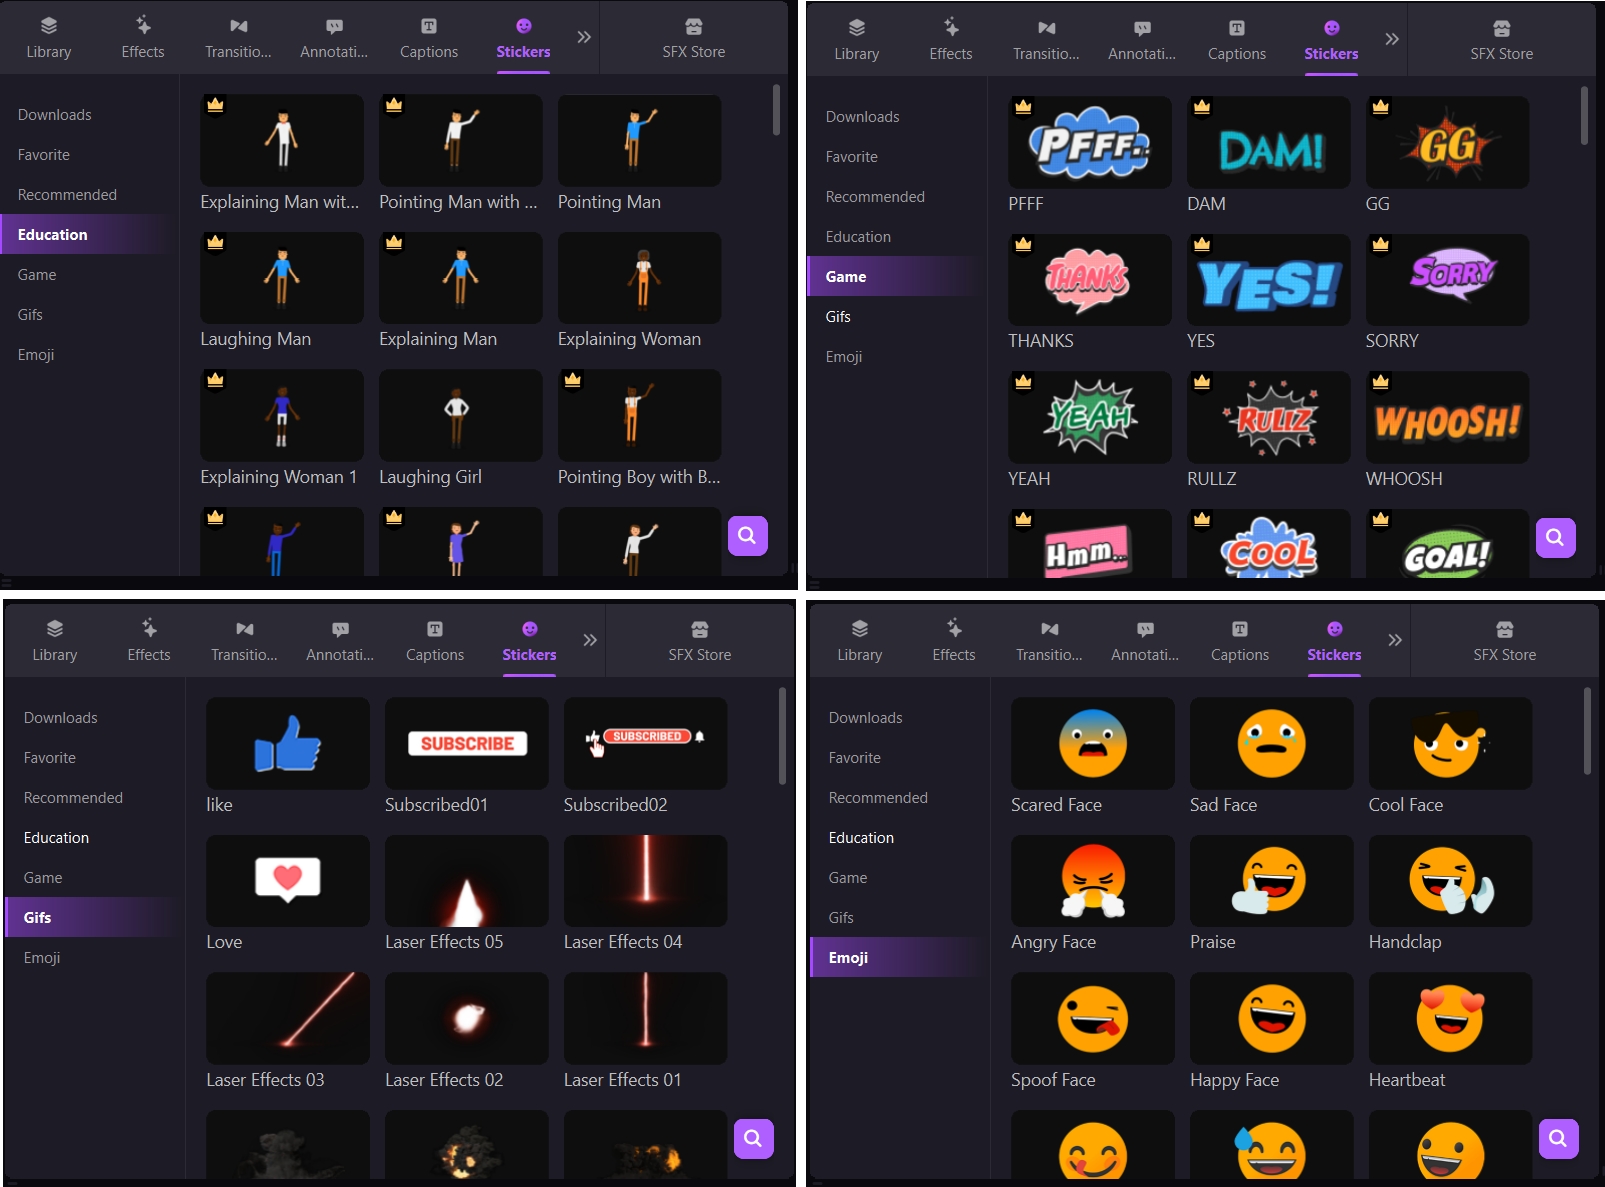
Elegant Stickers
Furthermore, as soon as you enter the Objects menu, the amazing and playable stickers are accessible in the software stock.
Export or Share your Recording
With Wondershare DemoCreator, you have a wide range of choices and settings that you may customize before your final product is stored to your PC. To improve the quality or output size of your video production, you may choose from a variety of video codecs.
If you wish to share your screencasts with your YouTube channel, convert them to MP4 first since MOV is only appropriate for web content videos. You may choose whichever of these forms works best for you. You may choose an encoder from a drop-down menu list in the export options as it will save the memory space for your presentation video without compromising the quality. Also, you can preview the properties of the exported video in the Preset section as shown in the Export window.
Conclusion
We hope this guide will help you supercharge your video marketing strategy on a budget. As you can see, you don’t need expensive marketing agencies or big budgets to make great videos. You just need the right tools and some out-of-the-box thinking.
Today, video is without a doubt the most effective tool for commercial communication. According to reports, 85% of businesses utilize videos in their marketing campaigns. Videos are the preferred format for everything from investor pitches to welcome videos, webinars, and more. Video marketing is clearly on the rise.
DemoCreator can help with all your video presentation needs, in a quick, simple way.