How to Turn Photographic Textures Into Masks in Photoshop
Texture is a key element of design. Learning how to wield and apply textures effectively will really open up your level of skill and proficiency in Photoshop.
Today we’re going to learn about a super quick and easy way to take a photographic texture and turn it into a mask that affects the transparency of a layer. No matter how proficient you are with Photoshop, you should be able to pick up this technique and begin using it on your projects today.
The Easy Way
Everything you want to accomplish in Photoshop can be done in a dozen different ways. You’ll find as you experiment more and more that some methods yield nearly identical results, but others that seem like they’re pretty similar can actually lead to dramatically different results.
Your task then is not to learn one way to do something and stick with it, but to explore different ways of working so you can reach a point where you instantly know which method is best in a given circumstance.
Let’s start off with an extremely basic design that could use a little texture to make it interesting. All we have is some text on a solid color background:

Let’s say you wanted to distress this a little, age it up. How would you go about it? One thing that you might try is to grab a photograph and then use it as a texture. I want to add some cracks and random lines, so I grabbed this image.
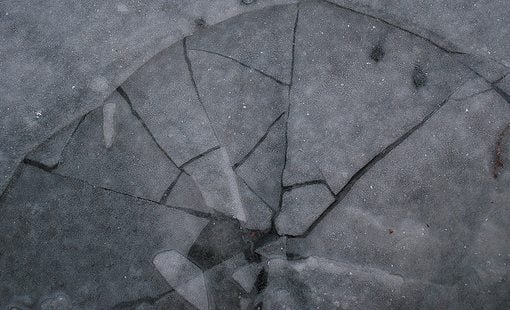
image source: Virginie Moerenhout
There’s a reason that I picked this one: because it seems all wrong. It’s an image of cracked ice, that’s not what I want at all is it? What you have to learn to do is see resources differently when thinking about Photoshop. Consider that they could be, not what they are.
So let’s say we grab this ice photo and throw it into Photoshop, now what? The easy answer is to throw it on top of everything, reduce the opacity and maybe apply some different blending modes to see what works. This will give you something like the image below:
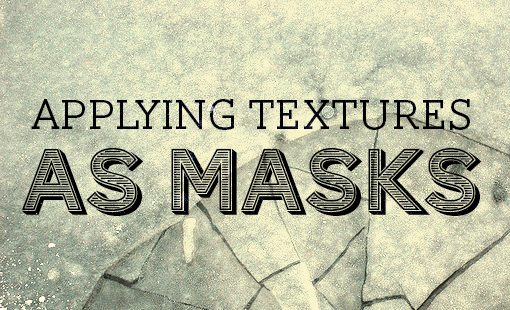
Pretty cool right? Unfortunately, this isn’t what I want at all. It still looks like a photo of cracked ice, just heavily styled and thrown behind my text. Let’s think about how we can go about this differently.
Masks to The Rescue
The problem with the effect above is that we’re just mixing the pixels of two images together. What we really want is a way to take the intricate crack pattern on the ice and somehow apply that to the text so that some parts appear to be worn off with time.
The trick to accomplishing this is of course to use a mask. The cracks on the photo are darker than their surrounding environment, so we can use those pixels to build a mask that knocks out parts of the text in that same pattern. The question is, how do you turn a photo into a mask? I’m glad you asked.
Step 1: Select The Channel with The Best Contrast
In order to understand why we’re going to turn to channels for this task, you need to understand the nature of a mask. A mask is a collection of grayscale pixels that affect the transparency of a layer: black means hidden, white means visible and everything in between is, well, everything in between. If the image below were a mask, each circle would equate to a different level of transparency.
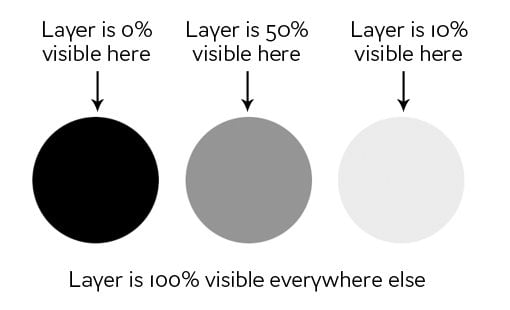
We cover this topic in-depth in our beginner’s guide to masking. A channel is very similar in nature and also uses grayscale values. The cool thing here is that you can turn a channel into a selection, which of course then becomes a mask in a single click.
To start this process, click on your Channels panel and try to find the channel with the best contrast ratio. In my case, it was the blue channel.
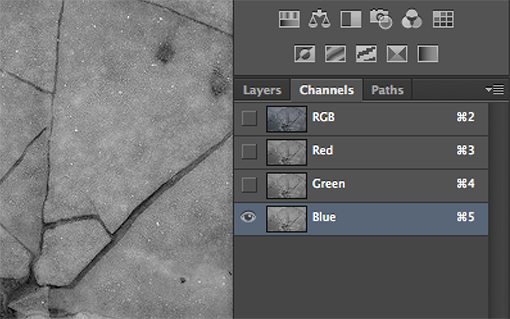
Step 2: Duplicate The Channel
Once you find the channel with the best contrast, duplicate it. This can be done by dragging the channel to the little page looking button next to the trash can near the bottom of the Channels palette (just like copying a layer).
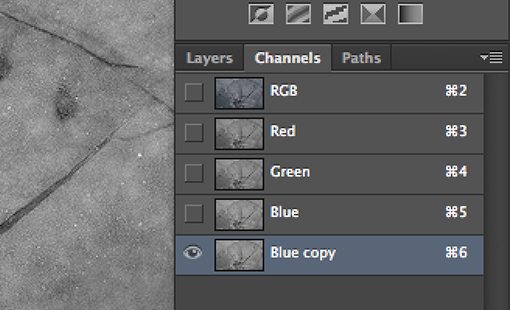
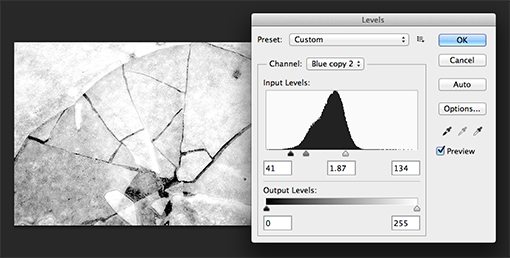
Step 3: Use Levels to Increase the Contrast
Select the new channel that you just created and perform a Levels adjustment that really cranks the contrast. How much you do this, if at all, really depends on the effect that you’re going for, but in this case we want to crank it.
Step 4: Turn the Channel Into a Selection
Now that you have a really good contrast ratio on a non-destructive channel, it’s time to turn this channel into a selection. This is really easy, just Command-Click (Control on a PC) on the channel and it should bring up a live selection.
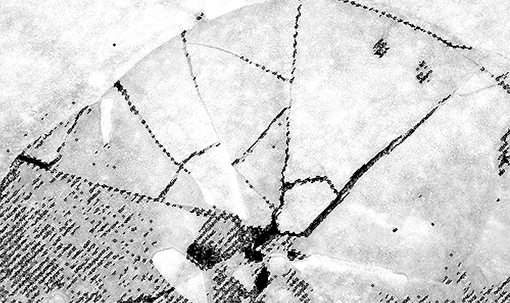
So what’s happening here? The color of the pixels are being used to determine what is selected, just like we saw how they affected the mask earlier. So black pixels will not be selected but white pixels will.
Step 5: Apply the Selection as a Mask
Now that we have an active selection, you probably already know how to turn that into a mask. All we have to do is select our text layer and click the little mask button at the bottom of the Layers panel. Voila, now we have the effect that we’re going for!

Notice that this doesn’t look anything like a broken chunk of ice. In fact, you can barely tell that we used the photo at all. We’ve simply borrowed the complex pixel structure so that we don’t have to manually draw in cracks and faded areas.
If you’d like to tweak the result, try running a Levels adjustment on the layer mask and watch how it affects the end result.
Going Further
Don’t stop there! Try the effect again, mix it with different textures, throw in some layer effects, and you can really come up with something cool:

Here I added in some faded text as a background image, then copied the mask that we built before but adjusted the Levels so that it was barely having an effect. Then I applied an inner-shadow with the blending mode set to Color Burn.
The result is a really dramatic, faded parchment look that’s a far cry from where we started.
Conclusion
This was another one of those posts that resulted from a friend asking how to accomplish a specific effect. I think a lot of new Photoshop users know that this kind of thing is possible, but it seems like it might be overly technical and too advanced for them to execute. Fortunately, the reality is that, despite being a very powerful technique, it’s not really difficult at all to implement!
Leave a comment and let us know what other tasks you struggle with in Photoshop so we can whip up some tutorials to help you out.