Mastering Variable Width Strokes in Illustrator CS5
Photoshop CS5’s fancy new feature set has garnered a lot of attention and tutorials, but Photoshop was by no means the only app to gain a little awesomeness. Illustrator CS5 has a few really stellar new features that make it even easier to create complicated vector art.
Today we’ll go over how to use one the many new features in Illustrator CS5: variable width strokes. With the new “Width Tool” you can make complex line shapes in seconds using only a few quick click and drag motions.
Variable Width Strokes: The Old Way
One of my favorite new features in Illustrator CS5 is the ability to control the width of a stroke at multiple points along a path. To understand why this is so great, let’s look at the old way of doing things.
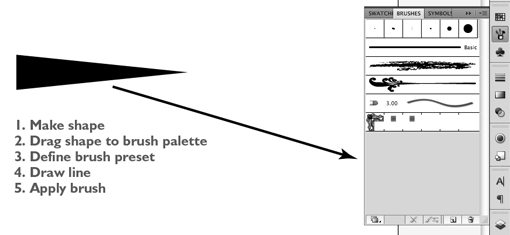
With Illustrator CS4 and any of its predecessors, creating complex strokes involved defining custom brushes. So let’s say you wanted to create a stroke that started thick and ended thin. First, you would create a basic triangle that mirrored what you wanted your stroke to do. Then you would drag that shape to the brush palette and define the various settings for shading, direction, etc. Finally, you would then be able to draw and apply the brush.
Obviously, this multi-step procedure was a bit long and drawn out and therefore tended to make it easier to manually draw out complex lines as if they were shapes.
Variable Width Strokes: The New Way
To illustrate how the new “Width Tool” works in Illustrator CS5, let’s look at an example. Imagine you’re working on a set of eyes for a character you’re sketching out and you’ve got the basic shapes in place.
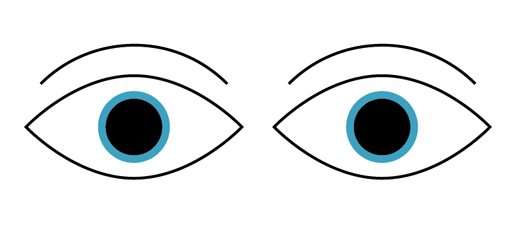
As you can see, the eyes are a little too rigid and lifeless. We need to bring in some thickness to help bring them to life. However, bringing in thickness in equal amounts doesn’t help make the eyes any more real than the thin strokes the already have. Instead, we need to add some variation to the widths of those lines to help give it that marker sketch look.
To begin, grab the Width Tool from your tool palette (Shift+W to activate it right away). Once you have the tool activated, simply click and drag anywhere in a stroke to change the width at that point.
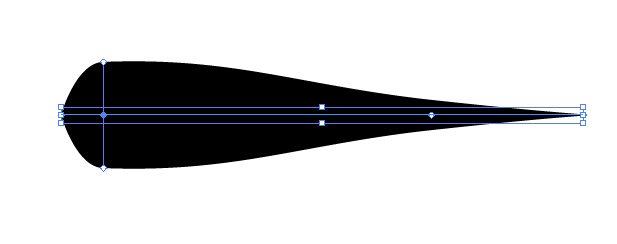
Adobe did an excellent job of reducing the learning curve here to near nil. The tool works exactly like you’d expect: a click and drag controls the width at that point, drag in to reduce the line weight and drag out to increase it. The nice part is that the transitions are automatically nice and smooth so you don’t have to spend time fiddling with the curve (unfortunately, these automatic curves can get a bit sloppy looking at times).
All we have to improve our set of eyes is click on a few selective areas where we want to add a little variation.
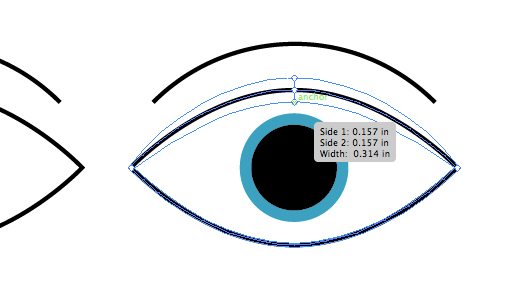
With only a few clicks and a little arranging, our pair of eyes is looking much better. Creating this in CS4, though no highly skilled feat, would’ve still involved considerably more steps.

Specifying Specific Widths
Though it’s fun to just click and drag around to see the results you can come up with, occasionally you’ll want to be more precise. For instance, if you take a look at the eyebrows from the previous example, you’ll see that they end pretty abruptly on one side rather than coming to a point.

To fix this, we could zoom way in and try to reduce this a bit, but it’s hard to work with such a small area. A better option is to take the Width Tool and double click on the point at the end of the line. This will bring up the dialog seen below.
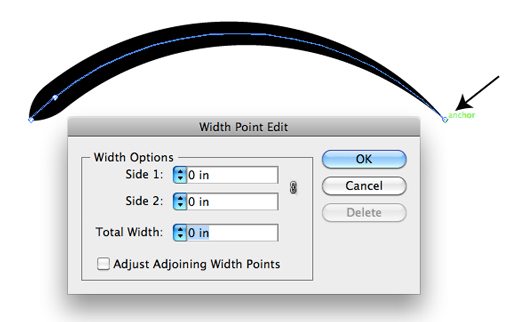
Here you can adjust the width of each side of the stroke. To get that line to come to a nice clean point, just set all the numbers to zero like I did above.
To get a better grasp of how these numbers in the dialog affect the shape of the line, consider the example below.
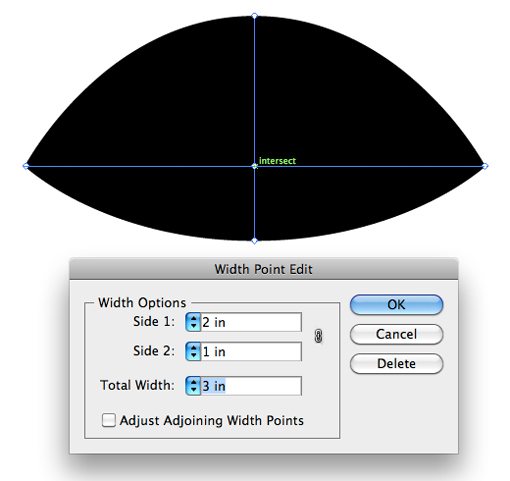
Here we’ve set Side 1 to extrude by two inches and Side 2 to extrude by one inch. This is great because it means that we can create complicated shapes that don’t have be uniform on each side.
Using Variable Width Profiles
Let’s say you’re creating an illustration like the set of eyes above where you’re going to want your strokes for multiple objects to be about the same. Rather than eyeballing it and hoping they’re close enough, you can setup Variable Width Profiles that automatically apply a given shape to a line.
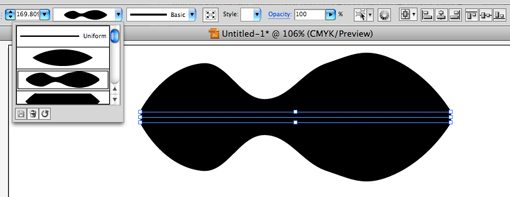
Illustrator comes with a few presets that you can use right out of the box. However, it’ll be far more useful to create and save your own as you work.
To create your profiles, simply draw a line and adjust it the settings that you want the profile to duplicate. Next, hit the little save button at the bottom of the profile palette.
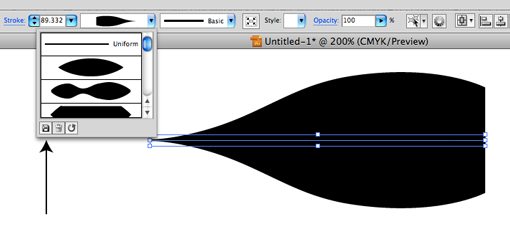
Now all you have to do to apply it is select a stroke that has already been converted to variable width, then click on the profile.
Functionality Tips
Now that we’ve gone over the ins and outs of using variable width strokes, we’ll finish up with a few tips to help make you a pro.
The Path Doesn’t Change
It’s important to note that as you apply variable width strokes, the nature of your path is staying exactly the same. Despite the fact that it might look and feel like you’re adding extra points to the path, you’re actually editing the stroke independent of the path.
To see what I mean, let’s look at both sets of eyes from before in outline mode (Command + Y). The top set is from before we added variable width strokes and the bottom set is after.
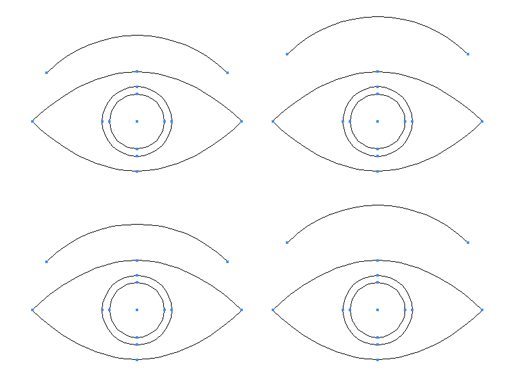
As you can see, the two are identical in both the number and placement of points.
Editing The Stroke Profile
Once you’ve taken the Width Tool and dragged out an area of a stroke, you’re not stuck with that transformation. Click and drag again in the same spot to readjust adjust the width at that point. You can also click and drag the point in the center to move it left and right along the path. This allows you to quickly tweak where the curves in the line lie. Finally, if you option-click and drag one of the transformation points, it will duplicate it so you can use the same transformation on multiple parts of the line.
Asymmetrical Strokes
We saw above how to use to use the dialog window to control both sides of the line, but you can also make these changes live right on the line. Simply hold down the option key while adjusting one side of the line to make the changes only affect that side. If you adjust the line width without holding the option key, all changes you make will be uniform across both sides.
Converting The Path To a Shape
If you want to convert the stroked path that you’ve made to an actual filled shape with points along the outer edge, click on “Object” in the menu bar and come down to “Expand Appearance.”
Remember that once you do this, it will be considerably more difficult to edit the shape. However, you will have more freedom over each point and curve. It’s a good practice to convert your strokes to outlines before you send off your artwork to a printer or anyone else that might attempt to scale or change it.
Conclusion
The information above should be enough to make you the master of your strokes. The best way to get a feel for how variable width strokes work is to just crack open Illustrator and start experimenting.
Leave a comment below and tell us what you think of the new variable width strokes in Illustrator CS5. Do you think they are useful enough to make it into your illustration workflow or is it just a neat feature that you can’t ever see yourself using?