7 Awesome Emmet HTML Time-Saving Tips
Emmet, formerly Zen Coding, is one of the most downright practical and productive text editor plugins that you will ever see. With its ability to instantly expand simple abbreviations into complex code snippets, Emmet makes you feel like a powerful coding wizard with the world at your fingertips.
Today we’re going to dive into seven awesome tips to help you become a true Emmet pro.
1. Skip the Div
Our first tip is that you rarely need to type out “div” in your macro. It’s tempting because that’s what you do with every other HTML element, but divs are special and actually require even less effort. All you have to do is type out an ID (using a hashtag) or a class (using a period) and Emmet will assume that you’re looking to create a div.
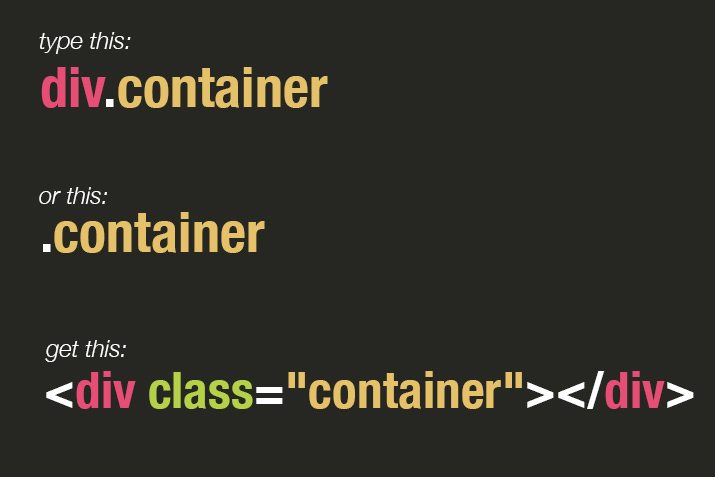
As you can see, both abbreviations yield the same result. Since Emmet is all about saving you time by reducing the amount of typing required, always shoot for the shortest route to what you want.
Implicit Tag Names
This quirk is actually part of a greater feature called “implicit tag names”, which attempts to interpret the tag that you want based on context. Notice that I don’t type out either “div” or “li” in my abbreviation, but they are assumed and inserted into the final expanded snippet.

2. Chain Abbreviations With DOM Navigation
If you’re using Emmet to expand simple class names into divs, good for you, you’re off to a decent start. The real time saving power though is only reached once you learn to effectively build larger macros that can expand into a significant portion of your markup.
The key to this is to memorize and understand the syntax that will help you branch off into different levels of your document tree. There are three important symbols to keep in mind:
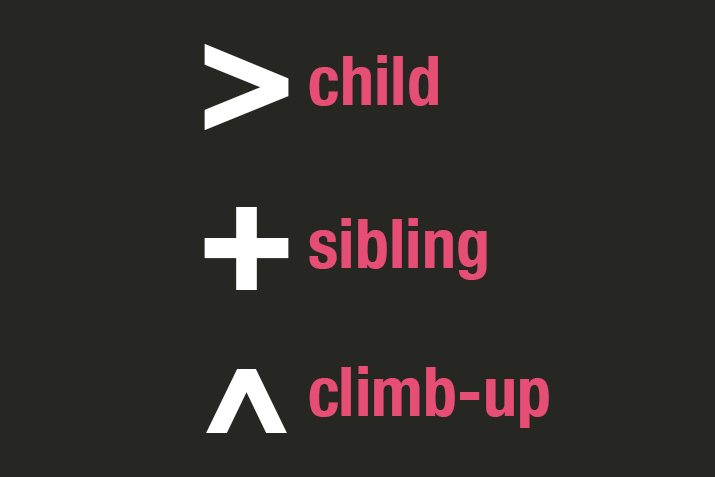
As you can see, “>” allows you to go deeper into the tree and create a child, “+” allows you to create a new element on the same level as the previous one (a sibling), and “^” allows you to climb back up a level to create an element. For the sake of simplicity, let’s start with the first two.

As you can see, with the child symbol (just like the child selector in CSS), I was able to place the inner div inside of the outer div. Then I used another child symbol followed by the sibling symbol to place both the h2 and the paragraph on the same level right inside the inner div.
Climbing Up
Now let’s move on and look at moving up the tree. This one is a little more complicated to wrap your mind around but is an awesome new Emmet feature that we didn’t have in Zen Coding. Basically, using the “move up” symbol, we can climb out of a branch that we’ve begun to dive into. Here’s what I mean:
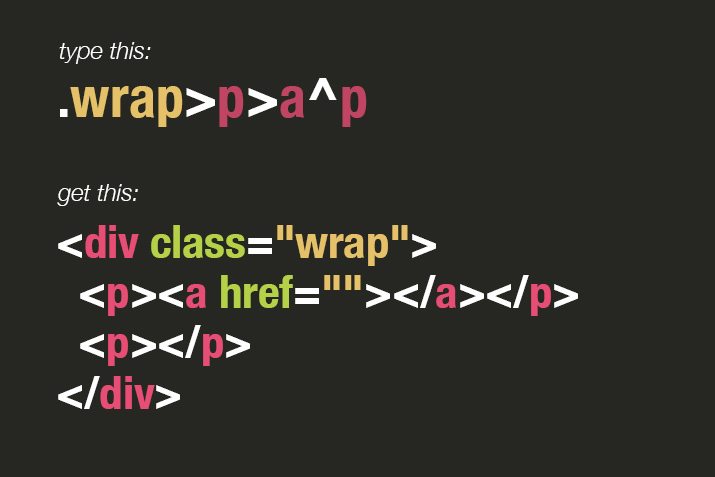
As you can see here, we dug into the first paragraph and tossed in an anchor tag, but then needed to climb back up and add another paragraph on the same level as the previous one. The “^” symbol allowed us to accomplish this.
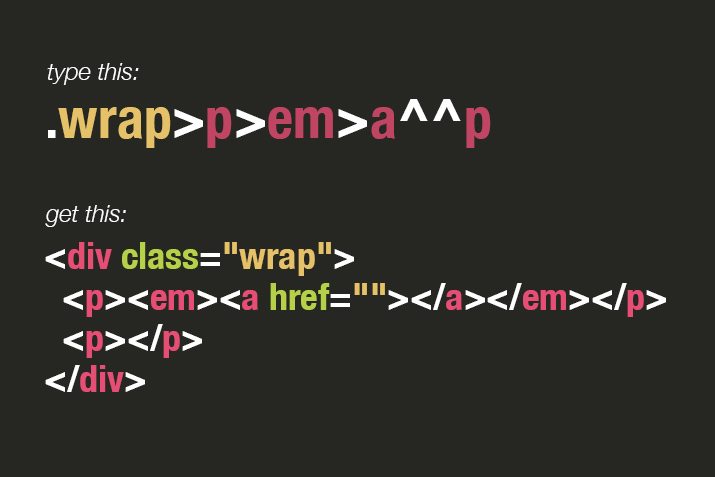
To make this feature even more useful, you can chain these symbols together to climb back multiple levels. For instance, if we added an em element to our previous abbreviation, we’d have to climb up two levels to place our next paragraph on the same level as the first.
3. Use Grouping to Simplify Your Structure
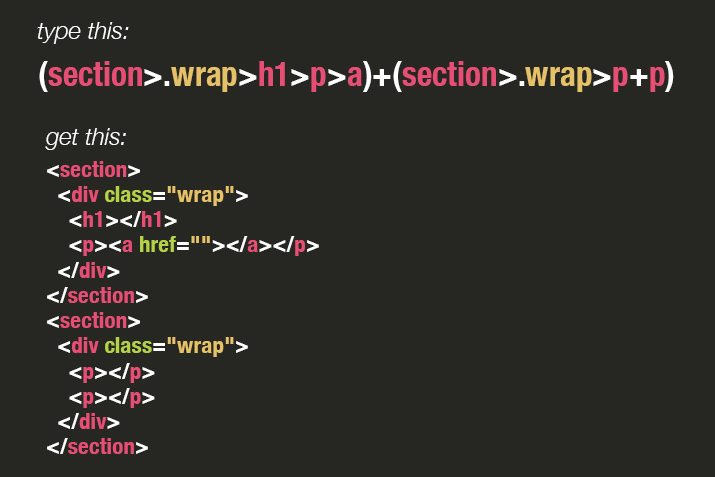
Sometimes you’ll find that you’ve dug so deep into a particular branch that it becomes a confusing mess to chain together enough climb up symbols to get what you want. In this case, it might simplify things a bit if you turn to grouping instead. This is accomplished by implementing parentheses around different sections of code.
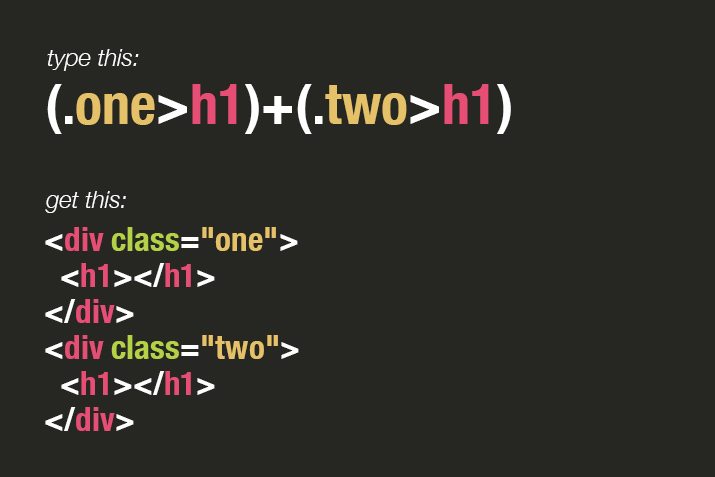
This actually feels more natural and logical than using the climb up symbol, and really we’re accomplishing the same thing. You can see this really start to pay off when you’re outlining a larger portion of your page.
4. Insert Text and Attributes
As you’re marking up your page, text and attributes are two things that you might expect that you can’t perform with Emmet. Many users simply outline a document with this tool, then fill in the content gaps after the expansion. This is a great way to work, but if you’re interested, you can insert both text and attributes using the syntax shown below.
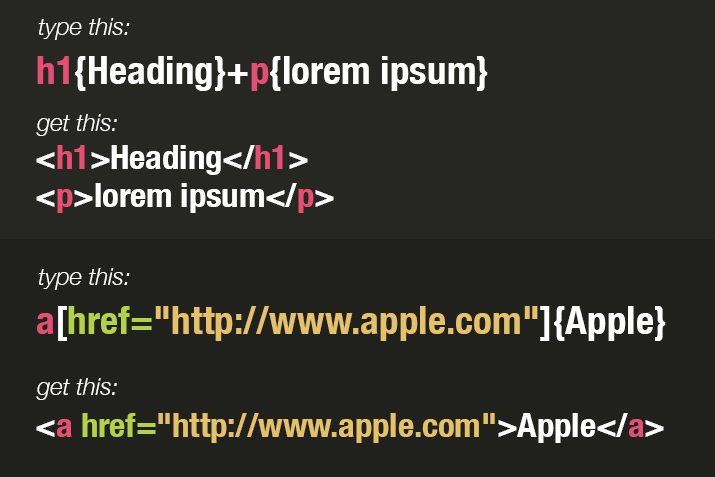
As I’ve shown above, text is inserted via {curly brackets} and attributes utilize [square brackets]. Keep in mind that anchors actually automatically insert an “href” but the value for it is left empty by default, this technique allows you to fill it. Further, remember that you can use curly brackets to create any attribute that you like, not just the one shown here.
5. Multiple Class Names on a Single Item
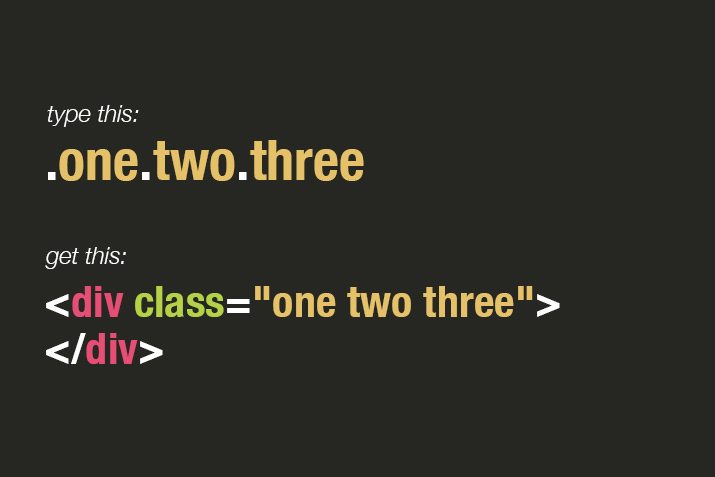
This one is super simple, but when I first began using this tool, it wasn’t clear to me how to add multiple class names to a single element. It turns out, all you have to do is type out all the class names in a row separated by periods.
6. Multiplication
This is another one of my favorites. You can save yourself tons of typing when inserting multiple elements of the same type. Simply use the following syntax:
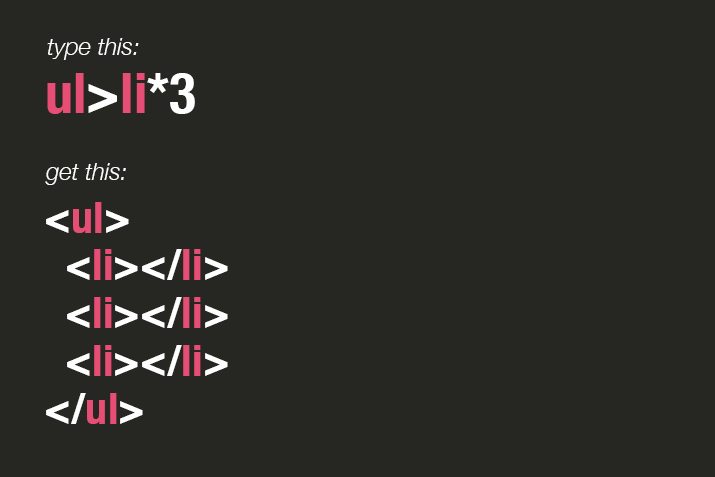
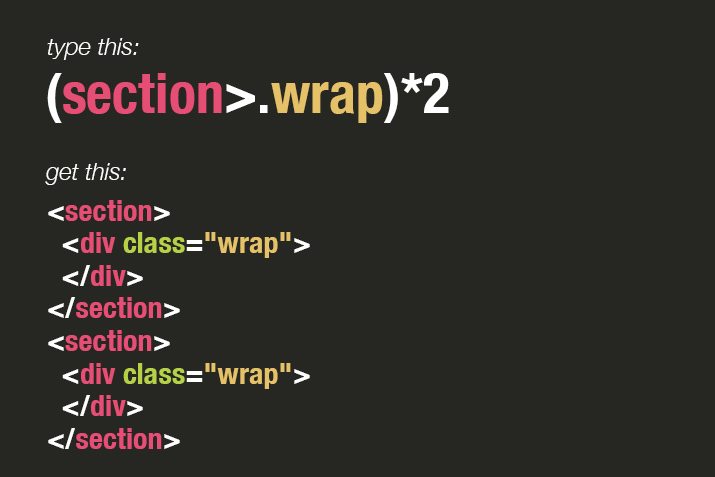
This works on pretty much anything you need it to, no matter how complicated. Try pairing it up with the grouping feature that we saw before for some interesting results.
7. Automatic Numbering
Our seventh and final tip is that you can insert automatically incrementing numbers into your snippets via the dollar sign. This works anywhere: classes, IDs, text, attributes, etc. Here’s an example in action:
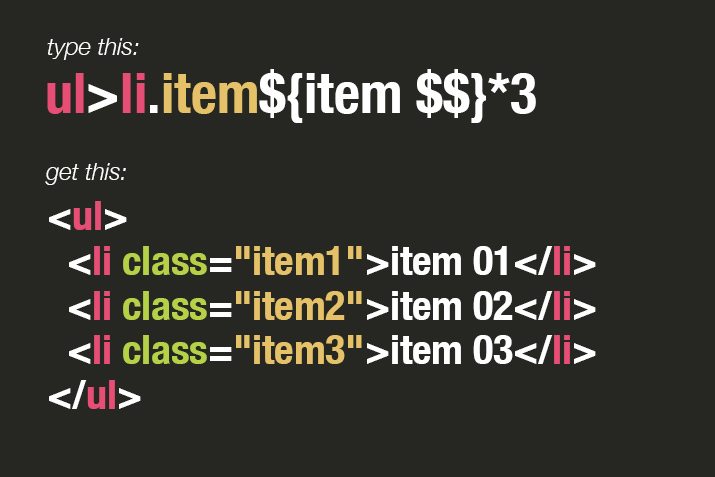
Notice that, the more dollar signs you use, the more digits the number will have. So in the first instance, I used $, which expanded into 1, 2 and 3. Then in the second instance, I used $$, which expanded into 01, 02 and 03.
Try Them Out!
Now that you know a bunch of seriously amazing tricks to try out with Emmet, it’s time to give them a shot. Hit up our Emmet demo page and try out a few of the abbreviations that we went over above. Here’s a list of each abbreviation in this article in plain text for your copying and pasting convenience.
<!-- Skip The Div #1 -->
div.container

<!-- Skip The Div #2 -->
.container

<!-- Implicit Tag Names -->
.wrap>ul.list>.sites

<!-- Chaining Abbreviations -->
.outer>.inner>h1+p

<!-- Climbing Up #1 -->
.wrap>p>a^p

<!-- Climbing Up #2 -->
.wrap>p>em>a^^p

<!-- Grouping #1 -->
(.one>h1)+(.two>h1)

<!-- Grouping #2 -->
(section>.wrap>h1>p>a)+(section>.wrap>p+p)

<!-- Text & Attributes #1 -->
h1{heading}+p{lorem ipsum}

<!-- Text & Attributes #2 -->
a[href="http://www.apple.com"]{Apple}

<!-- Multiple Class Names -->
.one.two.three

<!-- Multiplication #1 -->
ul>li*3

<!-- Multiplication #2 -->
(section>.wrap)*2

<!-- Automatic Numbering -->
ul>li.item${item $$}*3
Also be sure to hit up the Emmet home page, where you can learn more and try it for yourself right away.
How Do I Expand Abbreviations?
Expansion can be different in each editor and typically requires a plugin. In Sublime Text 2, open Package Manager, search for Emmet, install it, then restart the app. To trigger an expansion, simply hit tab after typing in an abbreviation.
What Are Your Favorite Tips?
Emmet is hands down one of my absolute favorite coding tools. Trust me, use it for a few weeks and you’ll never want to code without it again. It saves tons of work and is so much smarter than your typical code editor snippet functionality.
Now that you’ve seen my tips, leave a few of your own! Write a comment below telling me how you use Emmet or Zen Coding and which features are your favorites.