Animate.css: Kick-Ass CSS Animations in Seconds Flat
On my laundry list of todo items that I’ll do “someday” is the idea of creating a prebuilt library of useful CSS animations. The bad news is that I’ll likely never actually get around to doing this. The good news is that developer Dan Eden beat me to it.
Today we’re going to check out Animate.css, an awesome and free collection of CSS animations that you can apply to your projects with almost no effort. It’s a blast to play around with so follow along and join the fun.
What Is Animate.css?

There’s nothing groundbreaking or special about the way Animate.css is built, if you know how to use CSS, then you know how to use it. It’s simply a bunch of pre-defined keyframe animations rolled into some classes. If you want to use one of the animations, you apply the class. That’s it!
If these were all extremely simple transitions, this utility might not be worth your time. However, these are complex, carefully built animations that are fully customizable. If you’re looking to use keyframes on any level, Animate.css could save you a lot of time.
I Don’t Want No Stinking Classes
The minimal markup police are ready to swoop in for an arrest at this point. Who wants to go cluttering their HTML up with a bunch of extra classes? For the purposes of this tutorial we’ll stick to this method but if you don’t approve, it’s easy enough to simply copy and paste the code for an animation into a semantic hook.
Also, at the end of this piece I’ll show you an alternate route that will allow you to scrap the extra markup through the use of our good friend Sass @extend.
Creating a Custom Build

You have two options for downloading Animate.css. You can either grab the whole thing from Github (good for experimenting) or create a custom download that only includes the effects that you need for the specific project you’re working on (good for actual use).
One neat tip on the custom build page, try hovering over each animation label. It will show you exactly what the animation does so you can decide whether or not to include it.
The Download
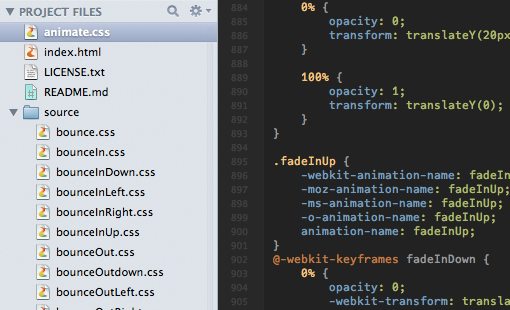
If you choose to download everything like I did, you get one one big CSS file containing all of the animation classes and a folder full of individual CSS files, each containing one animation.
You can easily select a specific CSS file if you only want to apply a single animation, but be aware that it won’t stand on its own. As we’ll see, there’s an “animated” class in the big file that you’ll need to make everything work.
Building a Quick Demo
Now that we’ve got our files downloaded, it’s time to figure out how to use this bad boy. We’ll need something to test it on though so let’s build a quick image gallery. You don’t have to go all out, just toss some images into a div, style them slightly and float them to the left.
HTML
<div id="gallery">
	<a href="#"><img src="http://lorempixum.com/200/200/city/1" alt="" /></a>
	<a href="#"><img src="http://lorempixum.com/200/200/city/2" alt="" /></a>
	<a href="#"><img src="http://lorempixum.com/200/200/city/3" alt="" /></a>
	<a href="#"><img src="http://lorempixum.com/200/200/city/4" alt="" /></a>
	<a href="#"><img src="http://lorempixum.com/200/200/city/5" alt="" /></a>
	<a href="#"><img src="http://lorempixum.com/200/200/city/6" alt="" /></a>
	<a href="#"><img src="http://lorempixum.com/200/200/city/7" alt="" /></a>
	<a href="#"><img src="http://lorempixum.com/200/200/city/8" alt="" /></a>
</div>
CSS
body {
	background: #eee;
}

#gallery img {
	border: 4px solid #fff;
	margin: 50px;
	-webkit-box-shadow: 3px 3px 5px #999;
	float: left;
}
If you don’t want to build your own, I made a slightly modified Tinkerbin that you can work with. I’ve placed the code you’ll need to get started in there already, follow along to apply some of the animations.
Animating Objects
Animating an object with this library is super easy. All you have to to is apply the prebuilt “animated” class, then choose a specific animation that you’d like to use and apply its dedicated class as well.
For instance, let’s say we wanted to add the “bounce” animation. Here’s what we do to our image.
<a href="#"><img class="animated bounce" src="http://lorempixum.com/200/200/city/1" alt="" /></a>
This will grab and apply the following CSS to that image. See how much work this just saved you?
.animated {
	-webkit-animation-duration: 1s;
	   -moz-animation-duration: 1s;
	    -ms-animation-duration: 1s;
	     -o-animation-duration: 1s;
	        animation-duration: 1s;
	-webkit-animation-fill-mode: both;
	   -moz-animation-fill-mode: both;
	    -ms-animation-fill-mode: both;
	     -o-animation-fill-mode: both;
	        animation-fill-mode: both;
}

@-webkit-keyframes bounce {
	0%, 20%, 50%, 80%, 100% {-webkit-transform: translateY(0);}
	40% {-webkit-transform: translateY(-30px);}
	60% {-webkit-transform: translateY(-15px);}
}

@-moz-keyframes bounce {
	0%, 20%, 50%, 80%, 100% {-moz-transform: translateY(0);}
	40% {-moz-transform: translateY(-30px);}
	60% {-moz-transform: translateY(-15px);}
}

@-ms-keyframes bounce {
	0%, 20%, 50%, 80%, 100% {-ms-transform: translateY(0);}
	40% {-ms-transform: translateY(-30px);}
	60% {-ms-transform: translateY(-15px);}
}

@-o-keyframes bounce {
	0%, 20%, 50%, 80%, 100% {-o-transform: translateY(0);}
	40% {-o-transform: translateY(-30px);}
	60% {-o-transform: translateY(-15px);}
}
@keyframes bounce {
	0%, 20%, 50%, 80%, 100% {transform: translateY(0);}
	40% {transform: translateY(-30px);}
	60% {transform: translateY(-15px);}
}

.bounce {
	-webkit-animation-name: bounce;
	-moz-animation-name: bounce;
	-ms-animation-name: bounce;
	-o-animation-name: bounce;
	animation-name: bounce;
}
Making It Work On Hover
What we’ve done thus far is simply animate the image when the page loads. Most of the time, this probably isn’t going to be what you want at all. We typically reserve animations for a specific event.
Let’s say we want the animations to only trigger on hover, all we have to do is add the hover pseudo class to the .animated class in our CSS and we’re good to go.
.animated:hover {
	-webkit-animation-duration: 1s;
	   -moz-animation-duration: 1s;
	    -ms-animation-duration: 1s;
	     -o-animation-duration: 1s;
	        animation-duration: 1s;
	-webkit-animation-fill-mode: both;
	   -moz-animation-fill-mode: both;
	    -ms-animation-fill-mode: both;
	     -o-animation-fill-mode: both;
	        animation-fill-mode: both;
}
See It In Action
That’s really all there is to it. Click here to see a live demo of the Animate.css bounce effect.
Go Nuts
To really see the power of this utility, let’s apply eight different animations to our eight different images. Proceed just like before, only apply replace the bounce class with something different each time.
<div id="gallery">
  <a href="#"><img class="animated bounce" src="http://lorempixum.com/100/100/city/1" alt="" /></a>
  <a href="#"><img class="animated flip" src="http://lorempixum.com/100/100/city/2" alt="" /></a>
  <a href="#"><img class="animated hinge" src="http://lorempixum.com/100/100/city/3" alt="" /></a>
  <a href="#"><img class="animated flash" src="http://lorempixum.com/100/100/city/4" alt="" /></a>
  <a href="#"><img class="animated shake" src="http://lorempixum.com/100/100/city/5" alt="" /></a>
  <a href="#"><img class="animated swing" src="http://lorempixum.com/100/100/city/6" alt="" /></a>
  <a href="#"><img class="animated tada" src="http://lorempixum.com/100/100/city/7" alt="" /></a>
  <a href="#"><img class="animated wobble" src="http://lorempixum.com/100/100/city/8" alt="" /></a>
</div>
See It In Action
This time, hovering over the images causes all kinds of commotion. Images, are wobbling, bouncing, even falling off the screen! Major kudos to Dan Eden, he’s create some solid animations for us to play with. Click here to see the Tinkerbin for all eight.

Tweaking An Animation
Customizing animations is a cinch. Simply target both the animated class as well as the specific effect you’d like to change, then apply any needed tweaks. Here I’ve changed the bounce animation duration to two seconds.
.animated.bounce:hover {
	-webkit-animation-duration: 2s;
	   -moz-animation-duration: 2s;
	    -ms-animation-duration: 2s;
	     -o-animation-duration: 2s;
	        animation-duration: 2s;
}
Don’t Really Go Nuts
The advice above is mostly for testing purposes. When you’re kicking the tires of Animate.css, be encouraged to dig in and try everything. However, if you plan to implement this into a real workflow, there’s a lot to keep in mind.

First, think about browser support. Keyframe animations are finally being supported in IE 10, but nothing under that. However, according to CanIUse, they do work well across almost everything else: Safari, Chrome, Firefox, Opera and even some mobile browsers like those for Android and iOS. Given the lack of IE support, keep your animations strictly in the eye candy category and don’t rely on them to structure your interactions or you’ll be leaving lots of users out.
Next up, consider the fact that keyframe animations can be pretty hefty actions that really bog down user experience if you go too far. Use some restraint and perform lots of tests to see how the page performs on different platforms.
Mixing It With Sass
Looking over Animate.css I find myself wanting to rewrite the entire thing in Sass. I can’t help but think about how much more concise and easily implementable it would be using the magic of preprocessors. The entire library could be built in a similar manner to Compass, making the implementation of an effect as easy as calling a mixin.
In the mean time, since Sass mixes perfectly with plain CSS, you could still give yourself a nice functionality boost without rewriting anything. The key here is to apply the animations using @extend, which eliminates the need to implement extra classes in your markup. Consider the following:
.button {
   height: 50px;
   width: 200px;
   background: #444;
   font: 12px/50px Helvetica, Verdana, sans-serif;

   a {text-decoration: none;}
}

.bigbutton {
   @extend .button;
   height: 100px;
   width: 300px;
}

.button:hover, .bigbutton:hover {
   @extend .animation, .bounce;
}
Here I’ve created a couple of simple button classes and leveraged the power of Sass to bounce them on hover. The result will be DRY CSS void of repetition. I think Sass is fantastic for stuff like this, it really shows off the usefulness of preprocessors.
What Do You Think?
I had a lot of fun playing with Animate.css. I’m not sure how much I’ll use it in the wild but I’m very grateful that Dan Eden took the time to put it together and offer it up free.
Leave a comment below and let us know what you think. Are you amazed at how far CSS has ventured into the territory of things we used to use jQuery for? Is this a good idea or should we leave stuff like this to JavaScript? I’d love to hear your opinions.