Drag and Drop WordPress Layout With Platform Pro
Building and even slightly altering WordPress themes can be a real hassle. You could buy a book or watch hours of video tutorials until you’re an expert on WordPress, but wouldn’t it be nice if you could skip all this and jump into building your own theme today?
Today we’re going to take a look at an impressively innovative product that allows you to use the simplicity of a drag and drop interface and basic forms to completely customize a WordPress site. The product is called Platform Pro and you’ve simply got to see it…
Meet Platform Pro

Platform Pro is essentially just a WordPress theme, but it’s likely different than any WordPress theme you’ve ever used before. Instead of just providing a few different color options or layouts, Platform puts you in the driver’s seat. Whether you’re a web developer and like to code by hand or someone who doesn’t even know what CSS stands for, you’ll find that Platform has a lot to offer you.
I stumbled across the theme completely by accident the other day and asked the good folks at PageLines to set me up a test page. It turns out the have already have a public test page set up for anyone to try totally free. After you get the gist of how everything works here, head over to that link to try the theme out for yourself.
Getting Started
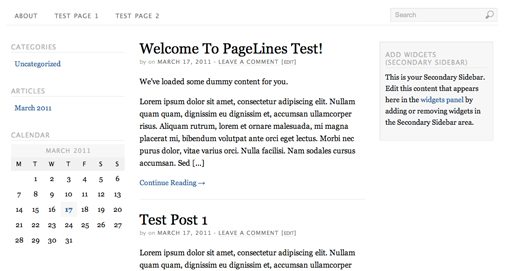
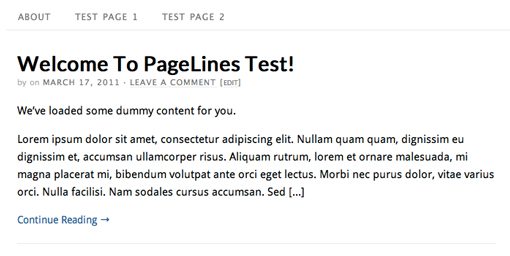
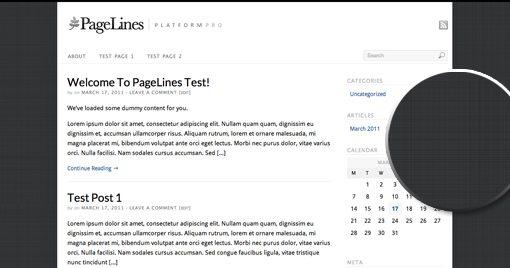
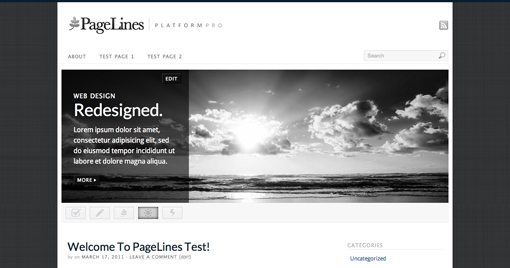
Below is roughly the page we’ll be starting with today (I’ve trimmed a bit so it’s not too huge). As you can see, it’s excellent for a blank slate. The typography and layout are fairly nice as is, but generic enough that we won’t mind digging in and changing it all around.
Again, this is close to what you get straight out of the box with zero work thus far:
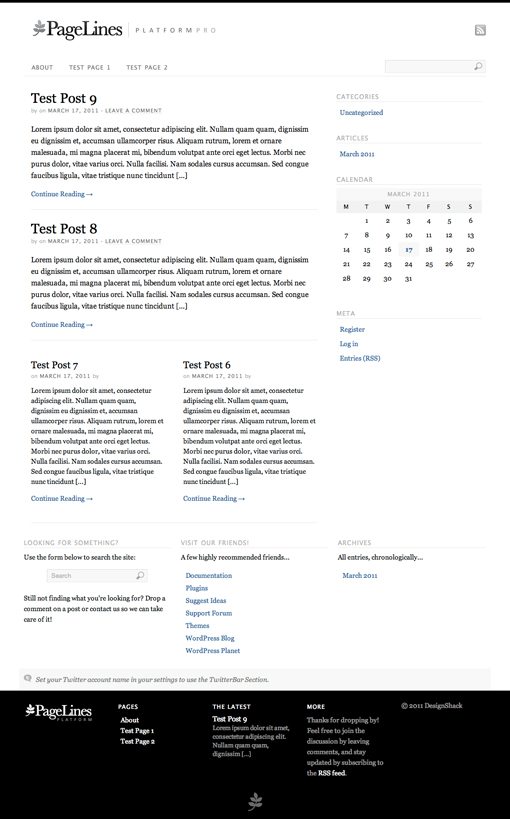
In the image above we can see a header and navigation area, some post previews, a sidebar, a footer, etc. Each of these has a number of options for customization so if you don’t like anything at this point, don’t worry, you can change it!
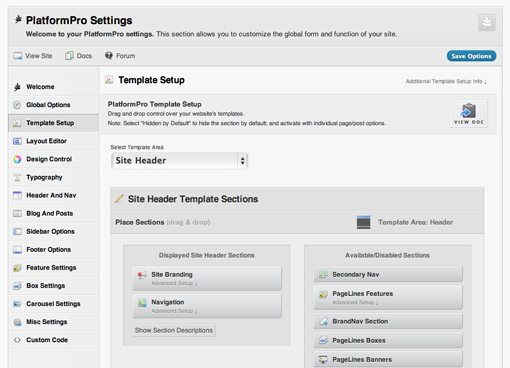
The Settings Panel
Within the typical WordPress admin panel, you’ll find a module for Platform Pro. This is where you will handle most, but not all, of the changes to your WordPress theme. There is a ton of stuff in here so you might feel a bit overwhelmed at first, but honestly, just about every setting you’ll find is straightforward and easy to understand.
We definitely won’t have time to go through every setting here but we’ll kick the tires sufficiently enough that you’ll get a good feel for what’s possible.
Modifying the Layout
As a designer, the first thing I want to know is how I can play with the layout. Clicking on the Layout Editor tab of the settings panel will bring up a number of options to choose from, both basic and advanced.
Your first choice is to choose between one of six basic layouts. Each of these is a mixture of a content area and either zero, one or two sidebar options.
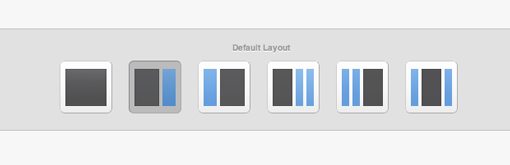
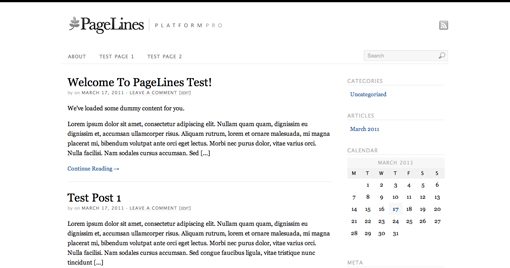
Hate that sidebar seen in the initial site preview above? Ditch it by selecting the icon with only a main content section. Then apply your settings and take a look at your page to see the changes.
Can’t get enough sidebars and widgets? Choose an option with two sidebars and you get the layout seen in the image below.
Going Further
If you want even more control over the layout, scroll down to find the panel shown below. Here you can drag the dividers and use the fields to determine the width of the overall page and each column.
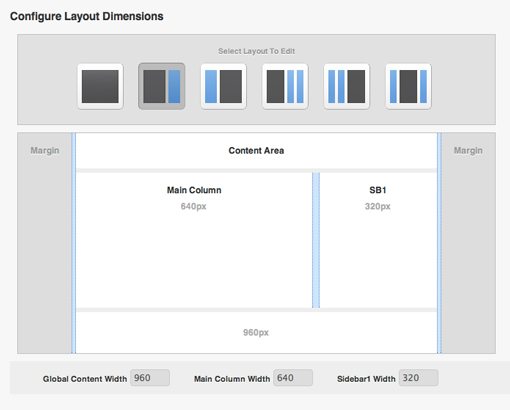
So let’s say I think my sidebar is far too wide. All I have to do to fix it is slide the little divider over to the right until my dimensions are 700px for the main column and 260px for the sidebar.
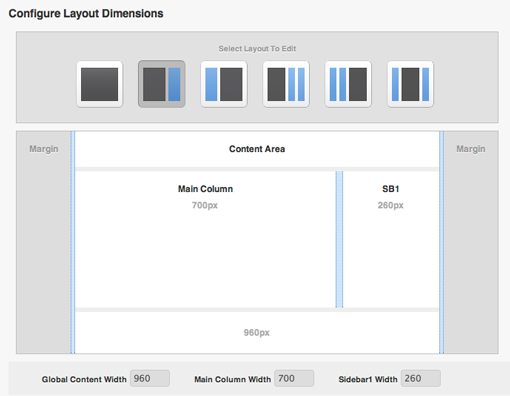
Once I save these layout settings and take a look at my page, here is the result:
Changing the Typography
Platform gives you a lot of freedom over the text on your page. Navigate to the typography tab and you’ll see options for changing the fonts for the primary font, secondary font, headers and even input areas.
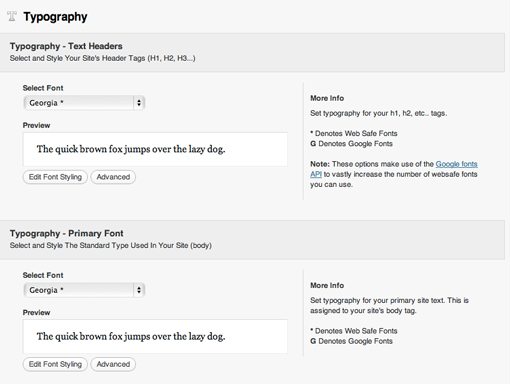
One thing that really surprised me is the huge selection of fonts that you can choose from with this theme. Pagelines has included several standard web fonts and even a good portion of the Google Font Library to really push your creative freedom to the limit (there are also custom Cufon options).
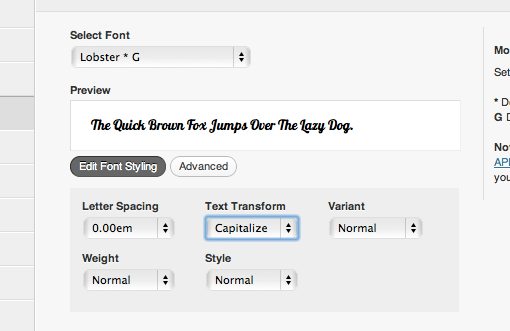
When you’re assigning a font to a specific area, you can choose from a number of standard styling options that you would normally have to write a bunch of CSS to manipulate. If you want to include your own CSS, just click on the “Advanced” button.
In the end I decided to go with a modern feel so I chose a couple of nice sans-serif fonts for the page: Lato for the headers and Droid Sans for the body.
Background and Colors
Under the Design Control tab you’ll find even more customization options. At the top of this tab you’ll find more interesting layout options that affect how a background image is applied. For instance, you can make a background image flood the whole site, or just affect a “canvas” area outside of the content. I chose the latter to keep things clean, you’ll see how this works next.
To add a background image, simply scroll down to the section seen below and upload a JPG. You have full freedom over how the image is applied. You can tile it or position it in a specific spot using percents.
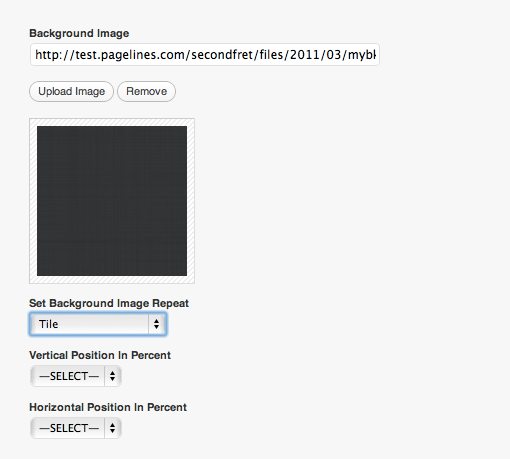
I uploaded a subtle dark gray texture to add come contrast to my page. Again, this could’ve flooded the entire background but I chose to have it flank the content.
Changing Colors
In the same tab as the settings above you can view and modify the color settings for every element on your site. This is as easy as finding the element in a list and changing the color values.
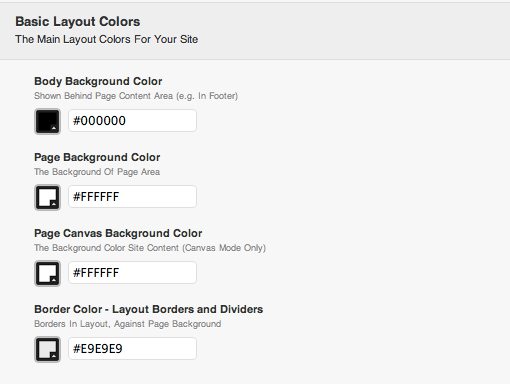
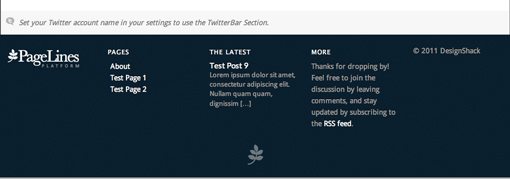
For instance, changing the primary background color affects the footer element. Just pick a color in Photoshop, copy the values and hit save to see the changes.
Adding Sections
Up to this point we’ve really just made minor tweaks to the site. It’s still fairly close to what we started with and not all that exciting. Let’s change this by adding some new sections.
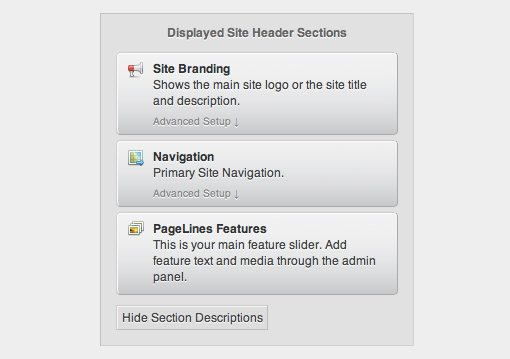
Under the Template Setup tab you’ll find a control that allows you to drag and drop new sections onto your site. The left side contains the sections that are currently active and the right side sections that are available to add.

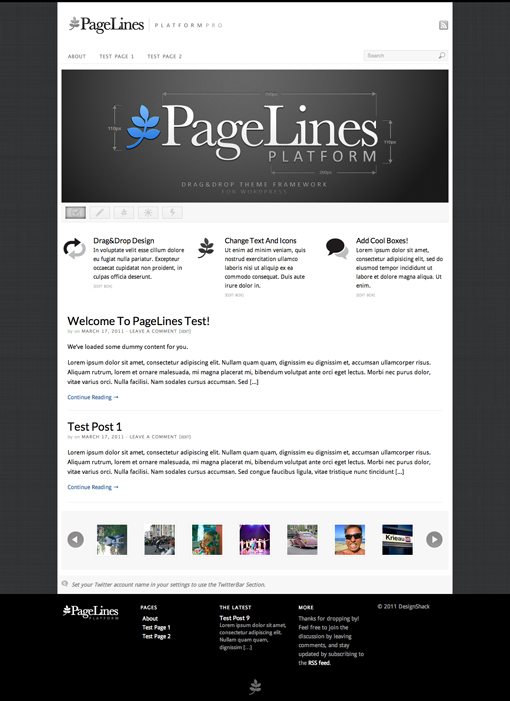
Let’s change our setup by adding an awesome “Featured” slider at the top of the page. To accomplish this, simply drag the “PageLines Features” box under the “Navigation” box in the header.
With this quick addition, suddenly our site is looking far better than when we started. Now we have a super fancy image slider at the top with several fully-customizable spots for images, text and even video. All without a single line of code!
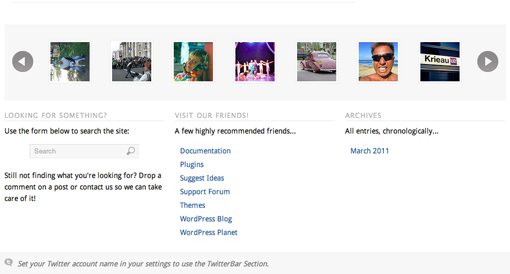
There are several cool default sections that you play with that really boost the awesome factor of your site. Below I threw in a Flickr image carousel near the bottom of the page. Other sections allow you to add feature boxes, banners, links, breadcrumb navigation and more.
Finishing Up
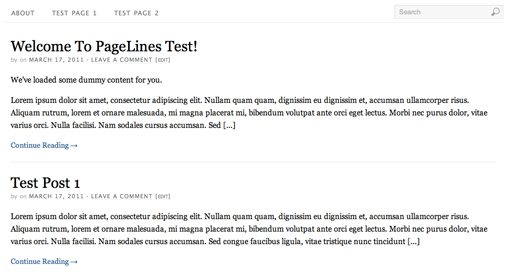
With just a bit more tweaking, our original boring blog is transformed into a sleek and modern website with lots of advanced features. The result below would probably take you around thirty minutes of work once you got used to how the system works and more like ten to fifteen minutes once you really knew your way around.
Closing Thoughts: Should You Try Platform Pro?
Even after that dramatic change, I’ve still just scratched the surface of what Platform Pro can do. We didn’t even discuss the custom HTML options, post thumbnails, social media integration, pre-configured plugins or a whole host of other things that I haven’t even discovered yet!
Honestly, I’m blown away by this product and think that it could really take the pain out of WordPress customization for a lot of people. Whether you’re a designer looking for flexible a flexible system to set your clients up with or just a small business owner who wants to get more out of WordPress, Platform Pro is a steal for $95.00 (read about the free version here). There are tons of $50 and $30 themes on the market, but they don’t offer a fifth of the freedom that you’re going to get with Platform.
To learn more, head over to the Pagelines website where you can see a comprehensive feature list and even a video of the theme in action. Leave a comment below and let us know if you’ve tried Platform and what you think. Also be sure to leave a link to any similar products that you’ve found for making WordPress more user friendly!