Create Awesome Animations in Photoshop
After Effects is the go-to Adobe application for creating both simple and complex animations. However, for those users that either don’t have the time to learn an entire new application or simply don’t own a copy of After Effects, Photoshop has incorporated very similar, albeit scaled back, functionality.
Today we’ll go over the basics of how animation works in Photoshop and then build a basic animation from scratch. Let’s get started!
Like the article? Be sure to subscribe to our RSS feed and follow us on Twitter to stay up on recent content. You can also share the article by copying the following snippet: Create Awesome Animations in Photoshop http://ow.ly/2EQ3e
Final Demo
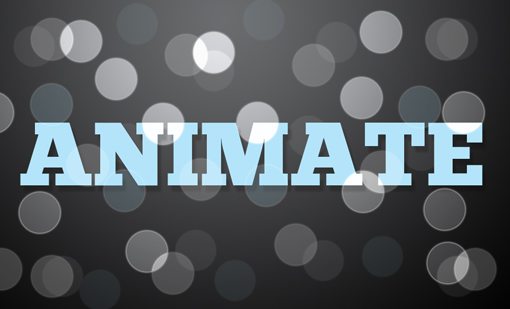
Click the image below to get a sneak peek of what we’ll be building today.

Meet The Animation Palette
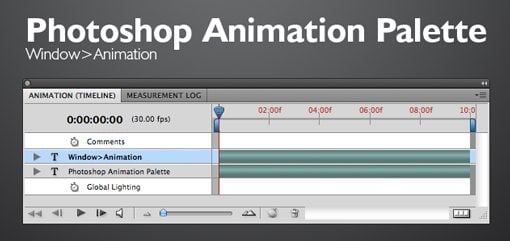
To get started, open up Photoshop and click on the “Window” menu item. Near the top you should see an item in the list that says “Animation”, click on this to bring up the palette below.
If you’re familiar with After Effects, this will make sense to you right away. If you’re not familiar with After Effects, it probably won’t make a lick of sense.
There are three main sections here. First is the list of layers on the left. This is where you will be defining which objects get animated. The area on the right is the timeline. This is where you will be setting points to start and stop animations. Finally, the area on the bottom is the list of controls. Most of these are self-explanatory (play, stop, etc.), we’ll discuss the functionality of the important stuff as we progress.
The button at the far bottom right of the palette allows you to work with frames instead of the timeline. If you’re like me the first time I used this palette, frame-based animation sounds much easier to grasp and you’re therefore considering just taking that route.
Though both methods have pros and cons, trust me that it’s definitely much easier to work with the timeline once you get the basic functionality figured out. Today we’ll be focusing on timeline-based animations and will ignore individual frames completely.
Animating a Layer
Animations in Photoshop are layer driven. Since you’re already used to working with layers this makes creating complex animations a nearly painless experience with a surprisingly low learning curve.
Each layer on your document will show up in the list on the left side of the Animation palette. As an example, I’ve created a simple document with a single text layer. You can see in the image below that the “Some Text” layer shows up in the list. To see the options for animating a specific layer, click the arrow next to the layer name.
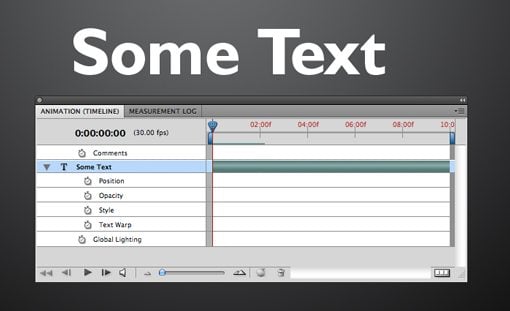
As you can see, for a text layer I have the option to animate Position, Opacity, Style, or Text Warp. For most non-text layers only the Position, Opacity and Style options will appear.
Keyframing
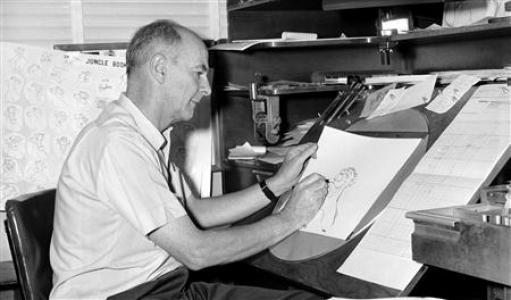
Before we get into how to use the timeline in the Photoshop animation palette, you should understand the concept of keyframing. Years ago the top animators at Disney would draw a few important panels for a scene (key frames) and the let the lower paid animators fill in all of the frames between (a process called tweening).
In Photoshop, you’re the high-paid professional animator that lets your computer do all the grunt work. Basically all you have to do is set the initial state of the layer along with its ultimate destination and Photoshop will fill in the rest. To do this, you use keyframes.
For example, if you want a layer to change position, you would position the layer, set a keyframe, move the layer to its final destination and set another keyframe. That’s all there is to it!
Let’s take a look at how all this works with by building our own basic animation from scratch!
The PSD
I threw together the simple image below to use as the basis for our animation. Basically it’s three quick and dirty bokeh layers and one text layer on top of a background gradient.
What we want to create is a sort of parallax effect with the dots slowly moving by the text. The first bokeh layer is on top of the text and will animate at the fastest speed. The second bokeh layer is behind the text and will animate at a slower speed. The final bokeh layer is on the bottom and will remain still.
This layering method combined with the varying speeds will give the end product a nice sense of depth.
Animating The First Layer
To make things easier to look at, first hide all the layers except for the one you want to work with. Next, bring up the animation palette and expand the proper layer.
Since we want the little dots to move, Position is the attribute we’ll be working with. Click the little clock next to the Position attribute to let Photoshop know you’ll be changing the position.
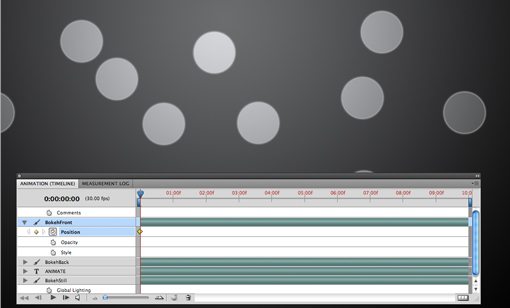
Clicking that clock should’ve created a little diamond at the beginning of your timeline. This is your first keyframe! Wasn’t that easy?
As a quick note, notice that my timeline is set to ten seconds. To change this simply click and drag the little vertical bar positioned at the end of the timeline.
Setting Keyframe Two
Now that you’ve set your initial state with the first keyframe, drag the little timeline slider (the playhead) to the end of your animation timeline.
Once the playhead is in place, drag the top bokeh layer and move it really far to the right (the bokeh art must extend well past the edges of the canvas for this to work right.)
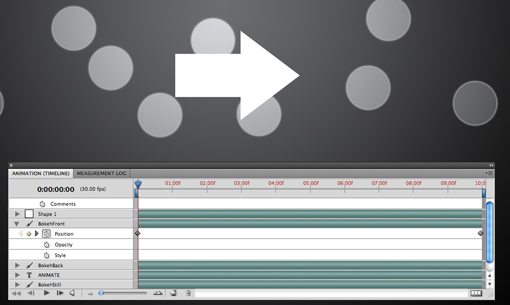
As you do this, another keyframe will automatically be created to save the layer position. Notice that you can move keyframes left and right or create a new one by clicking the empty diamond space next to the clock icon.
Now you’ve made your first animation! Click the play button to see it in action. The animation will be a little sluggish until you let it cache by playing completely through once, after that it should smooth out considerably.
Notice that if you manually slide the timeline back and forth, you can see your layers moving around.
Animating Opacity
Just for fun let’s make the dots pulse a little as the animation progresses. To accomplish this, activate the Opacity attribute by clicking on its clock and set three keyframes: one at the beginning, one near the middle, and one at the end.
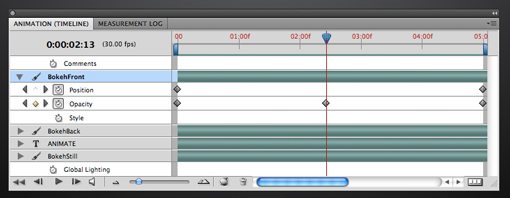
For the first and last keyframe, set the opacity to 100% and for the middle keyframe set the opacity around 30%. Now as the dots glide by they will also get dimmer and brighter!
Lather, Rinse, Repeat
Take the same steps that we just did above and apply them to the back bokeh layer. This time move the layer less to the right before setting your keyframe so it will have a shorter distance to traverse during the same amount of time and will therefore go slower.
Once you’ve completed this you should have a nice animated, pulsing, parallax bokeh effect!
The Text
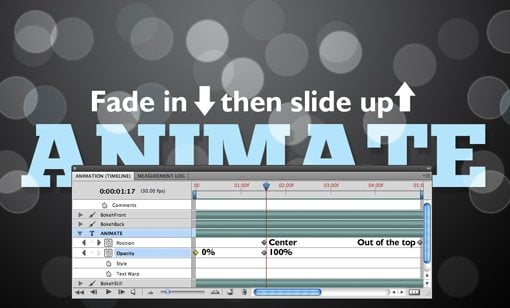
To finish off our animation we’ll play with the text a bit. First animate the opacity. Create a keyframe at the beginning of the timeline with 0% opacity and another at around one second at 100% opacity. This will gradually fade the text in.
Next create a position keyframe at the exact point where the text hits 100%. The text should be centered for this keyframe. Finally, create another keypoint at the end of the animation and drag the text up and out of the canvas.
The overall effect should be as follows: Text is invisible, text fades in, text starts moving up, text exits the frame. I’ve marked up the timeline below to better illustrate how this works.
The final effect when combined with the moving bokeh layers is pretty cool for ten minutes of Photoshop work!
Conclusion
I hope this tutorial has encouraged you to play around with Photoshop animations. It’s super easy to make something that’s ultimately quite impressive.
If you get hooked on creating animations be sure to check out a few After Effects tutorials to get started on high level professional animations.