Quote Robot 2: Creating Impressive Client Proposals Just Got Even Easier
As a designer or developer, paperwork is probably a necessary evil, not something that you particularly enjoy. Tasks like creating and managing client quotes and sending invoices can be annoying or even intimidating.
Fortunately, QuoteRobot is here to streamline the process for you. We took a look at this great app when it first launched, but now it’s been completely overhauled for version two, so it’s high time we had another peek!
Account Setup
In this article I’m going to give you a first class tour of QuoteRobot. We’ll start at the very the beginning with account setup and proceed all the way through building quotes and invoices.
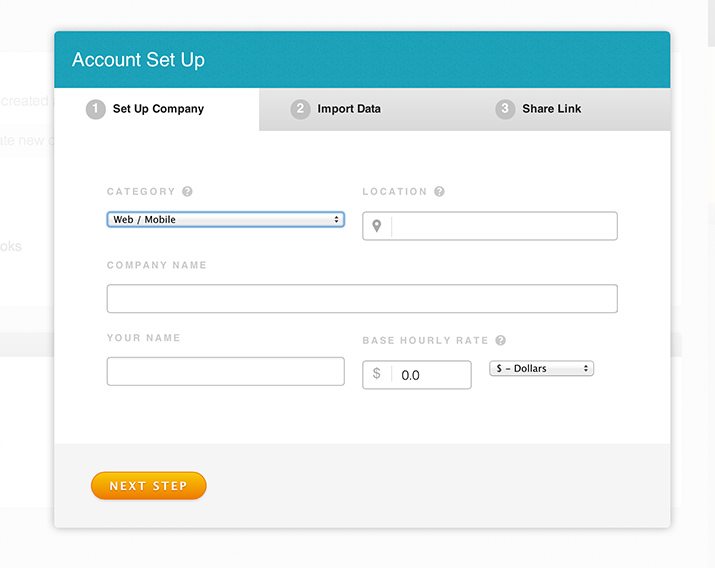
The first step in this process is obviously to create an account. This is fairly simple. You don’t need a credit card to sign up (there’s a 30 day free trial), just a name, location and hourly rate, all of which can be changed later.
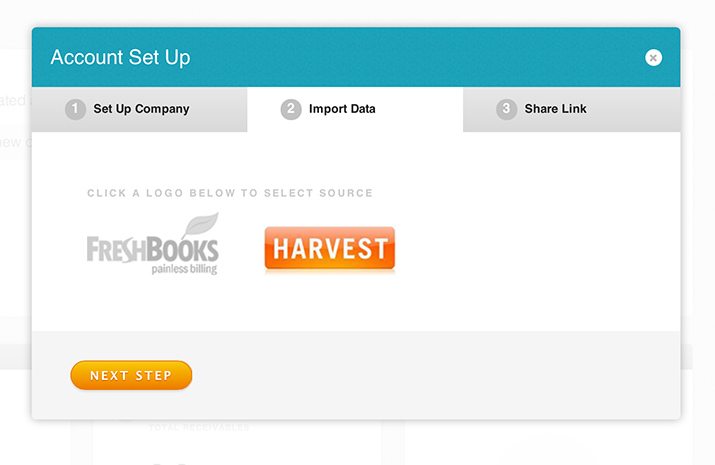
When you sign up, you have the option to import data (including clients) from Harvest or FreshBooks. If you’ve already spent a healthy chunk of time getting set up in one of those systems, this is a great feature that really streamlines the starting process.
We’re all finished with the sign up process, but before we proceed, we’re given a share link that earns us free months of use. If you’re going to subscribe to this service, then it’ll be great to get a month free every now and then when a friend signs up.

Creating a Quote
Account setup was easy, but now it’s time to really dig in and check out the process for creating quotes. Spoiler alert: it’s about as easy as the last step. QuoteRobot makes everything as easy as filling out a few web forms. Before you know it, you’ve got great looking quotes and invoices ready to send off to clients. Let’s begin.
Step 1. Add a Client
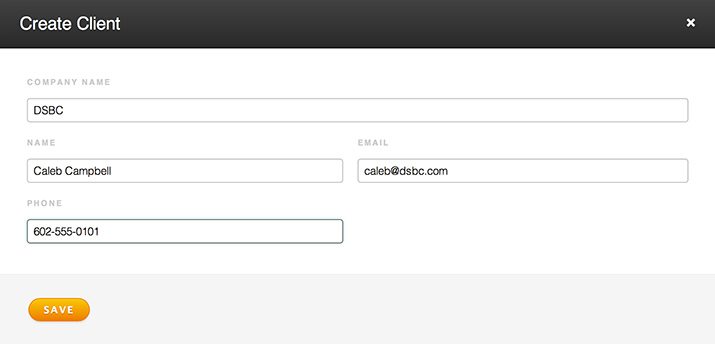
Step one for creating a quote is to make sure that you have a client. Adding one is easy, simply go to “Clients” in the sidebar and enter in some basic information. It only takes four fields to create a client so you’ll be up and running in no time flat.
Step 2. Choose a Client
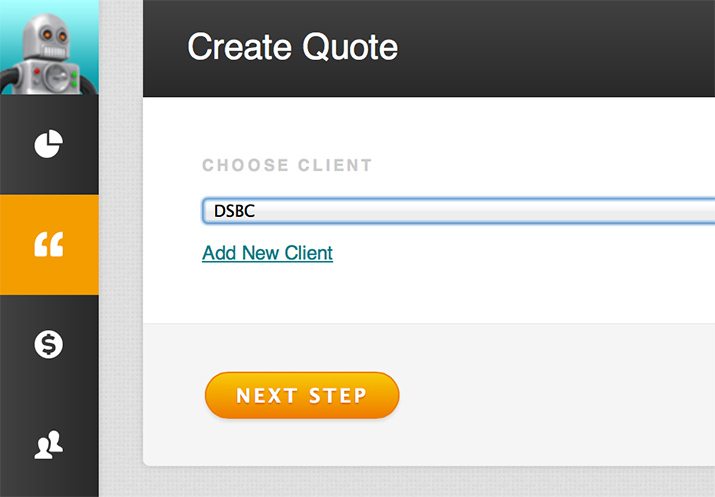
Now that we have a client to work with, switch back to the quote tab and choose that client from the drop down menu. From here, hit the “Next Step” button.
Step 3. Add Pages
The right side of the screen should expand to show a menu full of possible pages. These are the individual pieces that make up a quote and we can add them at will with a click. I’ll go through each so you can see what they do.
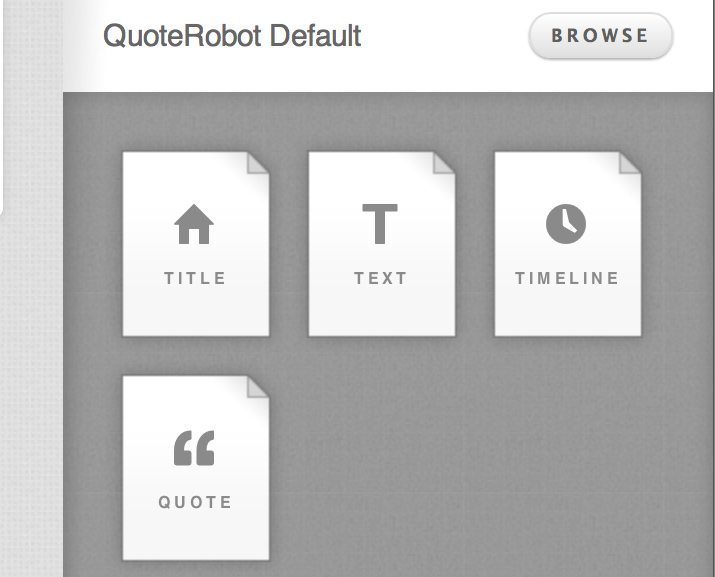
Step 4. Title Page
For the title page, all you need to do is insert a project title, the rest of the page design and content is taken care of automatically. If you don’t like the text that is auto-inserted, you can customize it in your settings.

Step 5. Text Page
The next available page is a simple text page. You can use this for anything that you want, but it’s typically where you’ll put things like the project description, scope and terms of the agreement.
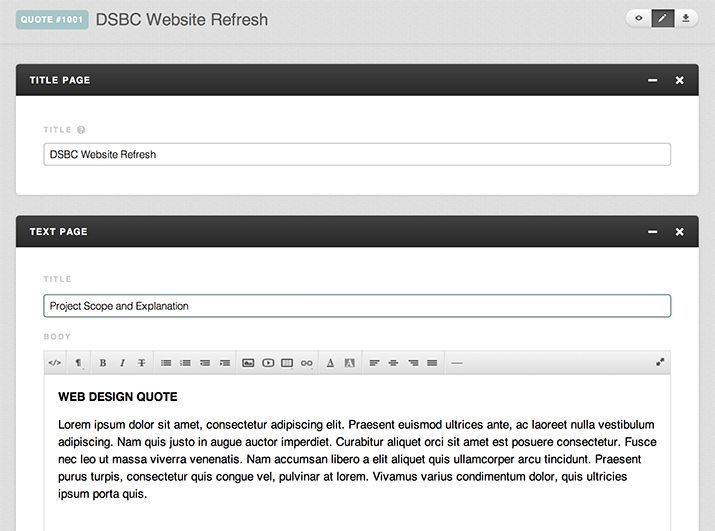
As you can see in the image above, all of your pages appear as modules that appear in a nice vertical list. Creating and editing client quotes is as easy as scrolling through and filling out the forms, it’s really never more complicated than that.
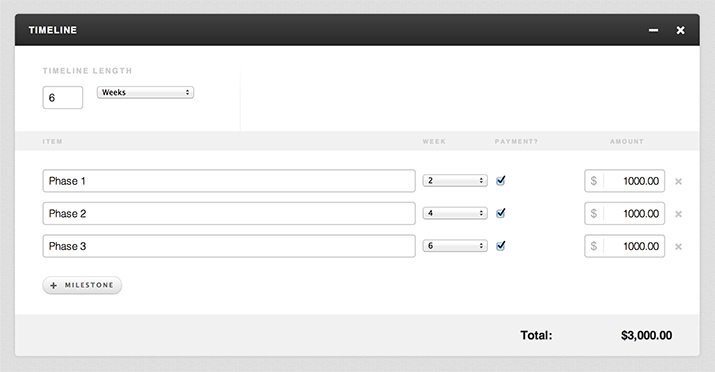
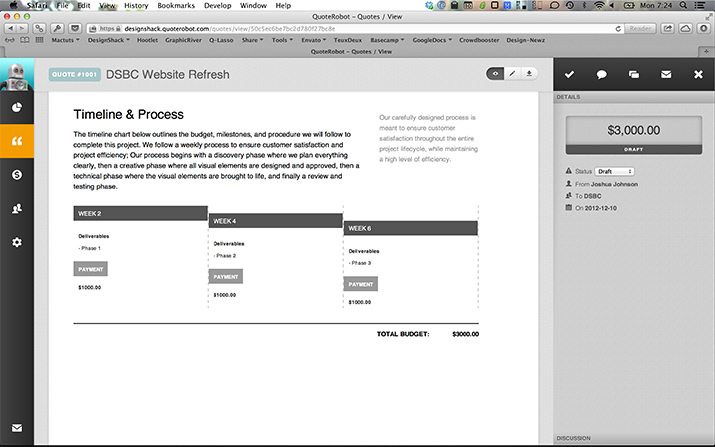
Step 6. Timeline
Next up is the project timeline. This is my favorite feature of QuoteRobot as it’s the part that I would probably waste the most time constructing on my own. Here you input your timeline length, then set up milestones and optional payment points.
Step 7. Quote
This is the page where you break down the individual parts of the project, how long they’ll take and how much they’ll cost. Designers famously suck at effectively communicating to clients just how big and costly projects are before the work begins. This simple tool will help you provide your clients with exactly what they need to know up front.
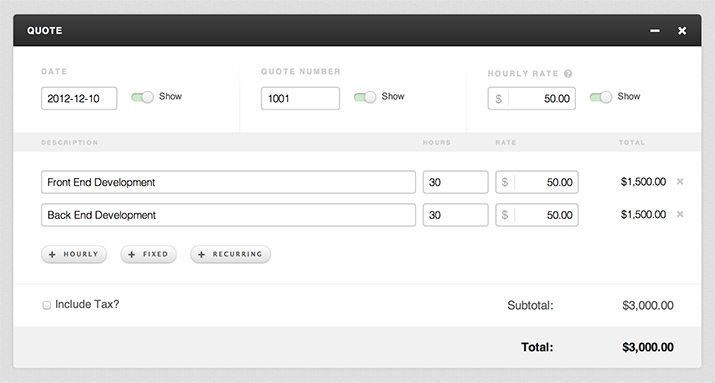
This protects you as well as your client. Later, when it comes time for them to fork over a check, the client can’t say that they didn’t understand what was involved or what it would cost. It’s all laid out right here and work doesn’t start until they click the “approve” button.
Step 8. Preview & Download
Once you’re finished adding pages and filling out the forms, you’re ready to view, download and/or send your finished quote. If you click the little eye button at the top of the screen, you’ll see the generated final preview of your entire multi-page quote.
Download: Click here to download a sample quote.
As you can see, the information that you put into the forms was automatically formatted into a nice layout. This way you spend your time only on getting the details right rather than wasting a full day creating something that looks presentable.
If you’d like to see the finished sample report that I created, you can download the PDF by clicking the link above.
Step 9. Client Approval
If your finished quote is to your liking, it’s time to send it off to the client. Simply click the “Send” button and your client will receive an email with a link to view the quote online and download a PDF.
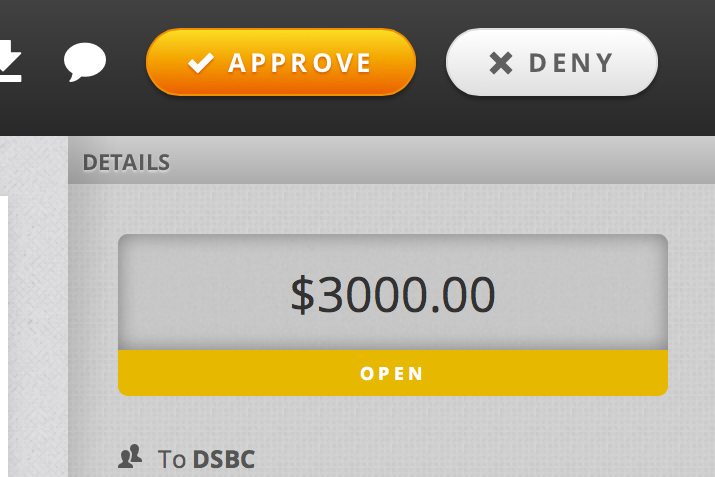
As you can see, the client will be given two options in response to the quote: approve or deny. Again, this makes doubly sure that you don’t start work until your clients have given you the thumbs up for both the project details and cost.
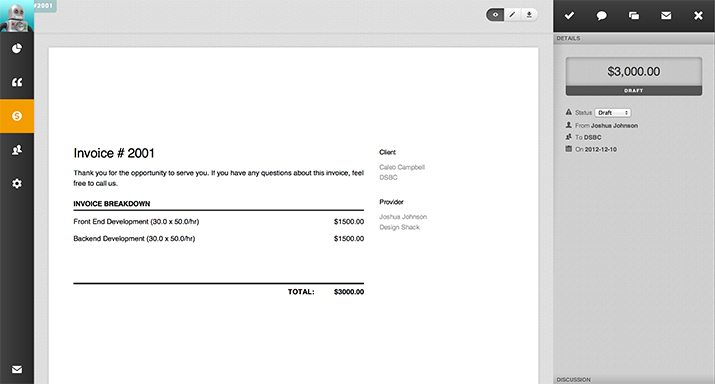
Step 10. Invoicing
QuoteRobot doesn’t leave you drifting after the quote. It sees things through to the very end by offering invoice functionality as well. When a project is completed, all you have to do is click on the Invoice tab, choose a quote and it’ll automatically be converted to an invoice to send off to the client.
How Is It?
I really loved QuoteRobot the last time we looked at it, and it has gotten way better since then. For starters, the UI design of the entire app has improved dramatically. I love how sleek the whole thing looks. It’s also super easy to find your way around.
A Streamlined Workflow
The previous version had a sort of drag and drop interface for building your quotes. This was nice, but it was more work and honestly, a lot of that work was superfluous. This new version has stripped out all of the unnecessary components so that you can breeze through quote creation in minutes flat.
I really appreciate the initiative involved in completely rethinking this app to be even better, even when on the surface it seemed like things were being stripped out.
Worth $10/Month?
At face value, I’ll go ahead and say that the functionality of the app merits the price. It’s not merely a wizard for creating paperwork, it’s a complete quote and invoice management system that will help you keep on top of things in the long term (with statistics and reports to help track your success).
Now, whether or not you need this depends on who you are and what you do. If you find yourself sending one or two quotes per year, this may not be for you. However, if you find yourself burning a significant amount of time on paperwork, QuoteRobot can dramatically simplify your life.
Further, I think there’s a huge market here for designers and developers who are in a place where they’re flying solo, running a company by the seat of their pants without any sort of official system in place to track and manage the business aspect. If this is you, then you should definitely look into QuoteRobot.
It’s time to replace scattered email communication and phones calls with a big boy client quote approval process, and this is the easiest way that I know of for you to wrap your mind around what that involves.
Feedback: More Themes
Overall, I don’t really have any major complaints about QuoteRobot. I put it through the paces and it performed quite well on all fronts without a hitch. The one thing that I was disappointed about was the lack of a proper theme gallery. I love that I have the ability to build and upload my own themes, but I think for $10/month, I should get at least five different pre-built design themes to choose from (this should be as easy as a click or two). The default theme is nice enough that I don’t mind using it, but given that designers are a big target for this product, some variation would go a long way.
Go Try It!
There are tons of invoicing applications on the web, but QuoteRobot is the only one that I’ve ever tried that helps you out far before the invoicing step even begins. I think this app has one main goal: to make it easy to manage proposals. In this it definitely succeeds. The process is delightfully simple.
If you’re interested, go check out QuoteRobot for yourself with the free trial. It’ll only take a second and I really think you’ll like what you see.