Design and Mail a Custom Postcard Without Leaving Your Desk
Have you ever browsed through the postcards at your local grocery store and nearly gagged at the horrible design or cheesy photography adorning everything on the rack?
Fear not, the world need not live with poor postcard designs. Today we’ll walk through the process of designing and sending your own. You won’t even need a stamp!
Why A Postcard?
The story behind this post is simple: I’m killing two birds with one nicely designed rock. As you may or may not know, apart from my work at Design Shack, I also do a lot for the Envato Network.
Several weeks ago, more than I want to admit, I received a simple request from the good people at Envato: they wanted me to send them a postcard showing where I was from. I, being the nerdy computer-bound guy that I am, put it on my todo list but have yet to actually go to the store and pick one up.
After coming to a realization that I’m probably never going to make it to said store, I decided to just create one myself and turn the entire process into a Design Shack post. It’s practical for you because the holidays are coming up and you could easily take this same process and use it to send out some awesome Christmas cards.
So that’s my story and I’m sticking to it. Follow along if it sounds fun!
Draw The Dunes
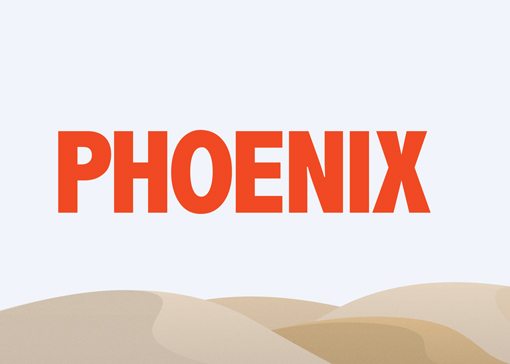
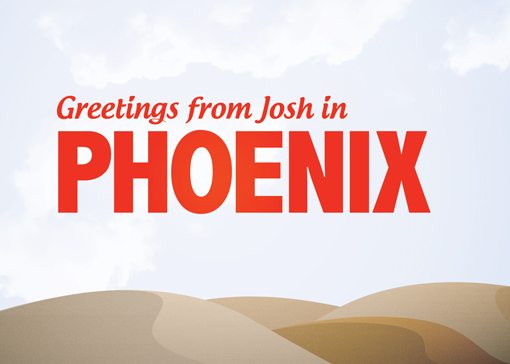
Since I’m from Phoenix, Arizona, I’m going to go with a simple illustrated desert theme. Now, if you’ve ever been to Phoenix you’ll know that most of the city is an endless sea of suburbia, not sand dunes, but the blistering summers always remind me that this city is very much built on top of the desert.
So to create Phoenix, we’ll draw out some simple sand dunes. I’m admittedly not a very good illustrator so if you suck at drawing, don’t worry, the difficulty level here will be somewhere around the talent possessed by a nine year old with a copy of Photoshop.
To begin, create a new document that’s 5″ by 7″ in CMYK at 300dpi. We might end up with a 4″ by 6″ postcard in the end but it’s better to start too big than too small. Once you’ve got the document started, fill the background with a light blue: #f1f4fa.
Next, grab the pen tool and make a simple mound shape in the bottom right corner.
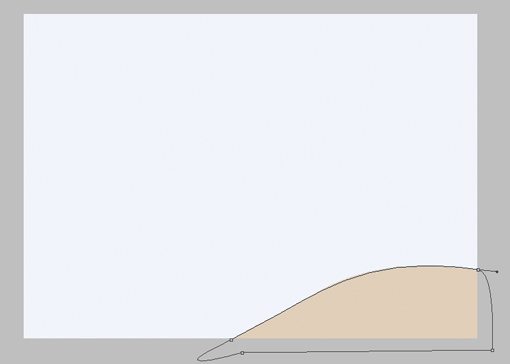
Repeat this process until you have a nice collection of shapes that somewhat resemble sand dunes. Don’t go overboard with it, you’ll only need three or four.

Add Some Definition
Now that you’ve got your simple dune shapes in place, copy the shapes, darken the colors a bit and use the distort transform command to add a little dimension to your hills.

If you want to make the dunes look a little more like sand, add some noisy texture. Command-click on all the dune layers to create a selection, then fill that selection with white. Now to Filter>Noise>Add Noise. Now set the noise layer to Overlay and bring the fill down to around 20%.

It’s a subtle effect on screen but printed large it should be much more noticeable.
Add The Greeting
Now that we’ve got a nice little desert scene, let’s add some big, bold text to make a strong statement. Since this is a print piece, we can use whatever font we want without worrying about all that web font nonsense. I used “Abadi MT Condensed Extra Bold” but you can just use any bold, condensed font that you have to achieve a similar look.
To start, I just wrote out the word “Phoenix” using all capital letters in #f04923. I also made several kerning adjustments. Never trust Photoshop to nail letter spacing for you as it will frequently yield some pretty poor results. To adjust the kerning, place your cursor between two letters and use the Option key in conjunction with the left and right arrows.
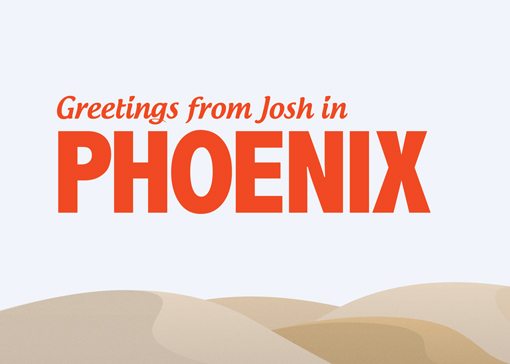
Now that I’ve got the main objective of placing the city name on the card, I want to add a personal touch. To complement the straightforward sans-serif used for “Phoenix”, I chose a bold script (Androgyne) for the greeting.
Add Some Clouds
Even with the text, the sky is looking a little boring so let’s add in some clouds. Rather than spending time creating our own clouds, we’ll cheat and use one of a million free Photoshop cloud brushes you can find online. Zip over to QBrushes and download the 13 high-resolution cloud brushes. Once the download is finished, simply drag the brushes to Photoshop in your dock and they will automatically show up in your brushes palette.
Now create a new layer, grab a brush that you like, set your color to white and click once on the canvas. Voila! A beautiful cloudy sky with zero effort. Thank you design community for your never-ending stream of amazing free resources.
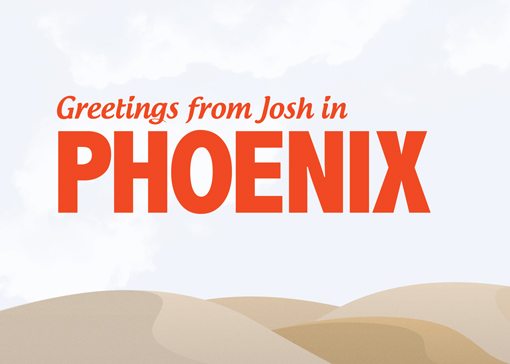
Add A Vignette
To add a little dramatic flair and help draw the viewer’s eye towards the center, let’s create an intense vignette. Doing this is fairly simple. First, create a new layer and fill it with a radial gradient from white to black (like the one below).

Now set this layer to Color Burn. This effect is nice but a little too subtle so copy that gradient layer and set the fill of the copy to around 30%.
A Little Texture
The vignette has given our image a slight aged look so I want to push that further with some texture. Grab this stone texture from Flickr and throw it in the topmost layer of your document.
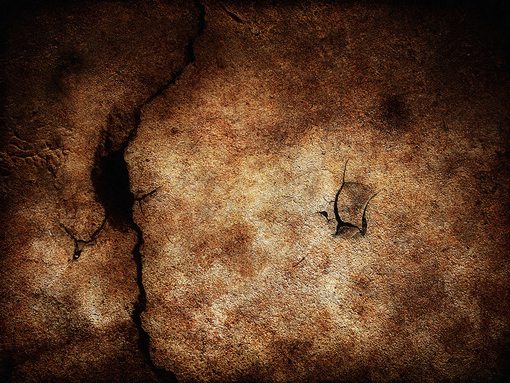
Next, set this layer to Color Burn (are there any other blending modes?). As with above, the effect will be subtle so you might have to duplicate the layer a few times (I masked out the dunes and let the texture mainly effect the sky).

Add a Ribbon
I wanted to add one more personal touch in the form of a little Envato branding. To do this, I created a little ribbon in the top right of the design with the following three steps.
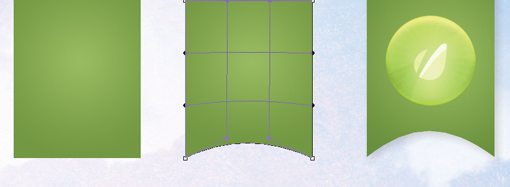
First, create a simple rectangle and fill it with a gradient. Next, warp-transform the bottom so that it curves like the example above. Finally, throw in a logo and a shadow and your’e good to go!
Get It Printed and Mailed
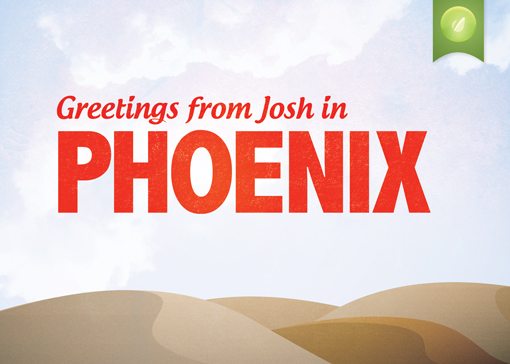
With that, our postcard design is finished. Here’s the completed product:
From here we now have to find someone that will print and mail this thing. After a few minutes of Googling I cam across Hazelmail. The site is pretty basic and is in fact intended for photo postcards but it should get the job done. Leave a link below if you know of a better alternative!
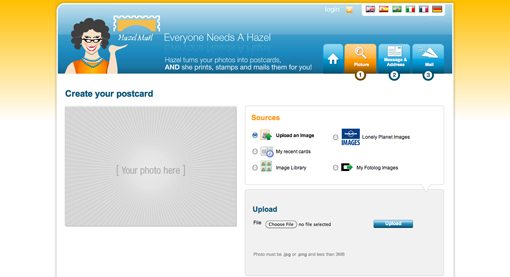
The process is pretty simple, you simply upload a JPG or PNG that’s less than 3MB (they don’t tell you what size so I hope ours will be good!). Next you fill out the address and message portions on the back of the card.
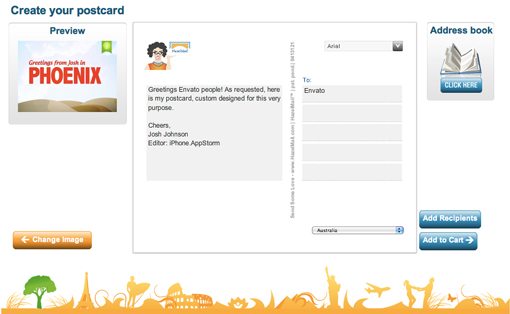
After this I went through a simple PayPal payment process and they (hopefully) mailed off my card. The printing and mailing combined cost me a whopping $1.50. I found this to be super cheap but if you’re mailing out 100 Christmas cards, you’ll probably want to search for something a little cheaper (some of that cost might be attributed to the fact that I sent the card to the other side of the planet).
Conclusion
So there you have it, the next time you want to send a postcard, whether for business or personal reasons, skip the drug store fodder and build your own. For a measly $1.50 you can make a much stronger statement with something custom and thoughtful.
Leave a comment below and let us know if you’ll be sending out a few custom postcards!