Photoshop Reflections 101
Today we’re going to learn all about how to make convincing reflections in Photoshop. Text reflections, 3D reflections, product shot reflections, all kinds of crazy reflections. We’ll discuss everything from custom transforms to blending modes and beyond. Whether you’re a beginner or a pro, you’ll probably learn a thing or two.
You might be thinking that reflections were all the rage a few years ago, but are currently losing a bit of steam, and you’d be right. However, you can still see plenty of them in practice on Apple.com and other sites. You should definitely beware of over-using them and adding to bad web 2.0 trends, but also know that once in a while they can add class to a boring item.

Text Reflections
We’ll start with one of the most common elements that you’ll see reflected: text. First, set up some simple text in Photoshop. Make sure the background is fairly solid, as reflections don’t really make much sense when placed over photographs or textures.

Now copy the text layer so you have a starting layer for the reflection. Your instinct might be to rotate this layer, but obviously, that’s not going to yield the correct results at all.

As you can see, a simple rotation leads to a reflection that is the reverse of what you want. Instead, what you want to do is go to “Edit” in the menu at the top of the screen. From here you go to “Transform” and click on “Flip Vertical”.
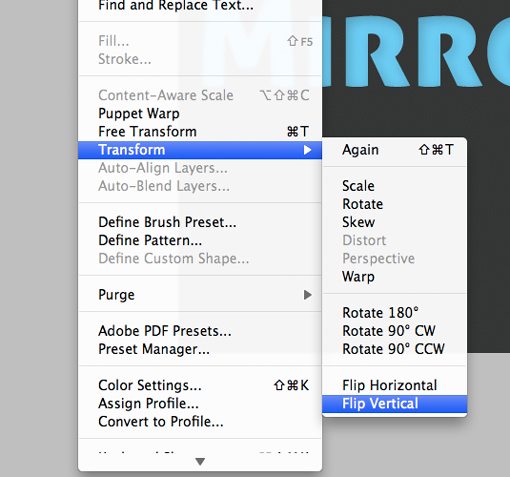
This will achieve the mirrored effect we’re going for!
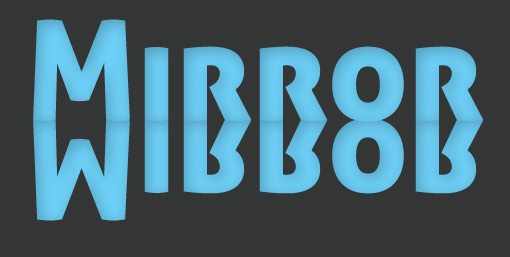
Unfortunately, this doesn’t quite look convincing does it? We’ll have to put a little more work into it if we want it to be somewhat realistic.
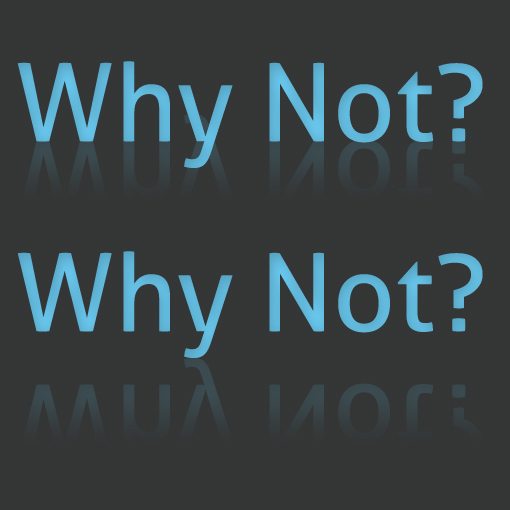
The first step here is to add a Mask to your reflection layer. This is accomplished by clicking the little rectangle with a circle on it in the layers palette.

Layer masks are quite complicated and merit an article on their own, but here’s a crash course. Essentially they add selective transparency to layers. Painting black makes an area of the layer completely transparent, painting white makes an area of the layer completely opaque, and various shades of gray do everything in between.
So, with the layer mask selected, if we want to fade out a layer gradually. We need to create a gradient that starts with white and fades to black. By option-clicking on a layer mask, you can see the actual tones used in your mask. It should look something like that below.

Once applied, this should give your reflection a really nice effect that takes it from opaque to transparent. After this, reduce the opacity of your reflection layer and you’ve got yourself a really nice text reflection!

Watch Those Descenders
As a general rule, avoid reflecting any text with descenders (lowercase y, g, etc.). The reason is that no matter what you do, it still ends up looking messy.
If you have letters with descenders, try converting to all caps like in the first example above. Since capital letters generally don’t have descenders, this is one of the easiest and most natural solutions.
Font Selection: Choose Wisely
Another thing to watch out for when reflecting text is what sort of typeface you use. Remember that reflections imply glossy, shiny, new, etc. This idea won’t fit well with every font in your library. I tend to stick to modern looking fonts and avoid anything that looks intentionally aged or feminine such as scripts.

Adding Blur
One popular effect that designers often add to their reflections is blur. There are a couple of ways to go about this, but some are better than others. Generally, I prefer non-destructive editing wherever possible. Once upon a time, non-destructive blurring wasn’t even possible, but the invention of Smart Objects and Smart Filters have dramatically improved the situation.
To begin, set up your reflection just like last time, only convert the layer to a Smart Object via Layers>Smart Objects>Convert to Smart Object in the top menu.
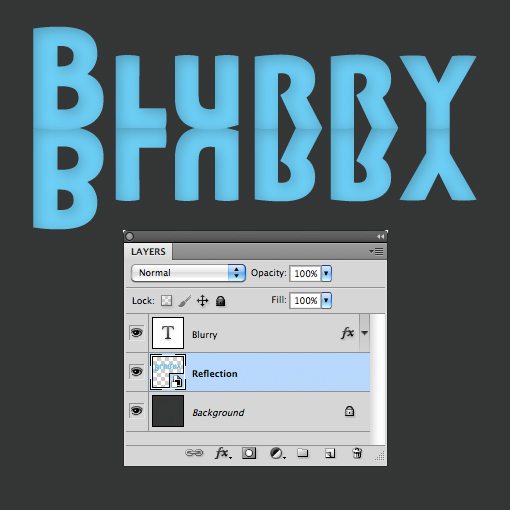
With the Smart Object selected, apply a Gaussian Blur filter. A few important things happen at this point. First, an editable Gaussian Blur object shows up on your layer. Double-clicking this at any time will allow you to adjust the intensity of the blur. Also note that double-clicking the Smart Object will allow you to edit the text of the layer.
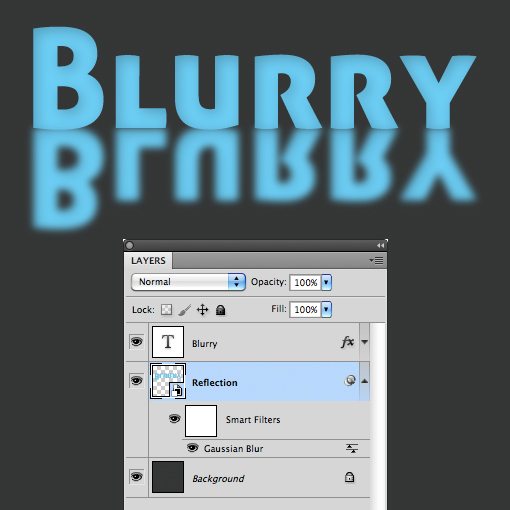
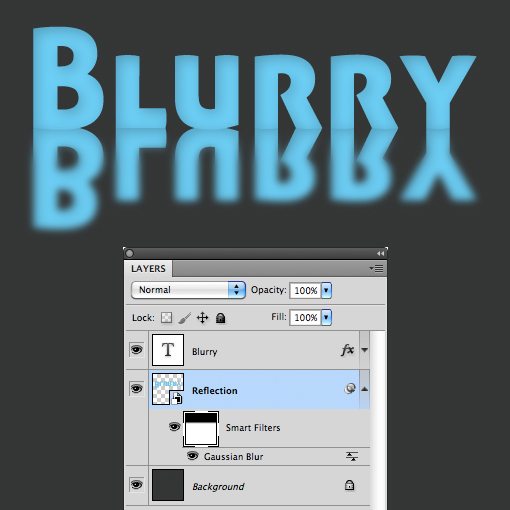
Another important thing that happened is a mask was created for the filter. If we use this mask just like the one above, we can create a gradient that controls the appearance of the blur. Below I’ve made the blur intense at the bottom of the reflection, and absent at the top.
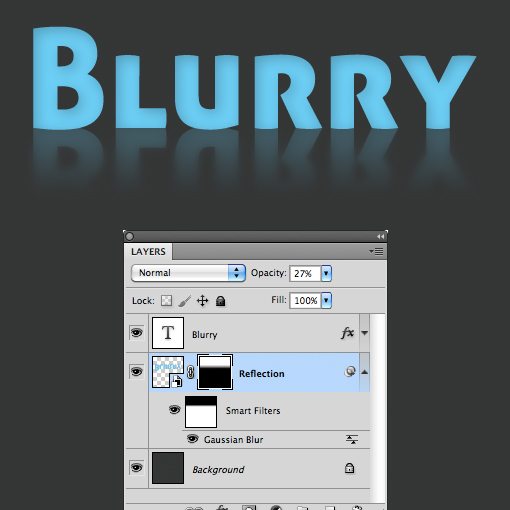
After this, apply another mask with a gradient directly to the layer and reduce the opacity like we did before. The result is an interesting reflection that gives us a wet or frosted glass appearance.
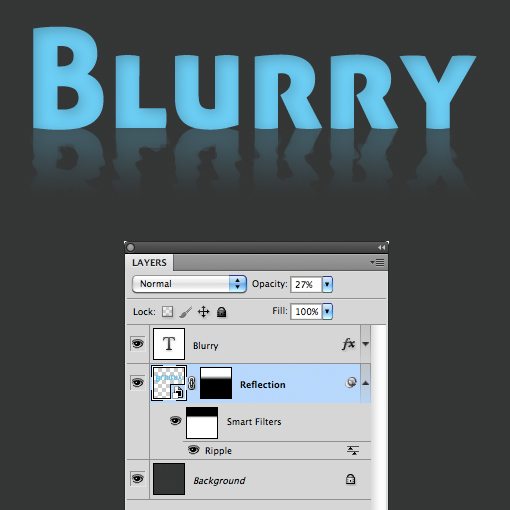
This trick works great with any of the Filters in Photoshop. Try it again with a Ripple filter for something that’s more intensely distorted.
Reflecting a 3D Object
The techniques above don’t merely apply to text, but to any two-dimensional object that you want to reflect. But what do you do when your object is more complex? Say like a box?

If we follow the first steps outlined above for flipping the object, it leads to disaster. This isn’t going to make a convincing reflection at all.

It turns out, reflecting a simple box is even easier than reflecting text. You don’t even have to perform an initial transform, just duplicate the box layer and stack the two on top of each other.
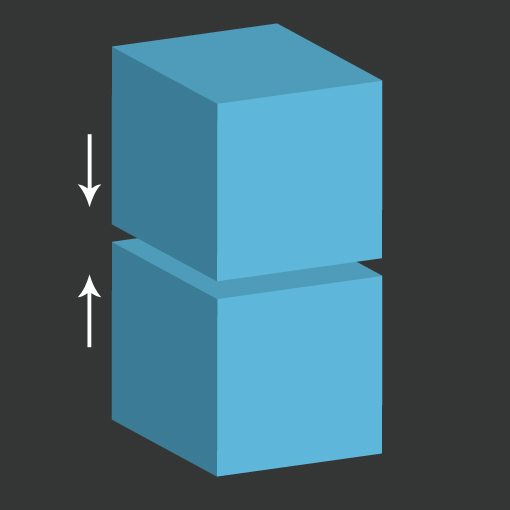
Then you can apply a mask and reduce the opacity like we did with the text and you have a beautifully reflected box!

This trick works on lots of shapes. For instance, the iPhone shot at the beginning of this article could’ve easily been reflected using this technique. Minimal cleanup would’ve been necessary to make sure the highlights and details like the screw heads were reflected properly, but otherwise you’d be done in seconds flat.
Reflecting Product Shots
I can already hear you saying “Not so fast!” What are the odds that you’ll ever have to reflect a plain old box shape? It might happen occasionally, but it’s far more likely the case that you’ll be reflecting a product shot or something else as equally complex.
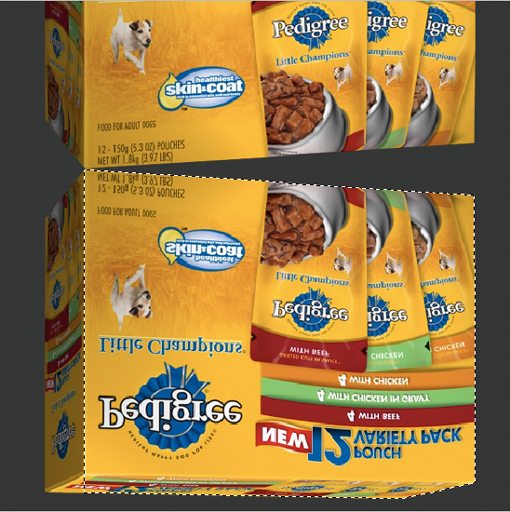
This is a problem that I frequently ran into back when I used to work for a company that created dog food ads. Watch what happens if I use the trick above on a real product shot reflection.

As you can see, the box artwork ruins the effect. This should be upside down. We’ll have to take this a step further if we want to pull off a good reflection for this image.
Note that Photoshop now has lots of 3D tools that help you in this situation by simply building a 3D object that you can spin around however you please. However, you won’t always have the time or resources to create a real 3D object so you should know how to effectively fake it.
The first thing you want to do is flip the image vertically like we did with the text above.

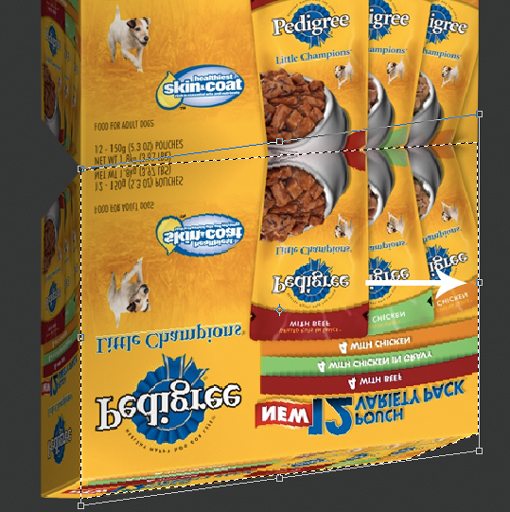
Next, you need to Command-Click on the layer preview to grab a selection of the object. While holding down the Option key, deselect the side portion of the box so that only the front is contained in your active selection.
With this selection active, perform a Free-Transform (Command-T), and while holding Command, grab the middle control indicated by the arrow in the image below and drag the face upward so that it aligns properly with the bottom of the box.
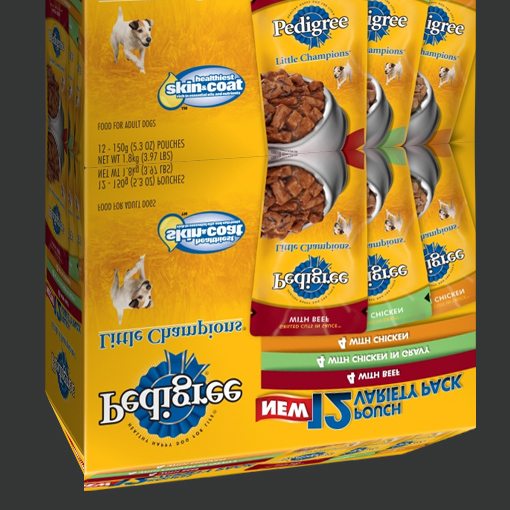
Now perform that same technique on the side panel of the box. This time make sure only the side is selected and use the middle left control to bring the left side of the artwork up to the top. This gives us a perfectly aligned box shape that is perfect for our reflection. At this point you might be worried about the bottom area of your reflection as the Transform really messed it up.
The good news is that you can completely ignore this. Remember that we’ll be fading out the reflection so anything near the bottom will be completely invisible.
Here’s the final effect. Not bad considering it’s a fairly complex shape and it took me less than two minutes to accomplish. Once you get used the process, you’ll be able to pull it off easily without slowing down your design process one bit.

A Quick Note on Blending Modes
One last thing to keep in mind when working with reflections in Photoshop is that you don’t have to stick with the default blending mode. Experiment with a bunch of different options to see how they affect your reflection.
Each reflection you create will contain different colors so which blending mode works best varies widely depending both on the specific subject (and it’s background) and your own personal taste.
If you really want to get fancy, you can even duplicate the reflection and combine two different layers with separate blending modes. Adding more complexity can really add to the realism of the final product.

Conclusion
Reflections have been overused and abused for years. The aim of this article was to help encourage proper reflection techniques and discourage messy work as well as frequent overuse of just one of the many tools in your design arsenal. Like drop shadows, gradients, strokes and other effects, reflections should be used selectively and with care.
You should now be able to know when text is appropriate for reflecting, and some methods to get started. You should also know how to effectively reflect both simple boxes as well as those containing complex artwork.
Leave a comment and let us know what you thought of the techniques above. Did you learn anything from them? How would you improve them?