How to Edit Portraits in Lightroom (Beginner Tips + Presets)
Lightroom is one of the best apps you can use for editing portraits. The simple user interface makes it much easier to edit photos, even for someone without any prior experience.
In this quick tutorial, we’ll show you how to edit portraits in Lightroom in a few simple steps. If you’re new to Lightroom, this is a must-read.
Since you own a subscription to Lightroom, we assume you already know how to open photos and organize them in Lightroom. So we’re not going to cover those boring parts in this guide.
Let’s jump straight to the details.
Tips for Editing Portraits in Lightroom
Before we get to the editing part, it’s important to know the basics of portrait editing. These are a few tips to keep in mind while you edit your first portrait.
Start with a Goal
When editing a portrait, have a clear goal in mind on what you want to achieve and what you want the final portrait to look like.
For example, if the portrait was shot in bad lighting conditions, you need to set a goal to improve the lighting in the photo. This will allow you to focus on one area of improvement rather than trying different things.
Use RAW Images
Unlike JPG, RAW images are uncompressed and contain more details of the original photo. Always use the RAW file of portraits for editing. It will provide you a blank canvas for practicing your art.
Most digital cameras capture photos in RAW by default. Smartphones also support the RAW format. You can enable it in the camera settings or by shooting in the Pro camera mode.
Learn to Crop
Unless you use a tripod, it’s difficult to capture a perfectly angled portrait. Lightroom has a Crop tool for fixing those tilted portrait shots. You can easily crop your images in Lightroom to fix the angle. Learn to take advantage of this tool.
Don’t Overdo It
Like most editing tasks in graphic design, it’s important to know when to stop. Just because it’s easy to make adjustments in Lightroom doesn’t mean you do try everything. Don’t destroy the natural look of the image by making too many edits and applying filters.
Capture Better Photos
The best way to make your photos look more professional is to learn to use your camera. Even smartphones allow you to customize settings like ISO, shutter speed, and aperture to capture better photos.
Your portrait editing process will be much easier when you have better photos to work with.
How to Edit Portraits in Lightroom
Now, let’s get to the fun part of the guide. Here we’ll walk you through a very simple portrait editing process, step by step.
Remember to use this process only as a starting point. Every portrait is unique so use your senses to achieve the perfect look for each photo.
Step 1: Start with White Balance
Adjusting the white balance should always be your first step when editing portraits. It simply fixes the lighting of the portrait and sets the setting for your other important adjustments.
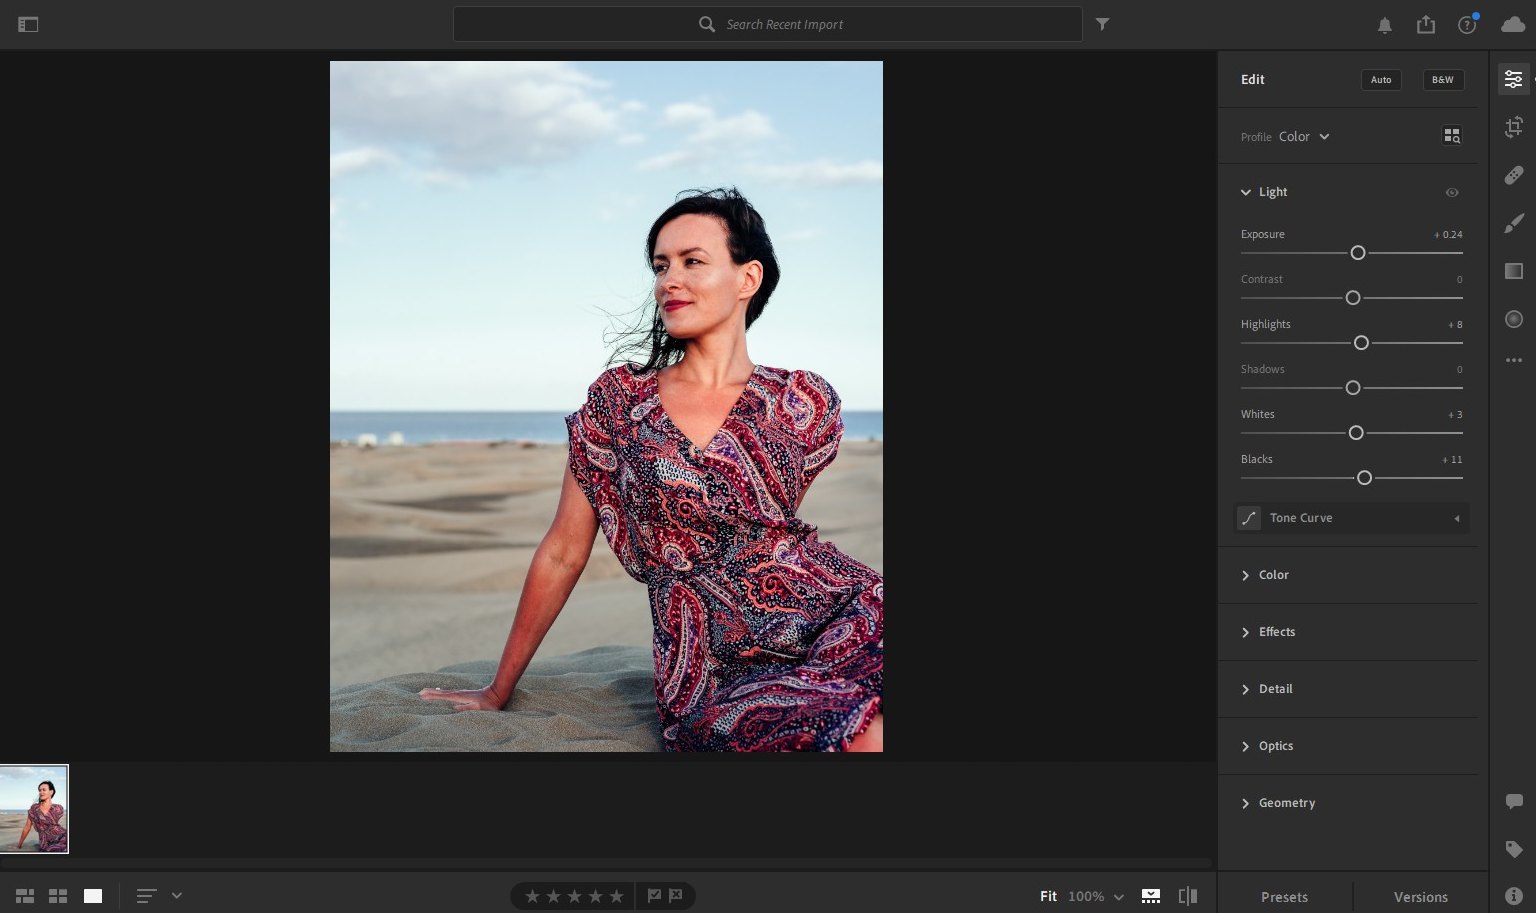
To edit the white balance, open the Edit panel in Lightroom and use the adjustments under the Light menu.
With just some small adjustments to Exposure, Highlights, Whites, and Blacks, we were able to drastically improve this portrait.
Step 2: Use Tonal Curve
To take white balancing to the next level, you can also use the tonal curves tool. It’s available under the same Light menu.
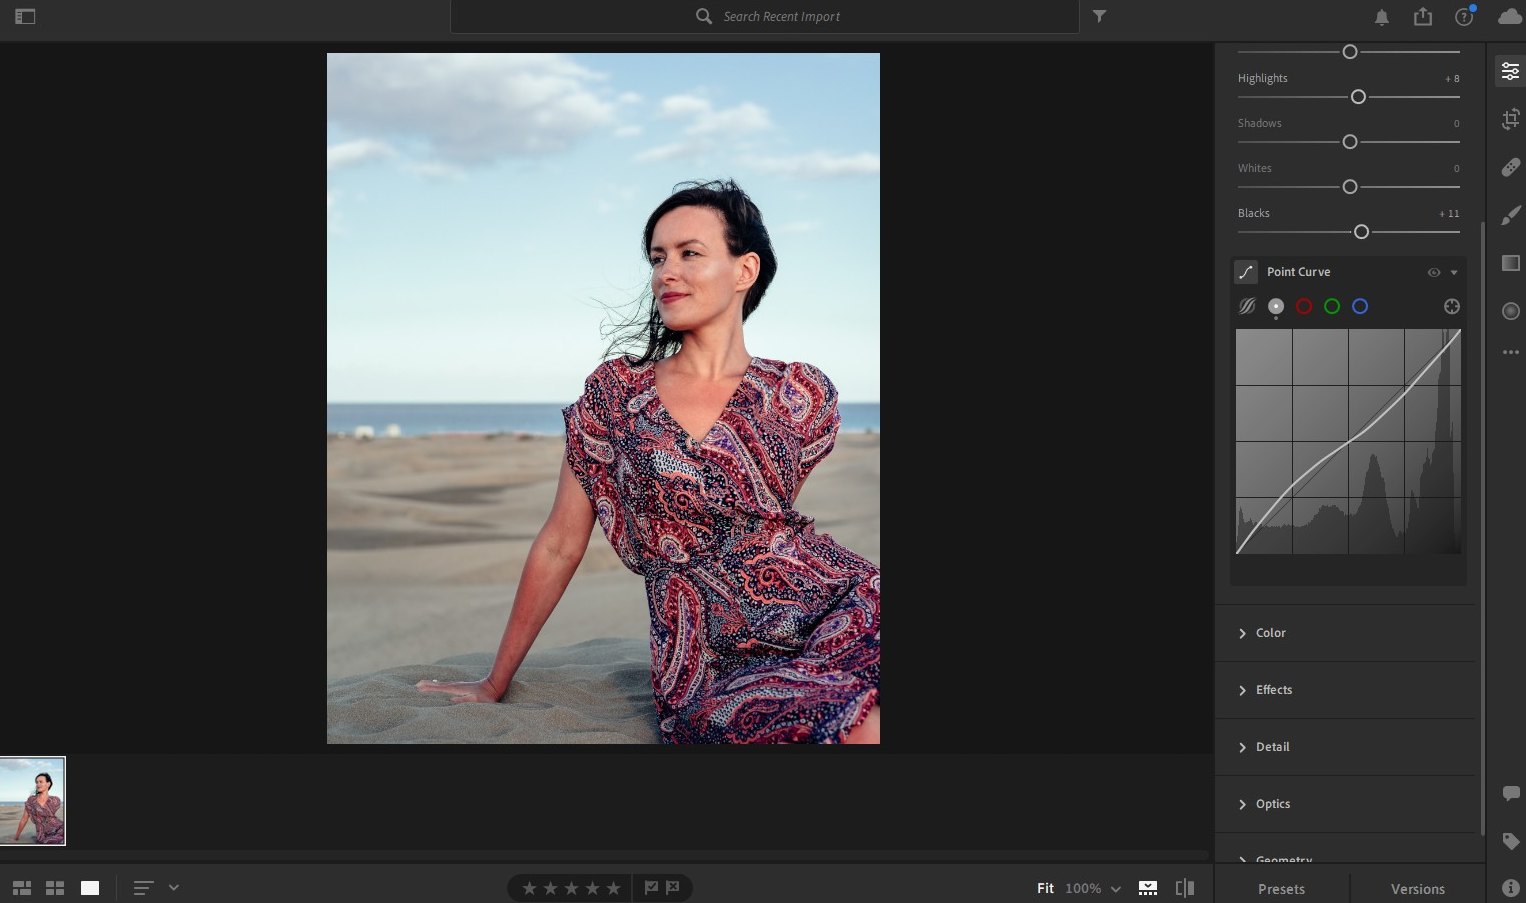
For example, this image had some darker areas that made it look unnatural, especially for a portrait shot on the beach.
We wanted to fix the lighting in specific parts of the photo, like the area of the woman’s hand is touching the sand. So we used a Point Curve to adjust specific parts of the portrait.
Step 4: Adjust Colors and Skin Tone
While adjusting the white balance, you’ll likely lose some color from the portrait. Now it’s time to color balance the portrait, especially focusing on the skin tone.
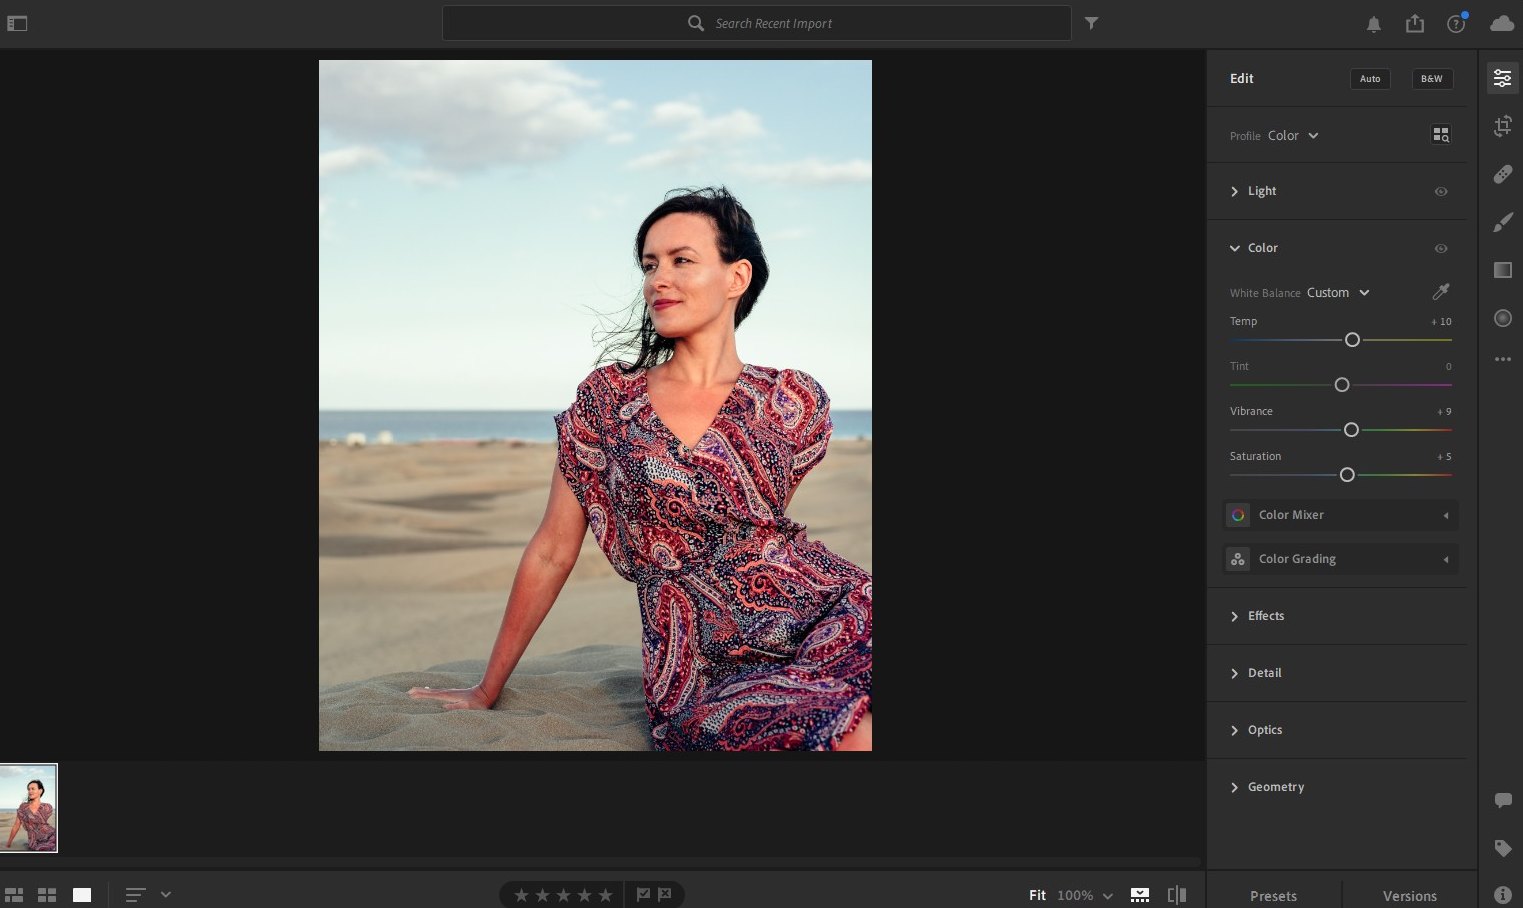
We slightly adjusted the Temperature along with Vibrance and Saturation.
Our goal was to make this portrait look more like a photo shot on the beach in a sunny day. We already achieved our goal with just a few simple adjustments.

Here’s a side-by-side comparison to show you how big of a difference it makes.
Step 5: Healing and Retouching
The Healing brush is a great tool in Lightroom you can use to fix any abnormalities in your photos.
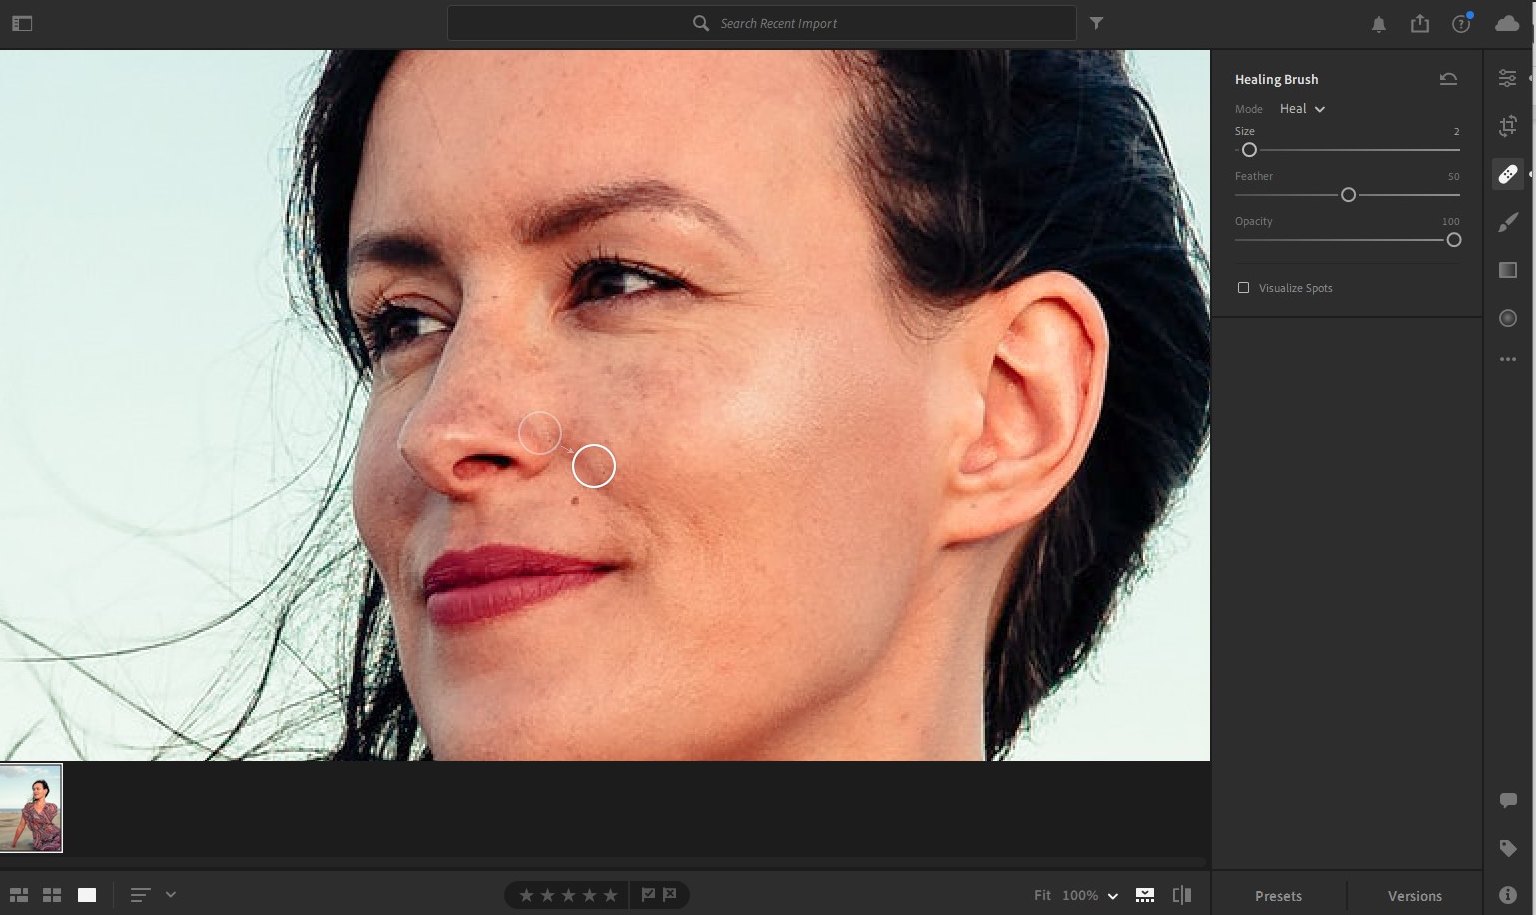
You can also use the Brush tool to retouch specific parts of the portrait. Or even add makeup and blush.
Best Portrait Lightroom Presets
With Lightroom presets, you can make all these portrait adjustments and make your photos look way better with just one click. Here are a few presets you can use to instantly optimize your portraits.
60 Natural Portrait Lightroom Presets
This is a bundle of Lightroom presets that includes 60 different presets for improving portraits. You’ll have plenty of choices to try with this pack.
Retouching Mobile & Desktop Lightroom Presets

Retouching portrait takes a lot of practice. If you want quick results, use this set of presets to improve skin tones and make adjustments more easily. It includes 11 presets.
Lightroom Presets for Portraits
This bundle includes 14 carefully crafted Lightroom presets for portraits. They are designed to work with various types of portraits, including family portraits, newborn, wedding, and more.
10 Professional Portrait Lightroom Presets
A collection of 10 portrait Lightroom presets featuring subtle improvements. This set of presets is ideal if you want to enhance portraits without losing the natural look.
Clean Portrait Action & Lightroom Preset

With this portrait Lightroom preset, you can instantly give a modern and colorful look to your photos. It comes as a Photoshop Action as well.
For more presets, check out our best portrait Lightroom presets collection.
In Conclusion
Our main intention with this guide was to help you understand the basics of portrait editing. We hope you’ll use it to learn more about editing photos and advance your skills to do professional-level edits.