How to Install & Apply a Lightroom Preset
Whether you are a photographer or designer with a need to edit photos, Adobe Lightroom can be a great tool. Designed for photo editing, it allows batch work that can be cumbersome in programs such as Photoshop.
One of the most popular elements of Lightroom are the number of presets available. These tools within the tool are super filters that allow you to enhance photos, add creative effects and add functionality to your design workflow. If you’ve used any Adobe product, the feel of Lightroom is familiar and easy to learn. Get started by installing and using a few cool presets. Here’s how to do it.
Adobe Lightroom Basics
Lightroom is Adobe’s photo tool. The portable software is available on any device for Creative Cloud users (probably a large number of us at this point).
What’s great about Lightroom is that it is made for editing photos. You can work with Camera Raw images, adjust the way stock photos look, mix up a visual aesthetic with a new twist on existing imagery, and just do more to make your photos look as good on the screen as you remember the moments to be. Or you can use Lightroom Presets to adjust imagery to fit a certain mood or them, which can be particularly helpful for marketing work.
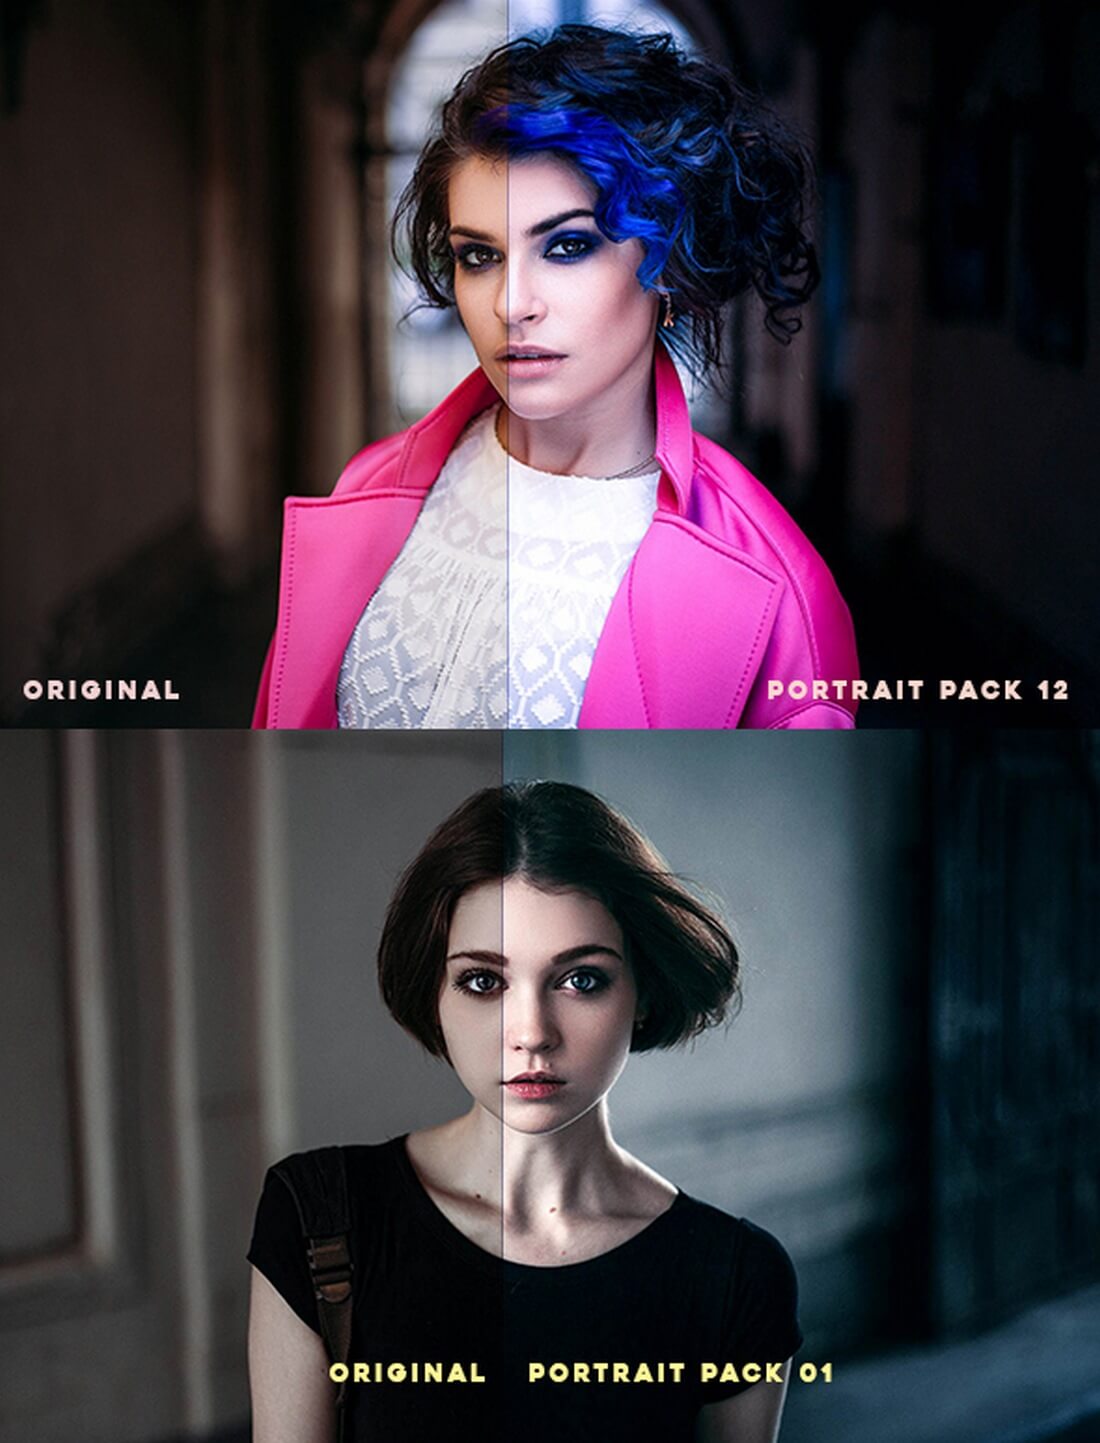
Some of the key selling points of Lightroom include the ability to punch up colors, make dull-looking shots vibrant, remove distracting objects and straighten skewed shots. Lightroom tools are the root of all those funky social media filters and you can create those looks on any photo at any scale. What a preset does is make all of these tasks a lot easier and less repetitive.
What Is a Preset? And Where Do I Find Them?
For beginners, or photo editors that don’t have a lot of time or designers that want to create a consistent visual style for imagery, a Lightroom Preset can be a get alternative to editing everything manually.
A preset is a free (or paid) add-on that comes with pre-determined settings for some of the different features in Lightroom. A preset has all the setting ready to create a certain type of visual with just one click. They can save photographers, editors and designers a lot of time while helping maintain a consistent visual style.
You can use and install as many presets as you like or create your own. Before you start Googling or searching the Adobe add-on library, we have a great list of the best Lightroom presets. These high-quality bundles will make it easy to edit and design using Lightroom so you don’t have to hand edit every photo for a project.
How To Install a Lightroom Preset
Installing a preset is pretty simple. There are a few ways to accomplish this task and we’ll provide two options here.
Option 1
- Download the preset file. (It will likely be compressed and you’ll want to unzip it and put the file somewhere easy to find.)
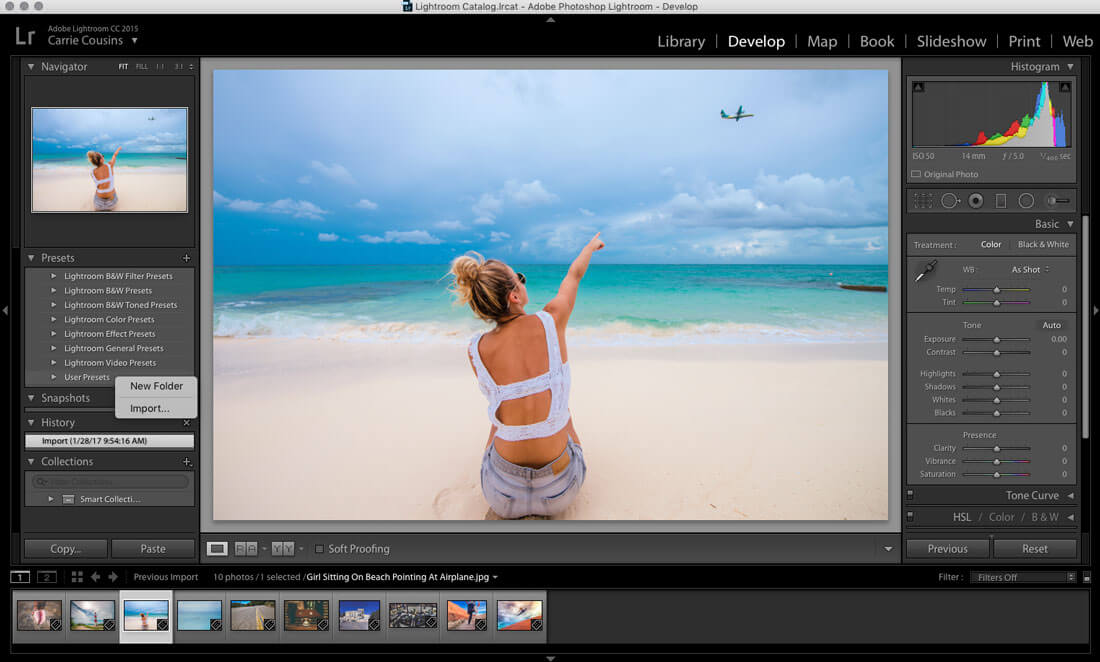
- Open Lightroom and make sure you are in the “Develop” tab. Presets will populate on the left side of the screen.
- Right- or command-click anywhere in the presets module and select “Import.” (The preset will go into the folder where you click.)
- Navigate to your downloaded preset and click “Import.”
- The preset is ready to use.
Option 2
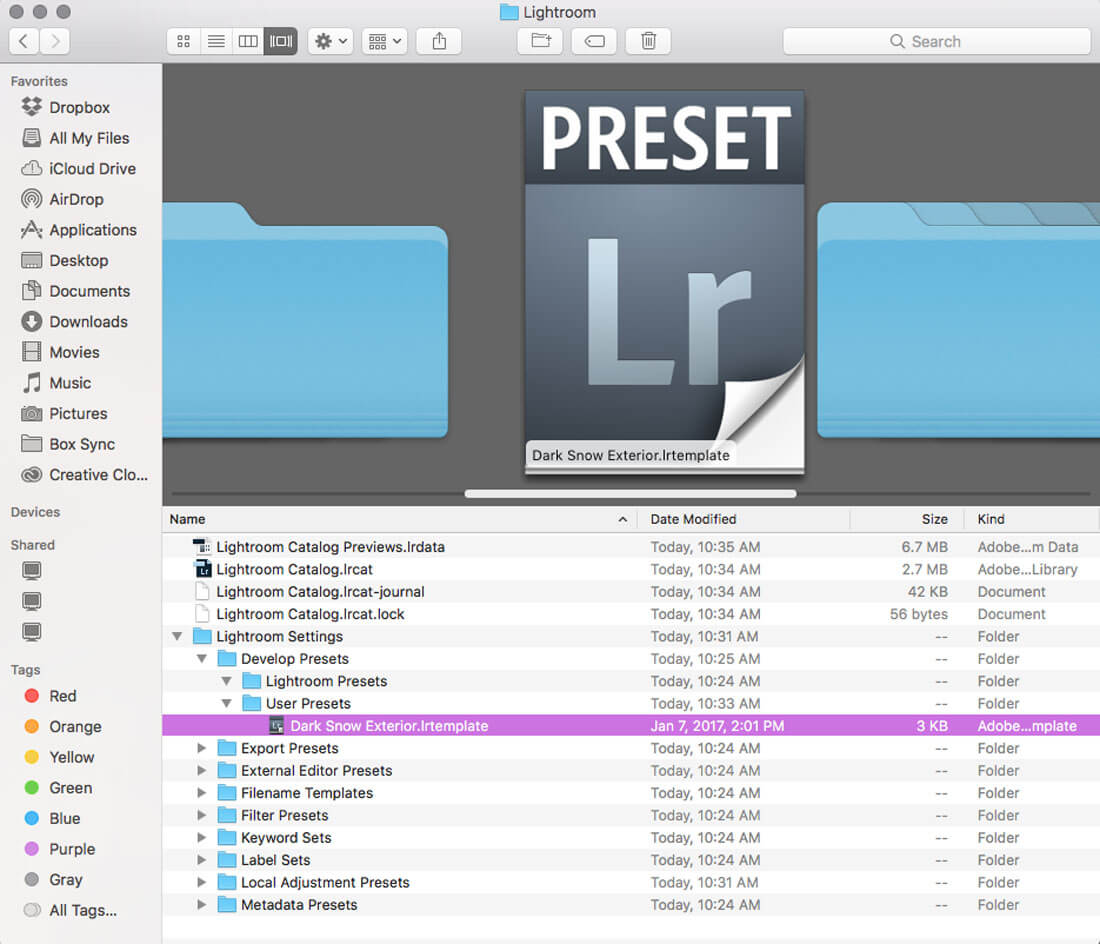
- Download the preset file. (It will likely be compressed and you’ll want to unzip it.)
- Drag and drop the file into the correct Lightroom Presets folder. Navigate to the folder from the main Lightroom folder to Lightroom Settings to Develop Presets and then drop in User Presets.
- Open Lightroom or restart it if the program was running. A restart is required after the preset file is dropped in the settings folder.
- In Lightroom, make sure you are in the “Develop” tab. Presets will populate on the left side of the screen.
- Navigate to the folder where you put your preset file. The preset is ready to use.
How To Apply a Lightroom Preset
Everyone has a different workflow for working with images. (Heck, most people have multiple workflows that they use depending on the project or what other things they are working on at the time.)
So, there’s no right or wrong or even preferred way to use Lightroom presets. It’s all based on how you work and the type of image editing project that’s on your computer at the time.
What’s important is to understand that you can use presets in different ways.
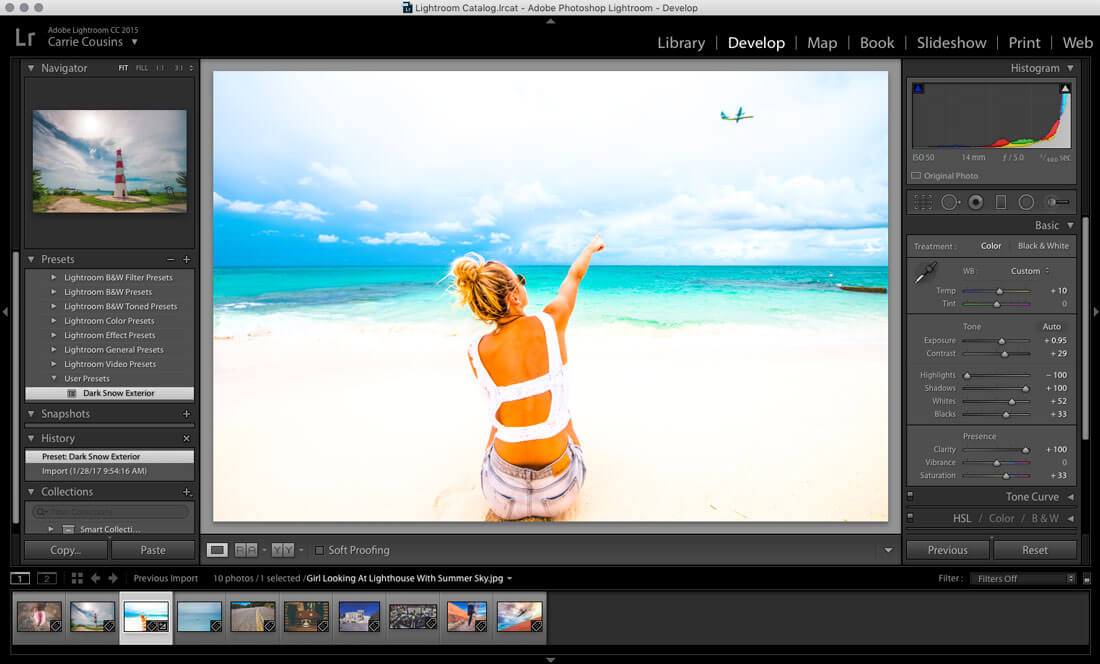
You can apply a preset to a specific image, by opening that image and clicking the preset. There’s really nothing more to it, than opening the image, clicking the preset and then saving. In Lightroom, you can save changes back to the original file metadata or create a new folder or single image using the export function.
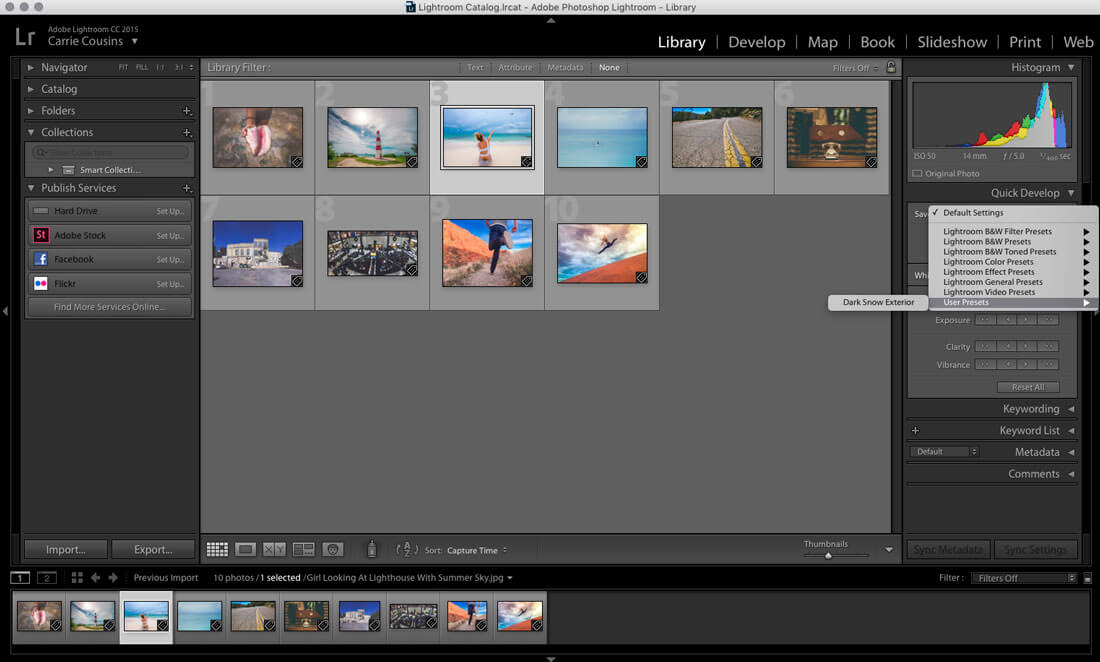
You can also apply a preset to a complete image import, by apply the preset on import. In the Library tab, these settings are located in the Quick Develop module on the right side of the screen. All of your saved presets are listed in the dropdown (or you can apply other manual changes) and import an entire group of images at once with the changes already applied to each image.
Conclusion
Adobe Lightroom Presets make working with photos and photo editing less of a design challenge. This is a great tool for designers and beginning photo editors in particular because using presets give you a solid idea of what each different setting does to an image.
Presets can also help you enhance images in a way you can imagine but maybe don’t quite understand how to execute. The nice thing about preset bundles is that everything you need comes in an easy-to–use package. If you can install the software, you can install and use presets. And don’t forget to start with some of the best options of the year.