How to Make Columns in Google Docs
In Google Docs, one of the simplest yet most powerful tools for improving document layout is the use of columns.
Effective document design can significantly enhance the readability and engagement of your content. Whether you are crafting newsletters, academic articles, or event programs, columns can help organize your content in a visually appealing way.
In this comprehensive guide, we will explore how to add columns in Google Docs and provide detailed tips for optimizing your document’s structure using this feature.
How to Create Columns in Google Docs
Google Docs makes it easy to structure text in columns, which can be particularly useful for comparing information side-by-side or when designing creative layouts for printed materials.
Step 1: Open Your Document
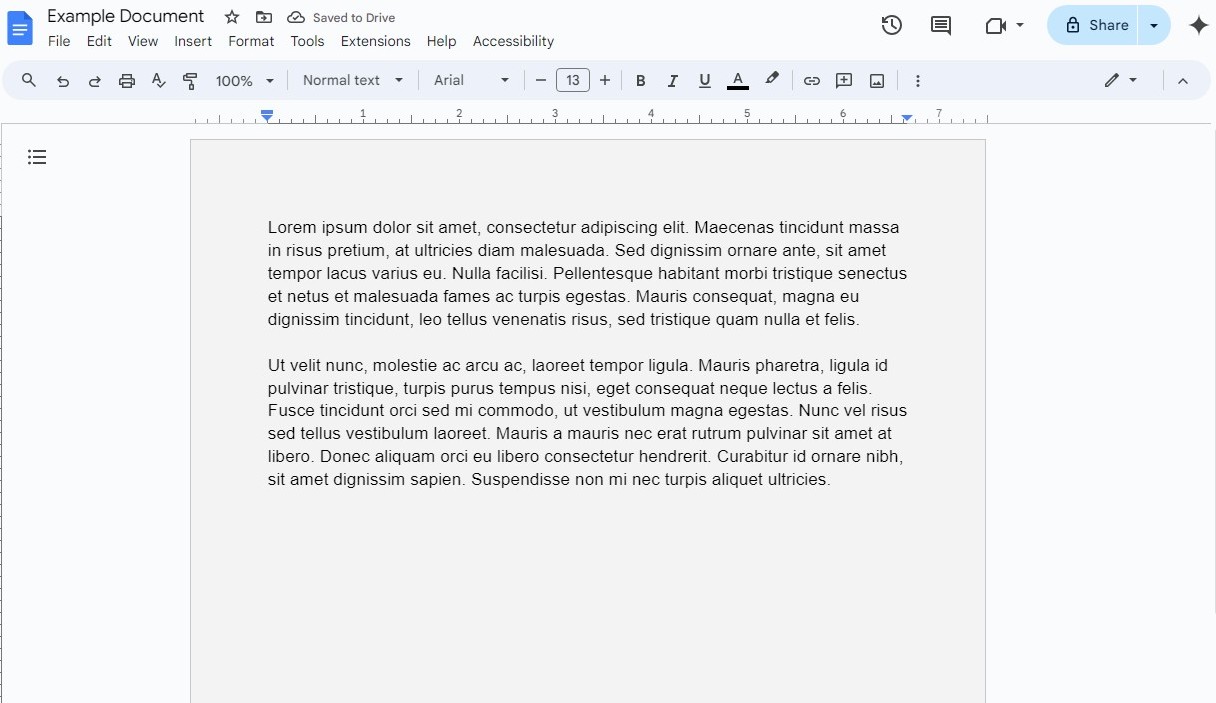
Begin by opening your Google Docs document or creating a new document. Then select the paragraphs or text you want to turn into columns.
Step 2: Access the Columns Setting
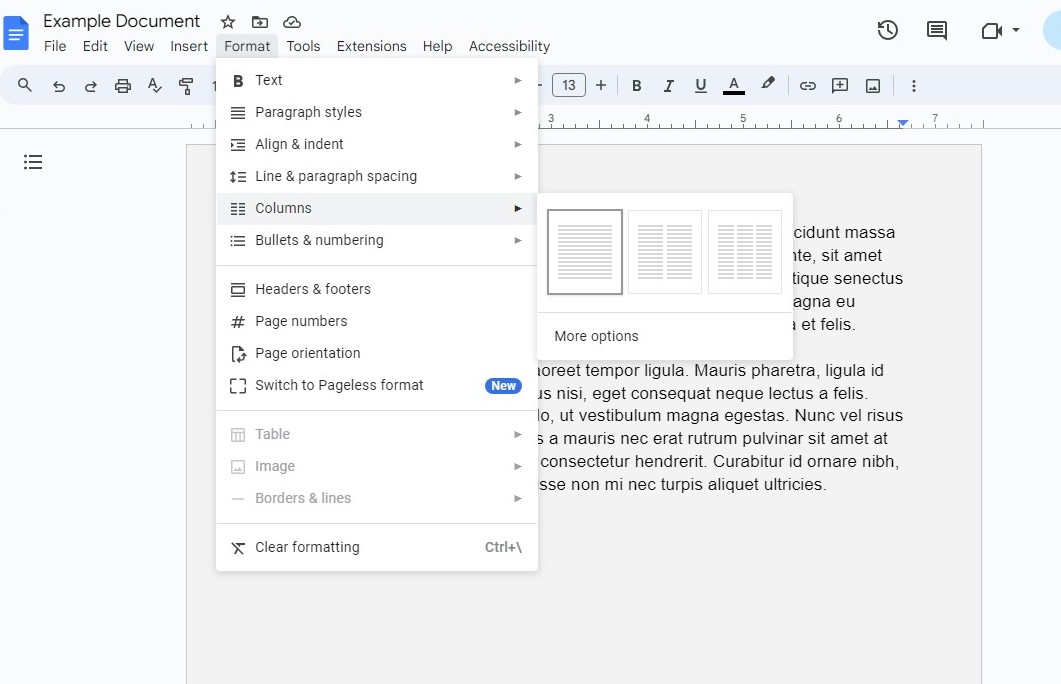
Navigate to the “Format” menu in the top navigation bar. From there, select “Columns,” which will show you a dropdown menu with different formatting options, including one, two, or three columns.
For more advanced settings, click on “More options.”
Step 3: Select Your Column Layout
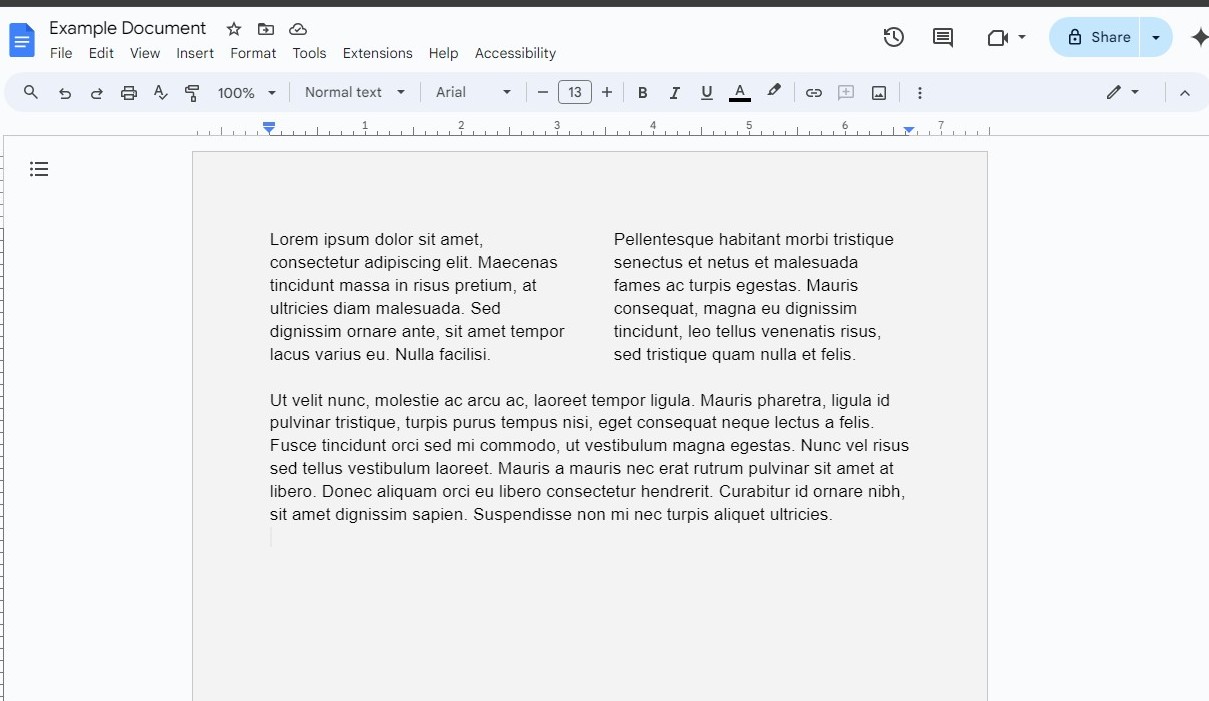
Choose the appropriate column layout for your content. For newsletters, two or three columns might be suitable, while for a formal letter or article, a single column might suffice.
The choice depends on how you want to organize and present your information.
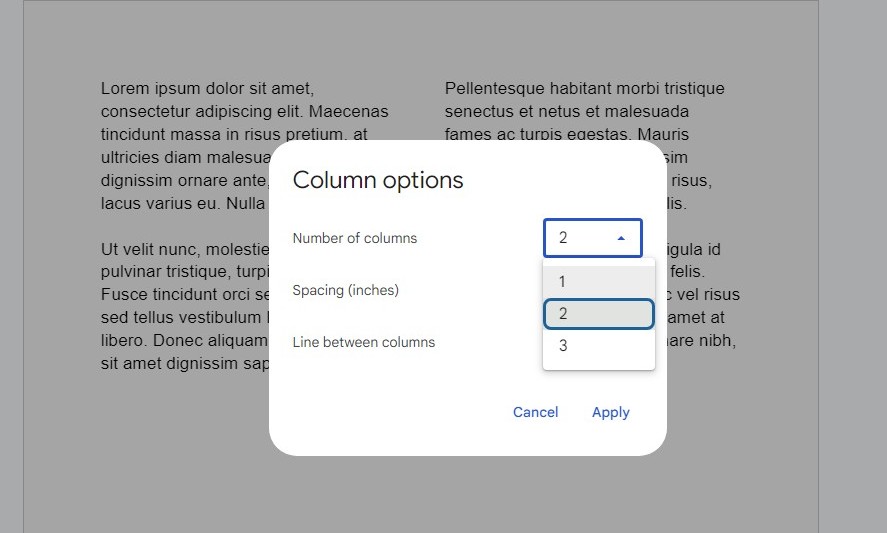
Step 4: Customize Column Options
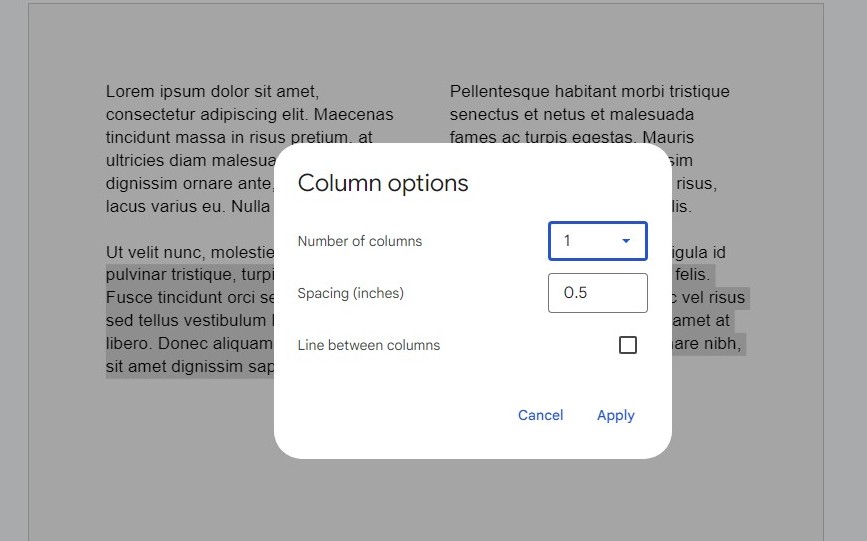
For more precise control over your columns, use the “More options” setting. Here, you can customize the number of columns up to three, adjust the spacing between columns, and decide whether to include a line between columns.
This feature is particularly useful for creating distinct sections within your document without the need for additional formatting.
How to Delete Columns in Google Docs
Once you’ve added columns to your Google Docs document, you may decide to adjust the layout by removing unnecessary columns. Here’s a quick guide on how to delete columns:
Step 1: Open the Column Settings
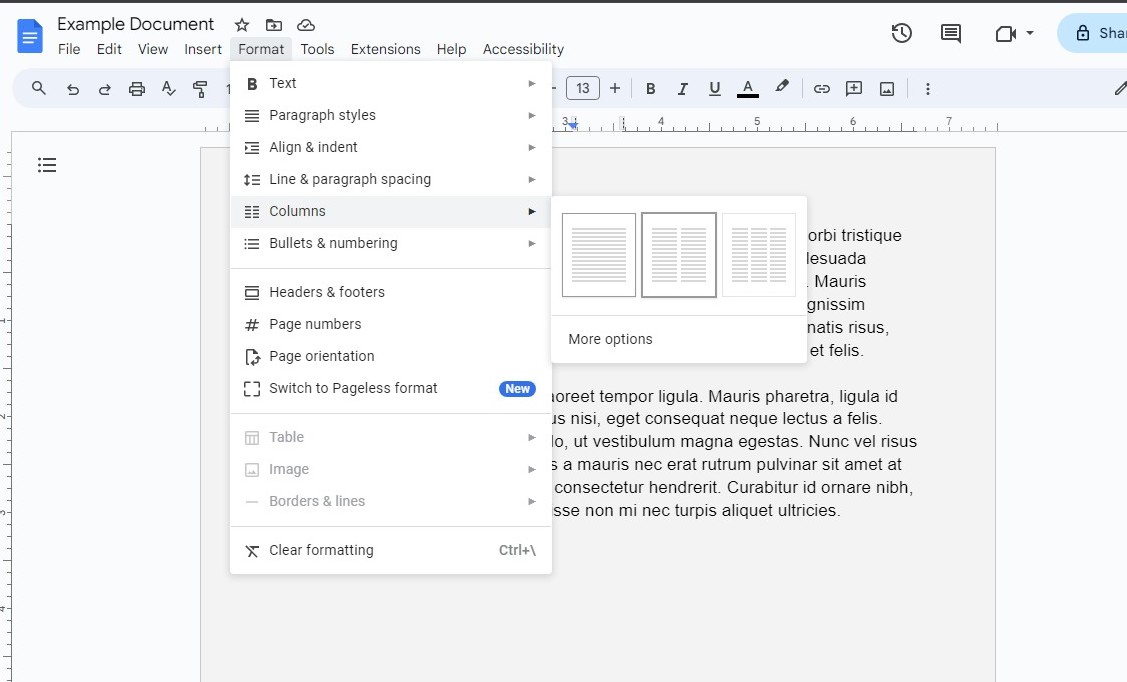
To begin, open your document and navigate to the top menu. Click on “Format,” then hover over “Columns.” This will display the current column configuration for your document.
Step 2: Adjust Column Count
If you initially selected two or three columns, you can simply change this setting back to one column to remove all columns. Just click on the “one column” icon, which will immediately revert your document to a single-column layout.
Step 3: Remove Section Column Formatting
If you applied columns to a specific section of your document using section breaks, place your cursor within the section you wish to change.
Repeat the process by navigating to “Format” > “Columns” and selecting “one column.” This action will remove columns from that particular section without affecting the rest of your document.
Step 4: Confirm and Review
After adjusting your column settings, review your document to ensure that the content flows correctly and that no text has been misplaced or formatted incorrectly during the transition back to a single column.
Deleting columns in Google Docs is straightforward, but it’s important to review your document after making changes to ensure that all elements are properly aligned and that the text displays as intended.
10 Tips for Using Columns in Google Docs
Follow these tips to create more effective column layouts in Google Docs.
1. Plan Your Layout Beforehand
Effective column design starts with good planning. Draft a layout or outline of your content to determine where columns can best enhance your document’s readability and aesthetic appeal. Visualize how the reader’s eye will move across the page and use columns to guide that movement effectively.
2. Use Section Breaks
To apply different column formats to various parts of your document, utilize section breaks. Insert a section break by going to “Insert” > “Break” > “Section break.” This allows you to change column structures in different document sections without affecting the entire page layout.
3. Keep Paragraphs Short
In a multi-column layout, shorter paragraphs are more visually appealing and easier to read. They help prevent text from appearing too dense or overwhelming, which is crucial in narrow column spaces.
4. Use Columns for Side-by-Side Comparisons
Columns are ideal for creating direct comparisons, such as showing pros and cons or different perspectives on a subject. This format can make it easier for readers to assess information and make informed decisions.
5. Adjust Text Alignment for Aesthetics
Experiment with different text alignments to see what looks best in your column layout. While left-aligned text is standard for readability, centered or right-aligned text might be more suitable for certain types of content or design aesthetics.
6. Utilize the Ruler for Fine Adjustment
Fine-tune your columns by adjusting the margins and column width directly using the ruler at the top of the document. If the ruler isn’t visible, you can turn it on via “View” > “Show ruler.” This tool is essential for achieving the perfect balance in your layout.
7. Consider Mobile Readers
Since many documents are now accessed on mobile devices, it’s crucial to consider how your columns will look on smaller screens. Narrow columns may be difficult to navigate on a phone, so it might be necessary to adjust the layout to enhance mobile readability.
8. Use Columns for Newsletters
Columns can transform a simple newsletter into a professional and clean layout. By separating different articles and sections into columns, you create an engaging, magazine-like feel that can hold the reader’s interest.
9. Balance Text with Images
Incorporate images that span across columns to break up text and add visual interest. This technique can also help illustrate concepts discussed in adjacent columns, providing a more integrated reader experience.
10. Preview Before Publishing
Always preview your document in “Print layout” mode before printing or sharing it online. This allows you to see how the columns will appear in the final format and make necessary adjustments to ensure everything looks polished and professional.
Conclusion
By following this guide and these detailed tips, you can create organized, attractive, and easy-to-read documents tailored to your specific needs. It will help improve both the aesthetics and the readability of your written content.