WebZap: Beautiful Photoshop Web Mockups at Light Speed
WebZap is an awesome Photoshop plugin for helping designers create high fidelity web design mockups faster than you ever thought possible. By combining simple one-click actions with robust customization options, this tool makes the entire layout process not only painless, but actually fun.
Follow along as we take a look at what WebZap does and put it through the paces to see how it performs. I promise, it’s the coolest Photoshop plugin that you’ve seen for web designers since GuideGuide.
What Is WebZap?
When you download WebZap, you’ll receive an Adobe extension package that you simply double click to install (CS5 or higher only). Once you’ve gone through the brief installation process in the Adobe Extension Manager, you’ll want to crack open Photoshop and go to Window>Extensions>WebZap.

This will bring up a new Photoshop Panel that looks like the one below. This friendly and attractive Panel holds the entirety of WebZap’s features.

It looks simple here, and it is simple from a usability perspective (just about everything takes a single click), but there’s a ton of hidden power and complexity here that make the extension earn its price point. Let’s jump in and see how it all works with a sample workflow.
Layout
The gist of the WebZap Panel is that it’s split up into four primary tabs: Layout, UI, Styling and Preview. These are represented by the large icons near the top.

We’ll walk through each of these quickly to see how they work. To begin, let’s jump into layout. The first thing that we need to do is decide if we want our navigation to be centered horizontally along the top of the page or running down the left side of the page. For our sample project, let’s choose the centered option.

This choice affects nearly everything after it. All of the layout options will automatically conform to the format that you’ve chosen to build upon. I’m actually really amazed at just how versatile WebZap is. It seems you’re always making a decision that affects other options, and it just rolls with the punches, never bugging out or giving you weird, unexpected results.
Navigation
Now that we’ve chosen a centered layout, we move on and choose from the fourteen built-in navigation options. All you have to do to build one is click on it. It’s as easy as that!
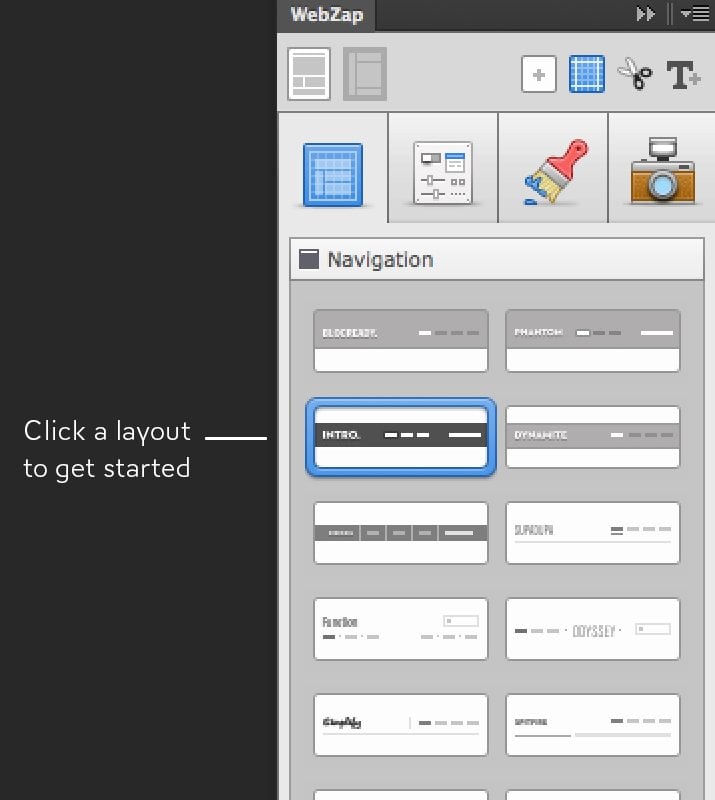
Clicking on a navigation option is essentially just like running a Photoshop Action. You sit back and sip your coffee as Photoshop automatically builds out the full navigation menu (this takes mere seconds). When its finished, you should have something like this:

Keep in mind that this isn’t a piece of flat art that WebZap is throwing at you. It’s actually building a fully layered and easily customizable PSD.

Interestingly enough, “Navigation” is a bit of a misnomer here. What you’re really getting is the basic frame for the entire page. This includes both the navigation at the top as well as a footer at the bottom. As far as I can tell, the footer is identical on each of the fourteen layout options.

As you can see, I chose a nice, minimal option with a placeholder logo, a search box and a few navigation items. Those navigation elements are live text and can be easily changed to suit your needs.
Main
After choosing your navigation layout, it’s time to select a “Feature”, “Fold”, or both. Feature is basically some sort of large image slider with a text and/or thumbnail arrangement.

Once again, a click later and my layout is coming right along. Remember that I’ve really only performed three or four mouse clicks up to this point. Everything else has been completely automated.

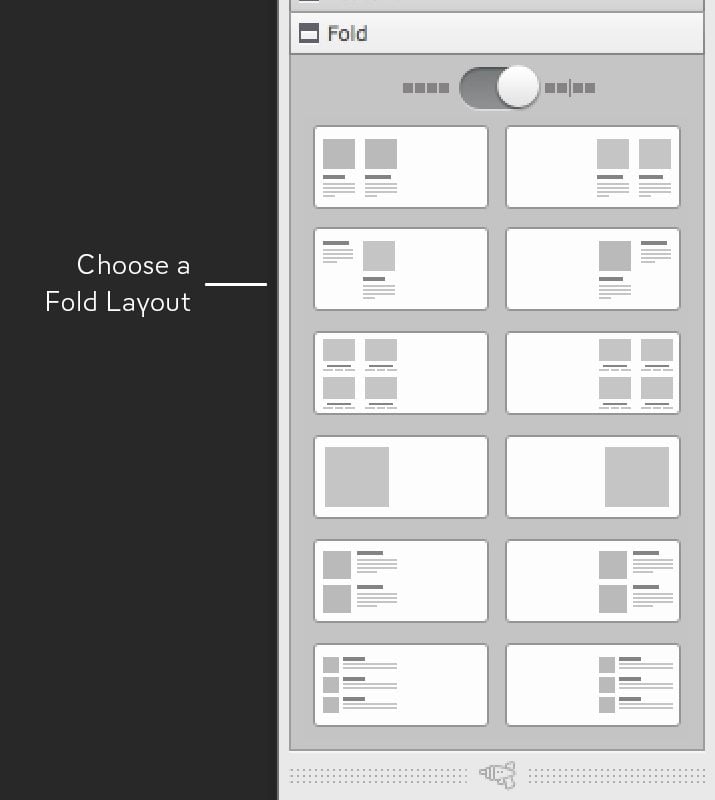
Fold
From here, it’s just lather, rinse and repeat. The final section of our layout is called “Fold,” meaning that it will likely typically be beneath the hypothetical fold (scroll point). Here we have two different tabs of options, one of which takes up the full width of the page while the other occupies half the page.

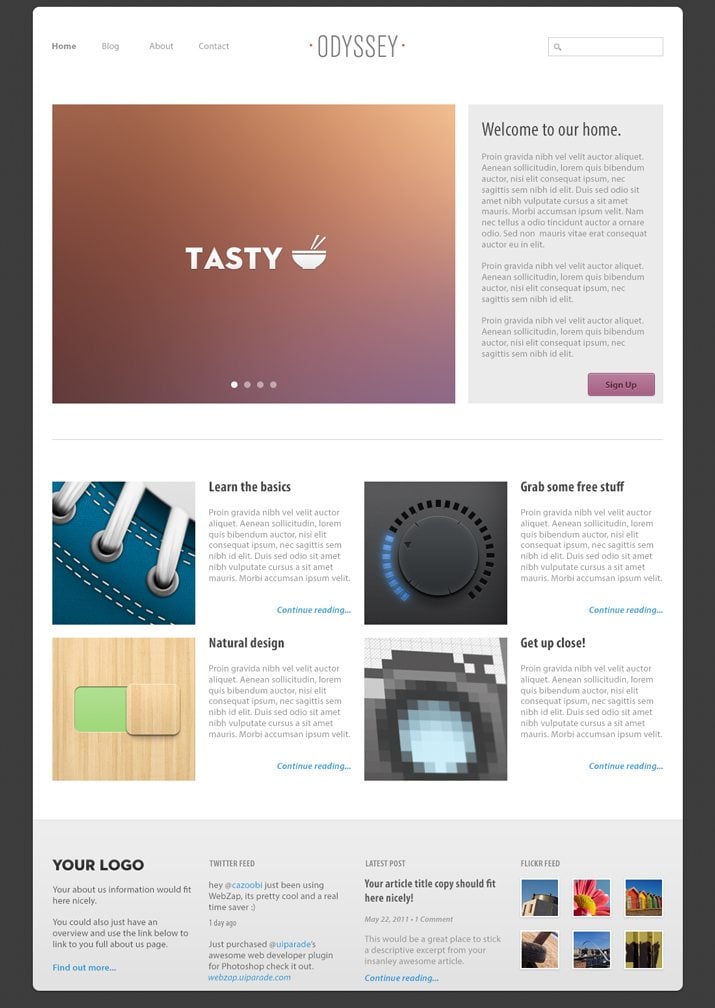
Before you know it, you have yourself an entire page layout! You had lots of mix and match options to choose from so you could conceivably follow this same process fifty more times and achieve unique results each time.

UI
By now, you get the idea for how the workflow progresses, so let’s quickly run through some more awesome features. The next major tab full of functionality is the UI tab. Here you’ll find various buttons, form elements and sliders.

One thing that I really like here is the ability to choose the color of your button when you create it. This can save a lot of customization time later.

Style
The Style tab is where you can begin to tweak some of the design decisions that have been made automatically for you. There are three sections here: Frame, Divider, and Text. Each is explained in the image below.

Here’s what happens when I toss a frame onto the layout that I’ve built thus far. Note that I can choose any color I want and even change the color repeatedly using the little color wheel on the right.
The text replacement options are actually really robust. You can choose to customize the headers (h1, h2, h3, etc.), paragraph text and links. You simply choose the item that you’re looking to change, pick a color and use the font replacement menu that pops up.

Preview
The final main tab is “Preview,” which automatically turns your web page into a fancy mockup that either sits inside a browser window or mobile device frame.

Some of these may seem a little gimmicky but they’re really nice to have and offer you a great way to show off your ideas at the last minute with zero effort.

Mini Toolset
The final chunk of tools that we’re going to discuss is the “Mini Toolset,” which sits at the top right of the WebZap panel. It contains four buttons:

The first two buttons here are pretty self explanatory. The first generates a new document so you can start a new page and the second creates guides based on the 960 grid system layout. The third button is extremely handy. It grabs the layer group that you have selected, crops it and tosses it into a new document. This makes it super easy to essentially slice up and save your images. Even as a standalone plugin, this feature would be quite useful.
Finally, the fourth button generates placeholder paragraphs filled with lorem ipsum. As with other layout items, you can choose from a variety of different options.

How Is It?
From web apps and development frameworks to Keynote and Powerpoint templates, there are a ton of products on the market for helping you quickly create web page design mockups. WebZap is the only one that I’ve ever used that actually made me smile. It’s so incredibly easy and yet so powerful that you can’t help but be impressed by its potential. I love that I can build such beautiful mockups with so little effort.
Will All My Sites Look the Same?
At a glance, you might think that the usefulness of WebZap is limited. After all, if you used this on your next ten projects, wouldn’t all your work start to look the same?
To that protest my response is, “only if you’re lazy.” If this were a web app, you would indeed be fairly stuck into the layouts, styles, etc. that you are provided. However, remember that this is a Photoshop plugin. This means that you can do absolutely whatever you want to the output generated by WebZap.
Think of WebZap as a starting point that helps you first generate some rough layout ideas and then eventually provide a strong structure that you can add to and customize for a completely unique design.
In this way, it’s a lot like a Photoshop version of Twitter Bootstrap, which is used by thousands and thousands of designers every day. With Bootstrap, designers can build a great looking site by using the default styles, but without much effort you can break out of the mold and create designs that are all your own while still leveraging the useful toolset. The same logic applies for WebZap.
Features I’d Love to See
As you can tell, I’m pretty excited about this tool and really think that it stands out as one of the best web design Photoshop plugins that I’ve ever used. When wielded properly, it can dramatically speed up your workflow without boxing you into too much of a strict system.
That being said, there are some features that I’d really like to see added in the future. Here are a few off the top of my head.
Footer Layout Options
Right now the footer is really tossed in as an afterthought with the navigation. It definitely deserves its own module that allows you to choose from a few different layouts, just as with the other layout items.
Tooltips
Unless you’ve thoroughly read through the documentation (which is awesome), there’s really no way to know exactly what a button does until you press it. Granted, actions are easy to undo, but if it’s possible, it would be great to have some tooltips that appear on hover to help you understand what’s about to happen. This would be especially helpful in the Mini Toolset section.
Custom Arrangements & Styles
There are lots of customization options already built into WebZap, but it goes without saying that I want even more. The more versatile this tool becomes (while holding tightly to its ease of use), the more designers will readily adopt it. I know it’s a tall order, but I’d love to be able to save my own layouts, button colors, etc.
Go Get It!
If you spend your days creating web design layouts in Photoshop, you absolutely need to give this tool a shot. It combines the ease of use that you’d get from something like Rapidweaver and the wide open possibilities of working in Photoshop. Hats off to Norman Sheeran and UI Parade for creating such an awesome tool.
Head over to the WebZap website to see some videos of the extension in action. Given the time it saves you, I think it’s well worth the $15.