8 Simple and Useful Tips for Kerning Type
Kerning is fun! All right, unless you’re a serious type nerd like me, that’s definitely not going to be a true statement. However, it is an absolutely essential part of your typographical education and implementation.
If you’ve been ignoring kerning or simply aren’t sure how to do it properly, take a look at these eight quick tips and get started on the road to becoming a kerning master.
Introduction
The past few years have seen an explosion of type on the web. It used to be the case that web designers were faulted for not having a strong sense of typography, but nothing could be further from the truth these days as web designers lead the art of typography to new heights of popularity and respect.
Designers have a newfound appreciation for both typographic art and the practical ways in which typography complements and even drives a strong design.
There’s still at least one major topic that web designers tend to miss out on though: kerning. The truth is, kerning on the web is still a nightmare. There are a few options for making the task easier but on the whole, we just sort of ignore it.
As a result, many web designers neither think about kerning nor do they really even understand how it works on a fundamental level. Fortunately, it’s not rocket science. The largest factor involved in learning to kern type is to make yourself aware that it often needs to be done. Below we’ll go over some basic and useful tricks to get you started.
#1 What Is Kerning? Think About Blocks
The first thing you should know about kerning is, well, what exactly it is. There are a lot of funny sounding typographical terms and it’s easy to get confused quickly so it’s necessary to make sure we’re all on the same page.
Once upon a time, there were no computers. Type was set, get this, by hand. It’s a crazy concept but believe it or not, the process of bringing a design to life used to be a pretty laborious task, unlike the cushy desk jobs that we now all enjoy.
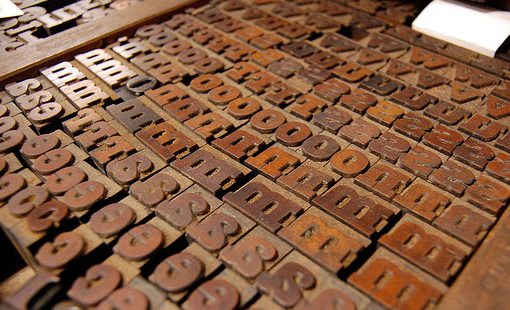
Back then individuals letters were set onto physical blocks made of wood or metal. Obviously, the nature of the blocks meant that you could only squish two letters together so far, to the point where their edges hit. As a solution to the problem, typographers created sets of notched blocks that fit together like puzzle pieces, thus allowing the letters to move closer to one another when needed.
Photo credit: Joel Gillman
The reason that I tell you this is that it gives you something real to picture when you think about kerning. This helps you remember what it is and distinguish it from other typographical terms. Now when you hear the word “kerning,” you’ll picture woodblocks with notches in them and remember how it works.
Obviously, these days the art of manual typesetting is a novelty. Instead, this is all handled in the digital realm, right on your computer screen. However, the core concept here is identical. Kerning still refers to the adjustment of space between two letters.
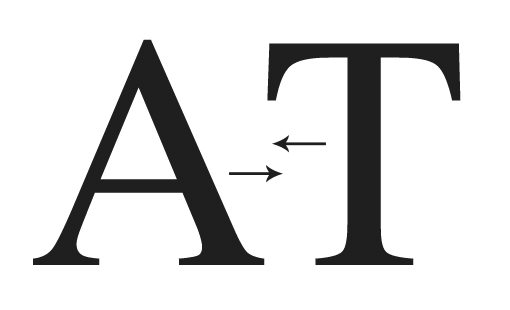
The goal is simple: to equalize the appearance of the whitespace between letters. This gets tricky because you really have to feel it out. Sometimes uniform spacing between letters won’t look like uniform spacing and you have to tweak and tweak until the word looks like you think it should. There’s really no magic formula, you just have to eyeball it and decide what looks right.
#2 Kerning ≠ Tracking
One thing that trips up most new designers is the difference between kerning and tracking. Don’t make the mistake of mixing these two terms up, old school print designers love to point and laugh at people who do that.
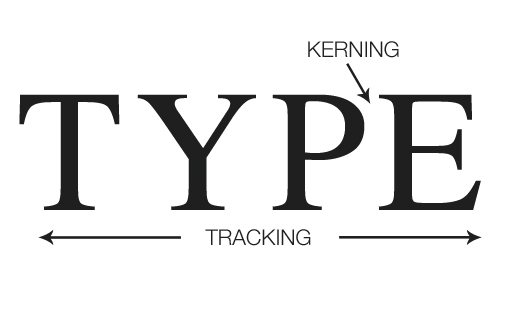
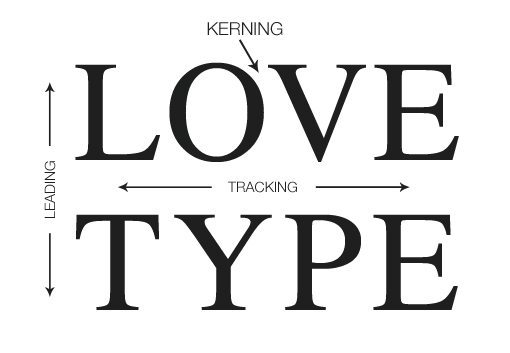
The difference between the two is simple: tracking refers to the uniform spacing between all the letters in a given selection of text and kerning refers to the spacing between two specific letters.
Leading
Now, to add even more confusion to this equation, we can throw leading into the mix. Leading (“led-ing”) is the vertical space between lines of type. In CSS we use a similar adjustment called “line-height”.
In The Type Palette
While we’re on the topic of adjusting all of these values, here’s a quick reference so you know how to spot them in Photoshop, Illustrator or InDesign.
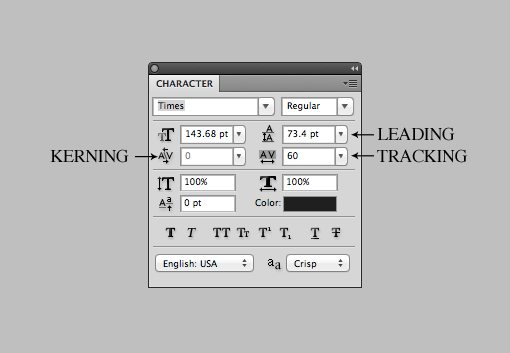
Note that the “Option” key (Alt) is your best friend when adjusting any of these, in conjunction with the arrow keys of course. Which one it adjusts depends on your selection and cursor. Place the cursor between two letters and Option+Left/Right adjusts kerning, or with a larger text selection the same commands adjust tracking. Similarly, Option+Up/Down with a text selection will adjust leading.
#3 Letters to Watch
Once you start making it a regular practice to kern your headlines and other important type, you’ll notice that certain letters are more problematic than others.
To get a feel for how this works, let’s open up Photoshop, set our kerning to “0” and type a few words with Times. These results haven’t been tweaked by me at all, they’re genuinely this horrid right out of the software.
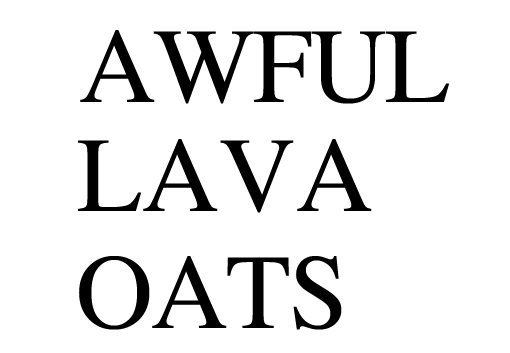
All caps type definitely tends to be quite problematic so as a rule of thumb keep a close eye on it. However, we find similar problems when we start mixing uppercase and lowercase letters.
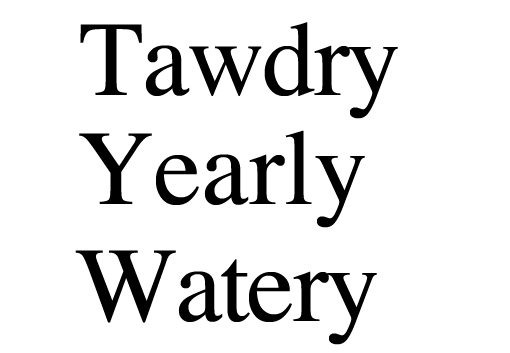
Looking at this, we see a pattern start to emerge. In general, the less a letter conforms to a block shape, the more problematic it becomes. Letters with strong slants like the uppercase “A” and “W” are bound to case some issues, whether they’re mixed with uppercase or lowercase letters. Also, notice how the overhanging bar on the “T” and the arm on the “Y” cause problems when used as initial caps. Here, the lowercase letters that follow are being spaced relative to their block outline, but we need to notch the blocks just like the old typographers:
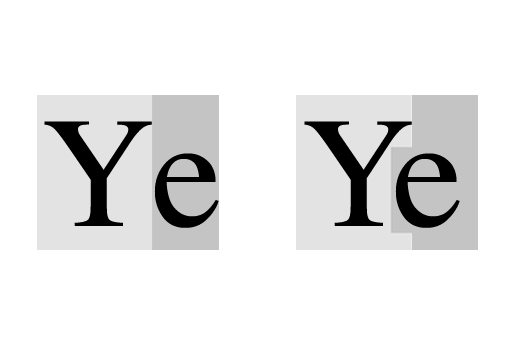
You can find big lists of specific letters to watch, but as a rule of thumb, I generally keep a close eye on letters with diagonal lines like “A” and instances of initial caps (especially when a “T” is involved), no matter what the pairings. Also, though lowercase letters tend to play fairly nicely together, you’re not off the hook with them. Notice the how the “ly” in the example above differs greatly from the “ry” spacing.
#4 Kern Upside Down
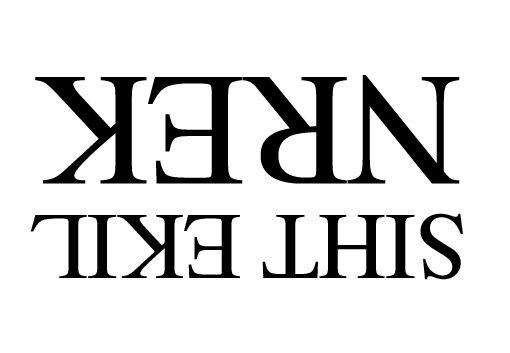
The reason kerning is so easy to miss is because your eyes tend to ignore the spacing in pursuit of reading the word or sentence. After decades of reading, adults don’t see letters anymore, we see words.
To help account for this, some designers suggest the simple trick of flipping your type upside down before kerning. It’s a brilliantly simple technique that really helps you focus on the letter shapes and how they fit together instead of getting distracted by the words.
#5 Don’t Kern Before You Decide on a Font
Obviously, letter spacing is going to differ drastically on a font to font basis. On a practical level this means your process should be to choose a font first, then kern.
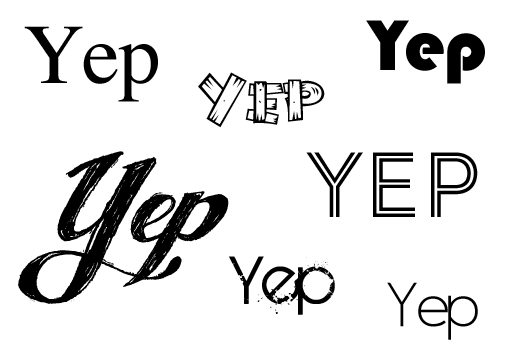
Easy right? We tend to forget this step though when we change our mind on a font at the last minute. At this point, you can’t bank on the kerning that you’ve already done but instead have to pretty much start from square one and treat each font as unique.
#6 Watch Word Spacing
We’ve discussed tracking, leading and kerning but there’s one more area of typography spacing that you really have to watch out for: the spacing between two words. This essentially boils down to the size of a “space” in a font.
One thing that has really been bugging me lately about free fonts is how many of them tend to have really awkward amounts of space between words.
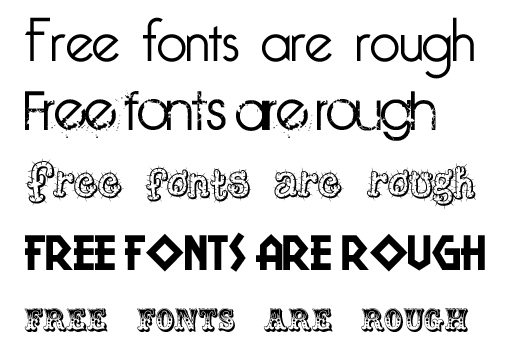
In general, kerning in free fonts can be a pretty bad, but the word spacing tends to be a specific problematic point that you want to keep an eye on. A font with really poor word spacing becomes super high maintenance when you start actually working with it so it’s best to use them sparingly or avoid them altogether.
#7 Don’t Trust the Software
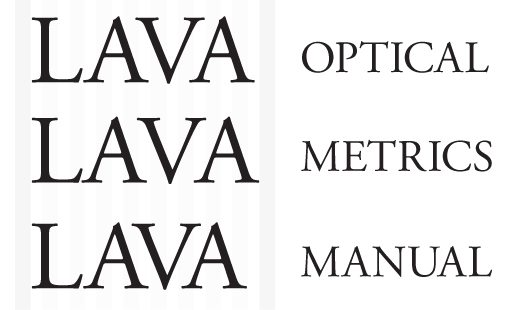
As I outlined in a recent article on general typography tips, Photoshop and Illustrator have a few built in auto-kerning modes. These are great to use, but use them in conjunction with manual kerning, they’re simply not smart enough to handle the task on their own.
#8 Use Kern.js to Kern Online
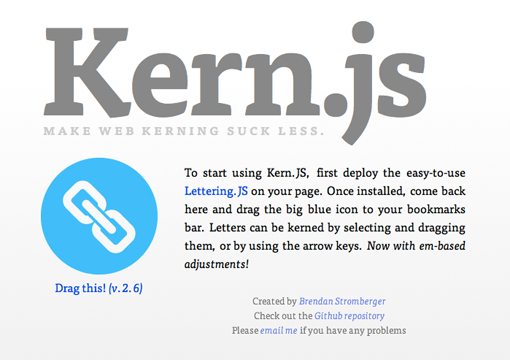
All of these tips are great if you’re designing for print or turning your headline into an image, but what about live web type? As I mentioned above, kerning on the web is a pain and many designers suggest just living with poor kerning where web type is concerned. However, recently some great JavaScript tools have been created to make the job a little easier. One of the best I’ve seen thus far is Kern.js, an extension of the excellent Lettering.js.
Conclusion
To sum up, kerning isn’t the hardest thing you’ll ever do in design, but it can get a little tedious and tends to be something that you flat out forget to do.
Make it a point to keep kerning in mind and to always analyze your letter spacing. Sixty seconds of kerning on every headline you create will improve your typographical competence by leaps and bounds.
Title photo credit: katietower.
