5 Simple and Practical CSS List Styles You Can Copy and Paste
Who doesn’t love a good list? We use them constantly in our markup for a variety of different situations. Today we’re going to take a look at a few simple and practical examples that you can steal and use in your own work.
We start off with a fun animated vertical list, then style up a list with thumbnails and text, another with just images and finally an ordered list where the numbers are styled differently than the rest of the type. There’s a ton of great things to learn here so let’s jump in!
HelvetiList
For our first list, we’re going to start with a simple, minimal but super attractive design that’s heavily dependent on the beauty of the typography. We’ll make use of some thin Helvetica styles and toss in a smooth animation on hover.
Demo: Check out the demo and code on CodePen.

HTML
Our markup here is dead simple. Create a div (you’ll probably want a class or ID in a live project), then toss in a header and an unordered list with five list items.
<div>
  <h2>HelvetiList</h2>
  <ul>
    <li><a href="#">Zurich</a></li>
    <li><a href="#">Geneva</a></li>
    <li><a href="#">Winterthur</a></li>
    <li><a href="#">Lausanne</a></li>
    <li><a href="#">Lucerne</a></li>
  </ul>
</div>
CSS
As we saw in the screenshot above, the list items use very thin type, subtle separators and a hover state that enlarges the font. To start, give the div a width and set your generic h2 styles.
Next, apply a list-style-type of none to ditch the bullets and reset any margins or padding that may be present. For the actual list items, I applied a slight bottom border, which provides that little divider. I did use the last-child selector, but it’s really no big deal if there’s a browser that doesn’t recognize that and decides to throw an extra border on the bottom.
Also notice that both of the times I set the font, I used CSS shorthand and applied different weights. To finish off, I applied some link styles and set the transition to enlarge the font and change the background color on hover.
div {
  width: 200px;
}

h2 {
  font: 400 40px/1.5 Helvetica, Verdana, sans-serif;
  margin: 0;
  padding: 0;
}

ul {
  list-style-type: none;
  margin: 0;
  padding: 0;
}

li {
  font: 200 20px/1.5 Helvetica, Verdana, sans-serif;
  border-bottom: 1px solid #ccc;
}

li:last-child {
  border: none;
}

li a {
  text-decoration: none;
  color: #000;
  display: block;
  width: 200px;

  -webkit-transition: font-size 0.3s ease, background-color 0.3s ease;
  -moz-transition: font-size 0.3s ease, background-color 0.3s ease;
  -o-transition: font-size 0.3s ease, background-color 0.3s ease;
  -ms-transition: font-size 0.3s ease, background-color 0.3s ease;
  transition: font-size 0.3s ease, background-color 0.3s ease;
}

li a:hover {
  font-size: 30px;
  background: #f6f6f6;
}
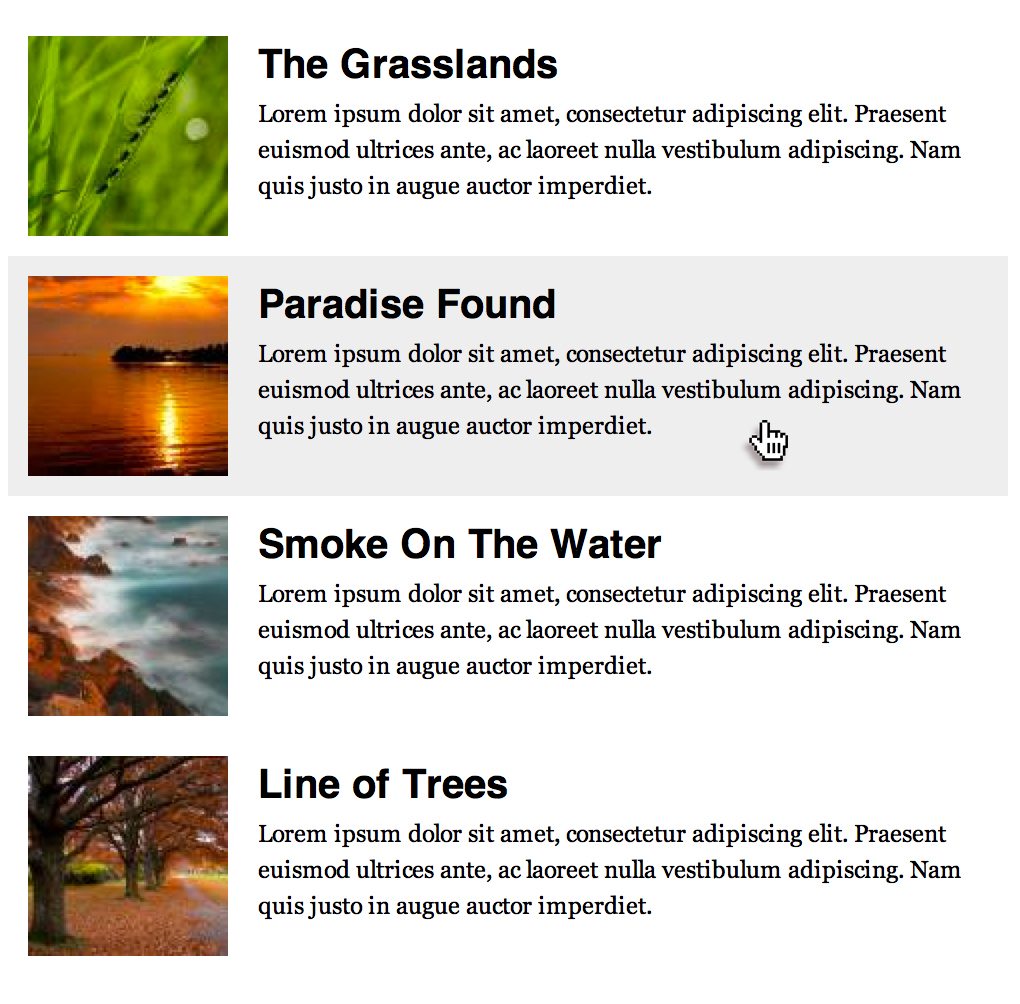
Thumbnail List
One really common format that you’ll see for lists is your basic “thumbnail and text” setup, which is a great way to add some nice visual interest to an otherwise boring list of paragraphs.
This is an extremely versatile list style that you can use on any number of projects. Let’s see how it works.
Demo: Check out the demo and code on CodePen.
HTML
The HTML on this one is a little more complicated. Each list item needs to have three children: an image, a headline and a paragraph. The images that I’m using are 100px by 100px so keep that in mind if you want to customize this to be a different size. Overall, this is all still really simple markup that shouldn’t trip you up in the least.
<div>
  <ul>
    <li>
      <img src="http://lorempixum.com/100/100/nature/1" />
      <h3>Headline</h3>
      <p>Lorem ipsum dolor sit amet...</p>
    </li>

    <li>
      <img src="http://lorempixum.com/100/100/nature/2" />
      <h3>Headline</h3>
      <p>Lorem ipsum dolor sit amet...</p>
    </li>

    <li>
      <img src="http://lorempixum.com/100/100/nature/3" />
      <h3>Headline</h3>
      <p>Lorem ipsum dolor sit amet...</p>
    </li>

    <li>
      <img src="http://lorempixum.com/100/100/nature/4" />
      <h3>Headline</h3>
      <p>Lorem ipsum dolor sit amet...</p>
    </li>
  </ul>
</div>
CSS
This one surprisingly doesn’t take too much code to pull off. Once again, we’re clearing our list styles and setting some typography related CSS. The thing that you have to understand is that you need to float your images to the left so that the paragraphs appear next to them.
* {margin: 0; padding: 0;}

div {
  margin: 20px;
}

ul {
  list-style-type: none;
  width: 500px;
}

h3 {
  font: bold 20px/1.5 Helvetica, Verdana, sans-serif;
}

li img {
  float: left;
  margin: 0 15px 0 0;
}

li p {
  font: 200 12px/1.5 Georgia, Times New Roman, serif;
}

li {
  padding: 10px;
  overflow: auto;
}

li:hover {
  background: #eee;
  cursor: pointer;
}
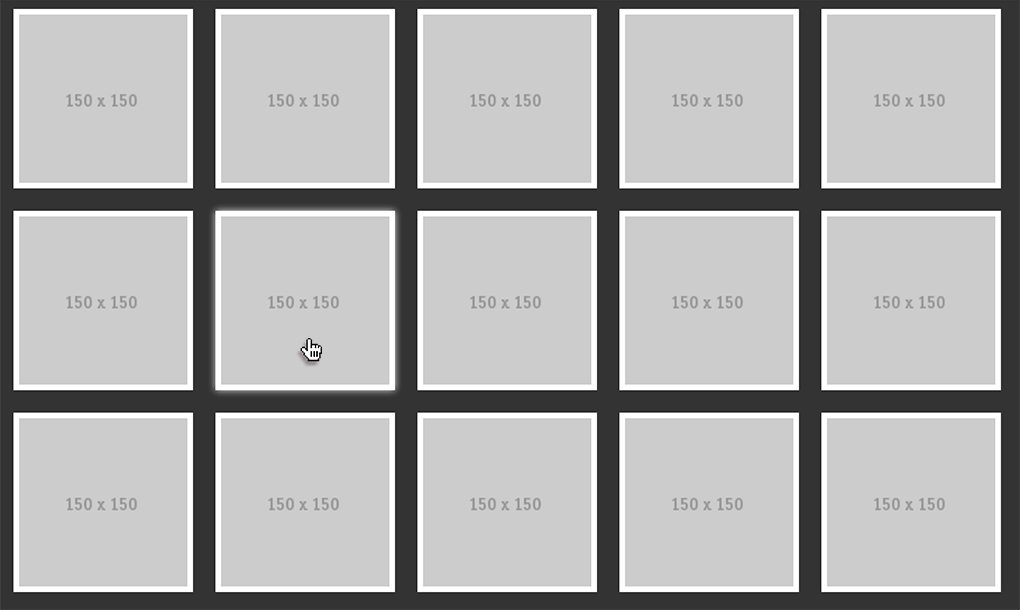
Standard Thumbnail Grid
If we’re talking unordered lists, we should throw in at least one image grid, which are almost always handled with lists. We won’t do anything too fancy, it’ll just be helpful for you to keep a form of this code on hand for quick insertion.
Demo: Check out the demo and code on CodePen.
HTML
The markup for has the basic structure of list-item>anchor>image. If you’re not used to seeing this code, it might seem pretty strange to use a list for this, but really that’s exactly what you’re creating: a big list of images. The fact that they’re arranged into a grid doesn’t negate the idea that’s it’s just a big ‘ol list at heart.
<div>
  <ul>
    <li><a href="#"><img src="http://placehold.it/150x150" /></a></li>
    <li><a href="#"><img src="http://placehold.it/150x150" /></a></li>
    <li><a href="#"><img src="http://placehold.it/150x150" /></a></li>
    <li><a href="#"><img src="http://placehold.it/150x150" /></a></li>
    <li><a href="#"><img src="http://placehold.it/150x150" /></a></li>
    <li><a href="#"><img src="http://placehold.it/150x150" /></a></li>
    <li><a href="#"><img src="http://placehold.it/150x150" /></a></li>
    <li><a href="#"><img src="http://placehold.it/150x150" /></a></li>
    <li><a href="#"><img src="http://placehold.it/150x150" /></a></li>
    <li><a href="#"><img src="http://placehold.it/150x150" /></a></li>
    <li><a href="#"><img src="http://placehold.it/150x150" /></a></li>
    <li><a href="#"><img src="http://placehold.it/150x150" /></a></li>
    <li><a href="#"><img src="http://placehold.it/150x150" /></a></li>
    <li><a href="#"><img src="http://placehold.it/150x150" /></a></li>
    <li><a href="#"><img src="http://placehold.it/150x150" /></a></li>
  </ul>
</div>
CSS
For this example, the basic structure is that you toss some margins on each of your list items and float them left. I used the “overflow:auto” trick to clear the float, set up a dark background and tossed a border on the images.
To make the demo slightly interesting, I added a hover effect that slowly applies a glow. This is of course completely optional and isn’t something you’d apply on every project.
* {
  margin: 0;
  padding: 0;
}

body {
  background: #333;
}

div {
  width: 900px;
  margin: 0 auto;
  overflow: auto;
}

ul {
  list-style-type: none;
}

li img {
  float: left;
  margin: 10px;
  border: 5px solid #fff;

  -webkit-transition: box-shadow 0.5s ease;
  -moz-transition: box-shadow 0.5s ease;
  -o-transition: box-shadow 0.5s ease;
  -ms-transition: box-shadow 0.5s ease;
  transition: box-shadow 0.5s ease;
}

li img:hover {
  -webkit-box-shadow: 0px 0px 7px rgba(255,255,255,0.9);
  box-shadow: 0px 0px 7px rgba(255,255,255,0.9);
}
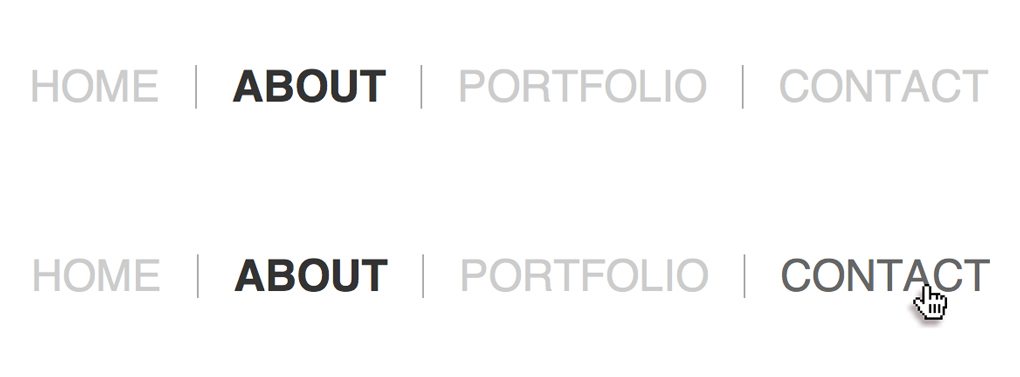
Horizontal Menu
Another thing that developers use lists for is horizontal navigation menus. As a new developer, the code for this trick was something I Googled constantly so be sure to bookmark it or toss it into your snippets saver.
Demo: Check out the demo and code on CodePen.
HTML
With the thumbnail grid above, we already learned how to float list items so that they appear next to each other so here we’ll use the same technique, only with fewer items. Notice that I’ve tossed in an “active” class, which is a fairly standard practice that we’ll use to tell the user which page they’re currently on.
<nav>
  <ul>
    <li><a href="#">Home</a></li>
    <li class="active"><a href="#">About</a></li>
    <li><a href="#">Portfolio</a></li>
    <li><a href="#">Contact</a></li>
  </ul>
</nav>
CSS
Here we floated our list items to the left, put a border only on the right side, strip the default link styles and setup my own, and then styled both the hover and active states.
* {
  margin: 0;
  padding: 0;
}

nav {
  margin: 50px;
}

ul {
  overflow: auto;
  list-style-type: none;
}

li {
  height: 25px;
  float: left;
  margin-right: 0px;
  border-right: 1px solid #aaa;
  padding: 0 20px;
}

li:last-child {
  border-right: none;
}

li a {
  text-decoration: none;
  color: #ccc;
  font: 25px/1 Helvetica, Verdana, sans-serif;
  text-transform: uppercase;

  -webkit-transition: all 0.5s ease;
  -moz-transition: all 0.5s ease;
  -o-transition: all 0.5s ease;
  -ms-transition: all 0.5s ease;
  transition: all 0.5s ease;
}

li a:hover {
  color: #666;
}

li.active a {
  font-weight: bold;
  color: #333;
}
Big Numbers Ordered List
Let’s not forget that all lists aren’t unordered lists! There’s definitely a lot of useful applications for ordered lists. One really tricky thing to do with ordered lists is style the numbers differently than the other text. Let’s see how this works.
Demo: Check out the demo and code on CodePen.

HTML
Now, how I built this is going to be super controversial. As you can see, I’m actually manually putting in the numbers despite the fact that HTML will actually do this automatically for you. There’s a good reason for this though.
To start this idea, I threw a paragraph into the list items, then coded the li type and the li>p type in different ways. However, trying to get everything to line up properly with this method was a total nightmare. Ultimately, to fix it the CSS was so messy and nasty that I abandoned it completely in favor of this simpler method which actually allows for clear, simple CSS.
<div>
  <ol>
    <li><span>1.</span><p>Lorem ipsum dolor sit amet, consectetur adipiscing elit. Praesent euismod ultrices ante, ac laoreet nulla vestibulum adipiscing. Nam quis justo in augue auctor imperdiet. Curabitur aliquet orci sit amet est posuere consectetur. Fusce nec leo ut massa viverra venenatis. Nam accumsan libero a elit aliquet quis ullamcorper arcu tincidunt. Praesent purus turpis, consectetur quis congue vel, pulvinar at lorem. Vivamus varius condimentum dolor, quis ultricies ipsum porta quis. </p></li>
    <li><span>2.</span><p>Lorem ipsum dolor sit amet, consectetur adipiscing elit. Praesent euismod ultrices ante, ac laoreet nulla vestibulum adipiscing. Nam quis justo in augue auctor imperdiet. Curabitur aliquet orci sit amet est posuere consectetur.  </p></li>
    <li><span>3.</span><p>Lorem ipsum dolor sit amet, consectetur adipiscing elit. Praesent euismod ultrices ante, ac laoreet nulla vestibulum adipiscing. Nam quis justo in augue auctor imperdiet. Curabitur aliquet orci sit amet est posuere consectetur.  </p></li>
  </ol>
</div>
CSS
As you can see in the code below, what I did here was ditch the default numbers and then set my spans to absolute so I could push them over to the left of the paragraphs, which in turn required some extra padding on the paragraphs. It may not be the prettiest solution code-wise, but it’s the briefest and most straightforward way that I could come up with to do it without bizarre positioning bugs.
div {
  width: 500px;
  margin: 10px
}

ol {
  color: #ccc;
  list-style-type: none;
}

ol li {
  position: relative;
  font: bold italic 45px/1.5 Helvetica, Verdana, sans-serif;
  margin-bottom: 20px;
}

li p {
  font: 12px/1.5 Helvetica, sans-serif;
  padding-left: 60px;
  color: #555;
}

span {
  position: absolute;
}
Conclusion
There you have it, five super simple but dead practical list styles for you to copy and paste into your own code. If you have any other creative list ideas that you’d like to share, let us know in the comments below!