What’s the Deal With :target in CSS?
I’ve been seeing a lot of tutorials lately that utilize :target in CSS to perform some fancy feat so I thought I’d take the time to really dig in and discuss how and why this syntax works. Instead of blindly following someone else’s code, you should be able to wield this tool with the knowledge of what’s happening how it affects browser support.
Read on to learn all about the basic functionality associated with the :target pseudo class and how you can stretch that ability to perform all kinds of crazy stuff with pure CSS. Along the way we’ll build some great navigation and slideshow examples for you to learn from.
What Is :target?
In CSS, :target is a pseudo class selector. Remember from our article on :before and :after, that pseudo classes are a way to select a whole piece of your HTML document while pseudo elements can be used to select a “sub-part” of an element. To help illustrate this point, here are some examples of each:
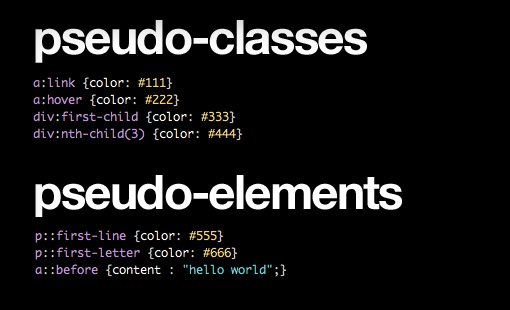
The pseudo class that you’re probably most familiar with is :hover, which allows you to declare special styling that will be activated when the user mouses over an element. The :target pseudo class similarly allows for custom styling that will be activated based on a specific scenario.
Fragment Identifiers
The special event for the :target pseudo class depends on something called a “fragment identifier.” There’s a complicated history and explanation behind these, but all you really need to know is that when we’re discussing fragment identifiers, we’re referring to a hashtag partnered with a word or phrase at the end of a URI.
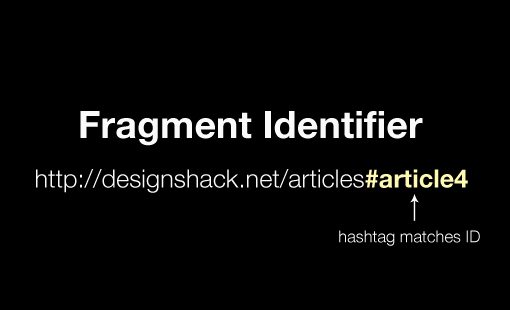
These are used to “target” a specific point in an HTML page and are partnered with an ID (which also use the hashtag syntax). When paired, the URI can be used to jump to its accompanying ID. Here’s a quick demo page that I whipped up that illustrates this functionality.
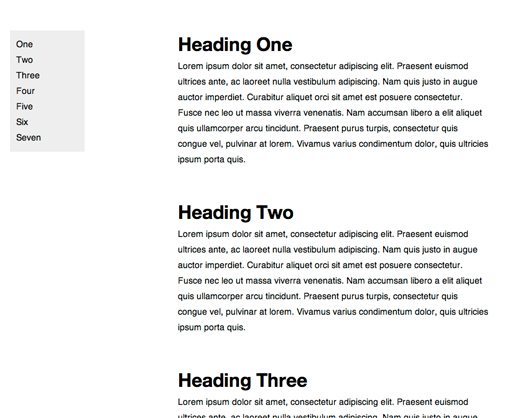
This page contains a series of h1 tags, each of which possesses a unique ID. Here’s the basic structure:
<h1 id="one">Heading One</h1>
<p>Lorem ipsum...</p>

<h1 id="two">Heading Two</h1>
<p>Lorem ipsum...</p>

<h1 id="three">Heading Three</h1>
<p>Lorem ipsum...</p>

<h1 id="four">Heading Four</h1>
<p>Lorem ipsum...</p>
This structure is partnered with a simple navigation menu made up of list items containing anchor tags. Each anchor tag points to one of the fragment identifiers that we set up. The functionality here is extremely handy: when you click on one of the list items, the page automatically jumps to the corresponding heading. Give it a shot to see it in action. Keep in mind this works with pure HTML, no CSS necessary.
<ul>
    <li><a href="#one">One</a></li>
    <li><a href="#two">Two</a></li>
    <li><a href="#three">Three</a></li>
    <li><a href="#four">Four</a></li>
    <li><a href="#five">Five</a></li>
    <li><a href="#six">Six</a></li>
    <li><a href="#seven">Seven</a></li>
</ul>
Leveraging :target To Create Click Events
Now that we’ve got a simple demo up and running that utilizes unique IDs and fragment identifiers, it’s time to pull out our :target pseudo class. Anything within a :target style block will be activated only when a fragment identifier is currently active in the URI. In a way, :target can be used to create the ever elusive CSS click event.
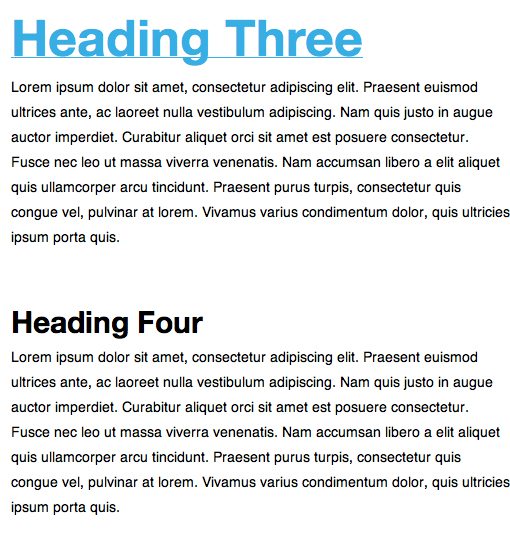
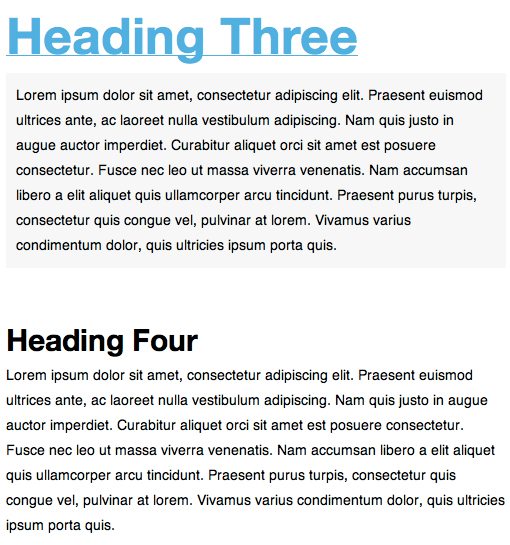
For instance, let’s say we wanted to make it so that the item that is clicked on in our navigation menu is somehow changed. This will allow users to clearly identify the section that they’re jumping to. To accomplish this, we’ll use the selector “h1:target” and add some variation through font-size, color and text-decoration. Check out the demo here.
h1 {
   font: bold 30px/1.5 "Helvetica Neue", Arial, Helvetica, Geneva, sans-serif;
}

h1:target {
   font-size: 50px;
   text-decoration: underline;
   color: #37aee4;
}
Animate It
You’re free to use :target pretty much however you would use :hover, which means you can have all kinds of fun adding animation effects. Here we added a nice little transition for the color change. See it live here.
h1 {
   font: bold 30px/1.5 "Helvetica Neue", Arial, Helvetica, Geneva, sans-serif;
   -webkit-transition: color 0.5s ease;
   -moz-transition: color 0.5s ease;
   -o-transition: color 0.5s ease;
   -ms-transition: color 0.5s ease;
   transition: color 0.5s ease;

}

h1:target {
   font-size: 50px;
   text-decoration: underline;
   color: #37aee4;
}
Manipulating Non-Targeted Objects
Let’s say we wanted to also change the accompanying paragraph when a given heading is targeted. This may sound difficult since we’ve already set up our HTML structure so that the unique IDs are used only on the h1 tags, but remember that CSS gives us a number of powerful selectors. We can actually use a click on the targeted element to manipulate other objects on the page.
In our example, targeting the paragraph element after the clicked h1 is as easy as pulling out the adjacent sibling combinator. The code is below and the demo is here.
h1:target + p {
   background: #f7f7f7;
   padding: 10px;
}
Create a Simple CSS Slideshow
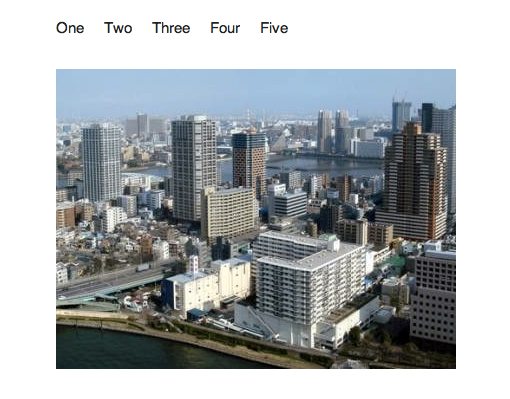
Given this as a starting point, developers have come up a with a ton of great applications for utilizing the :target pseudo class. You can use it to make a pure CSS tabbed interface or even an image slideshow. Let’s see how to create the latter.
To start, we need to code up an unordered list. Each list item will contain an anchor tag pointing to a fragment identifier, followed by an image with a matching ID.
<div id="slideshow">
  <ul>
    <li><a href="#one">One</a><img id="one" src="http://lorempixum.com/400/300/city/5"/></li>
    <li><a href="#two">Two</a> <img id="two" src="http://lorempixum.com/400/300/city/4"/></li>
    <li><a href="#three">Three</a> <img id="three" src="http://lorempixum.com/400/300/city/3"/></li>
    <li><a href="#four">Four</a> <img id="four" src="http://lorempixum.com/400/300/city/2"/></li>
    <li><a href="#five">Five</a> <img id="five" src="http://lorempixum.com/400/300/city/1"/></li>
  </ul>
</div>
Now we’re going to use some clever positioning to push everything into place and of course a little :target magic to make it all work. See if you can figure out what’s going on here before I walk you through it.
* {
  margin: 0px;
  padding: 0px;
}

#slideshow {
	margin: 50px auto;
	position: relative;
	width: 400px;
}

ul {
  list-style: none;
}

li {
	float: left;
	overflow: hidden;
	margin: 0 20px 0 0;

}

li a {
	color: #222;
	text-decoration: none;
	font: 15px/1 Helvetica, sans-serif;

	-webkit-transition: color 0.5s ease;
	   -moz-transition: color 0.5s ease;
	     -o-transition: color 0.5s ease;
	    -ms-transition: color 0.5s ease;
	        transition: color 0.5s ease;
}

li a:hover {
	color: #50b0df;
}

li img {
  position: absolute;
  top: 50px;
  left: 0;
  z-index: -1;

  -webkit-transition: opacity 1s ease-in-out;
     -moz-transition: opacity 1s ease-in-out;
       -o-transition: opacity 1s ease-in-out;
      -ms-transition: opacity 1s ease-in-out;
          transition: opacity 1s ease-in-out;

}

li img:target {
	z-index: 1;
}

li img:not(:target) {
	opacity: 0;
}
First we floated our list items to the left, styled the text and applied a hover effect. The interesting part about the positioning is that we’ve scooted all our images away from the text part of their list items using the wonderful technique of absolute positioning inside of a relatively positioned parent. Read this article to learn all about how this works.
Next, we set the z-index of all of the images to -1, then set the z-index of the targeted image to 1. This causes the list item that you click on to bring its image above the others. To make the switch nice and gradual, we reduce the opacity of the other images to zero and add in a CSS3 transition. See the pure CSS slideshow demo here.
Browser Support
The :target pseudo class selector is a CSS level three selector, all of which have awesome support on pretty much every browser around… except of course for IE. Good old Internet Explorer supports CSS3 selectors in version 9 and 10, but nothing older than that.
For this reason, it’s largely unwise to use :target on anything that directly affects the success of user interaction. For instance, it might be fine for the optional differentiating styles from our first few examples but our slideshow won’t work at all for IE8 and older users.
Selectivizr To The Rescue
As with any IE CSS3 selector problem, there’s actually a pretty easy fix that allows you to utilize :target without excluding the sad human beings who run antiquated versions of a browser built by Microsoft: Selectivizr.
Just drop in your favorite JavaScript library like jQuery or MooTools, then paste in a snippet of code from Selectivizr and the rest is taken care of in a completely automated fashion. Selectivizr will work its voodoo to bring impressive CSS3 selector support to IE6 and up.
Conclusion
Utilizing pseudo classes can be tricky, but once you get a feeling for how some of them work, the types of things you’ll be able to pull of with pure CSS will amaze you. The “:target” pseudo class is a great example of something that can dramatically change the way you structure user interactions. Just be sure you don’t run off and use it too much without considering the ramifications that it will have on browser support.
Leave a comment below and let us know what you think of :target. Have you ever used it in a real project? Why or why not?