5 Quick Google Slides Tips & Tricks
If you aren’t using it already, Google Slides might quickly become one of your favorite tools. For anyone with a Google account, the presentation software is included to use completely free of charge.
It’s packed with tools to help you make great presentations with ease, and it supports downloadable templates to help you get started fast.
Make the most of this presentation tool with these tips and tricks that make Google Slides that much more functional!
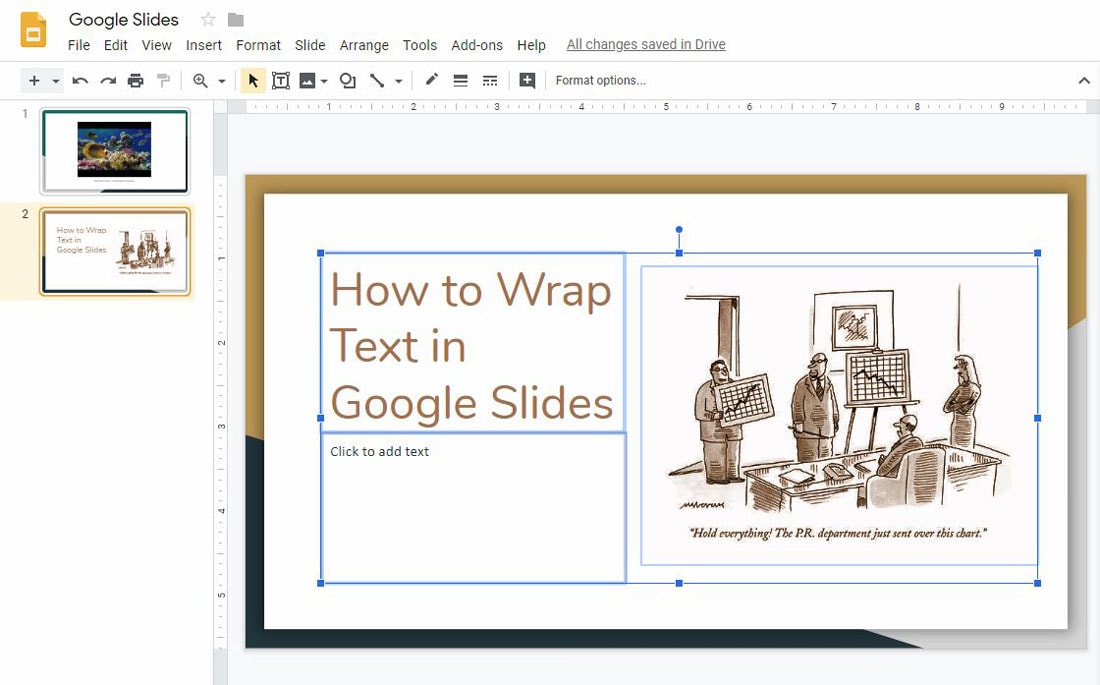
1. How to Wrap Text in Google Slides
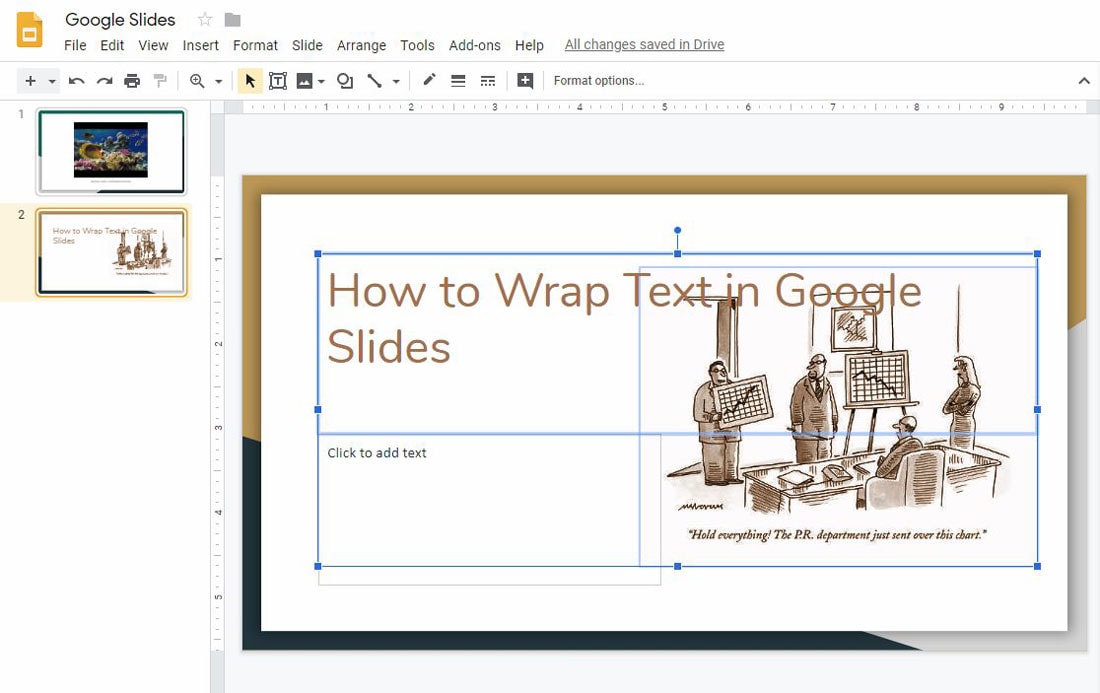
As a designer, you probably love text wrap. Put a halo on an image and all the text just bumps right off it. Unfortunately, Google Slides doesn’t quite work this way.
To wrap text in Google Slides, take care with text and image frames.
Use the handles on text and image boxes to adjust the height and width of these boxes. That’s how you essentially wrap text using this tool. It is not as precise as design software, but it can do the trick for most slide designs.
One more trick? Send the image to the back using Arrange > Order > Send to back. Then use returns to stack text in a certain format within the text frame.
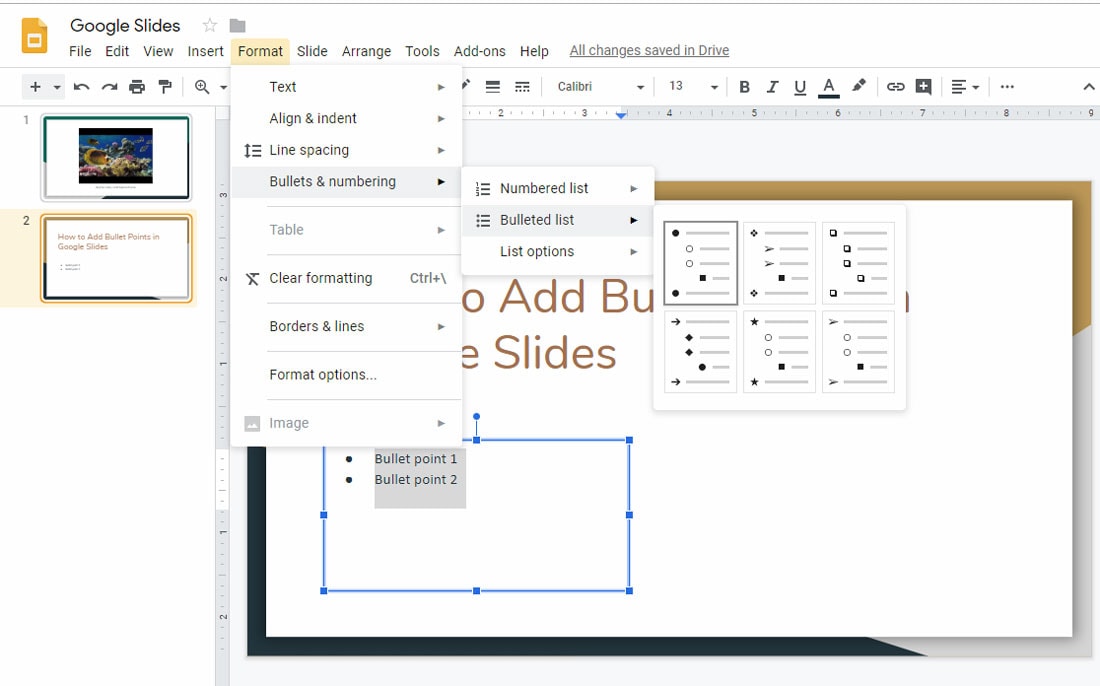
2. How to Add Bullet Points in Google Slides
Bulleted lists seem to be a staple in presentations.
Short lists can actually reinforce an idea without forcing the audience to read too many things during the talk.
Add bullet points in Google Slides text boxes by navigating to Format > Bullets & numbering > Bulleted list > Pick the style you like from the visual options. Make sure you first clicked on the box to which you want to add bullets (it will bullets to each paragraph) or highlight only the text elements you want to convert into a list.
Choose from multiple style options to find what works best for your presentation. Subsequent paragraphs will also use bullet formatting.
3. How to Print Google Slides with Notes

Plenty of presenters like to add what they plan to say or notes into the notes view of each individual slide. Google Slides allows printing with both the slide image and these notes printed on each page.
Navigate to File > Print settings and preview > Change dropdown to 1 slide with notes.
Other printing options include the ability to print single slides or handout views with 1, 3, 4, 6, or 9 slides per page. Prints can be done in landscape or portrait view and can be printed to a physical print or to PDF for digital sharing.
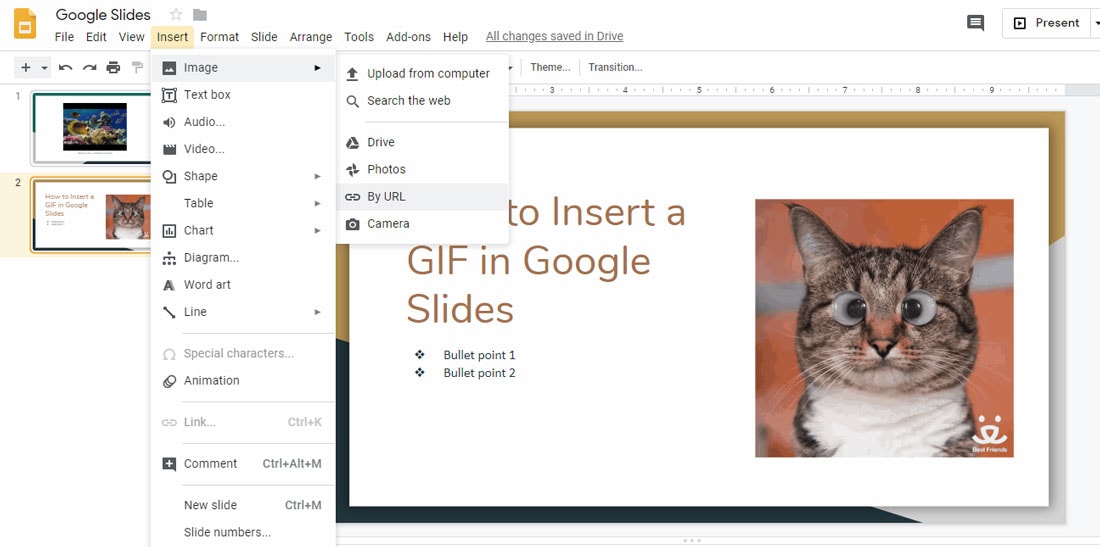
4. How to Insert a GIF into Google Slides
Spice up your presentation with an animated GIF.
Google Slides supports using still images in most common formats as well as GIF animations and video.
To insert a GIF, navigate to Insert > Image > then pick where your GIF file is located. If you will have an internet connection during the live presentation, you can even use that URL to pull and add the GIF to your slide.
To do this, select By URL and then paste in the image location. If an animated preview appears, you added a valid image address. (If the URL is not valid for a GIF image, it will return an error message.) Note that to use a URL, it has to be the image link, not a link to a webpage containing an image.
Click Insert to add the GIF. Then drag and drop the image to the preferred location on the slide.
5. How to Convert Google Slides to PowerPoint
Depending on where you are presenting, it might be better to convert your Google Slides to a PowerPoint document. This can be because of the computer or system you are using or because you might present in a location without an internet connection and don’t want to use offline mode.
Regardless of the reason, Google Slides can be exported into a number of different formats including PowerPoint. Note that internet-connected features, such as inserting a GIF from the web or linking to a video will render as still images in an exported Google Slides file.
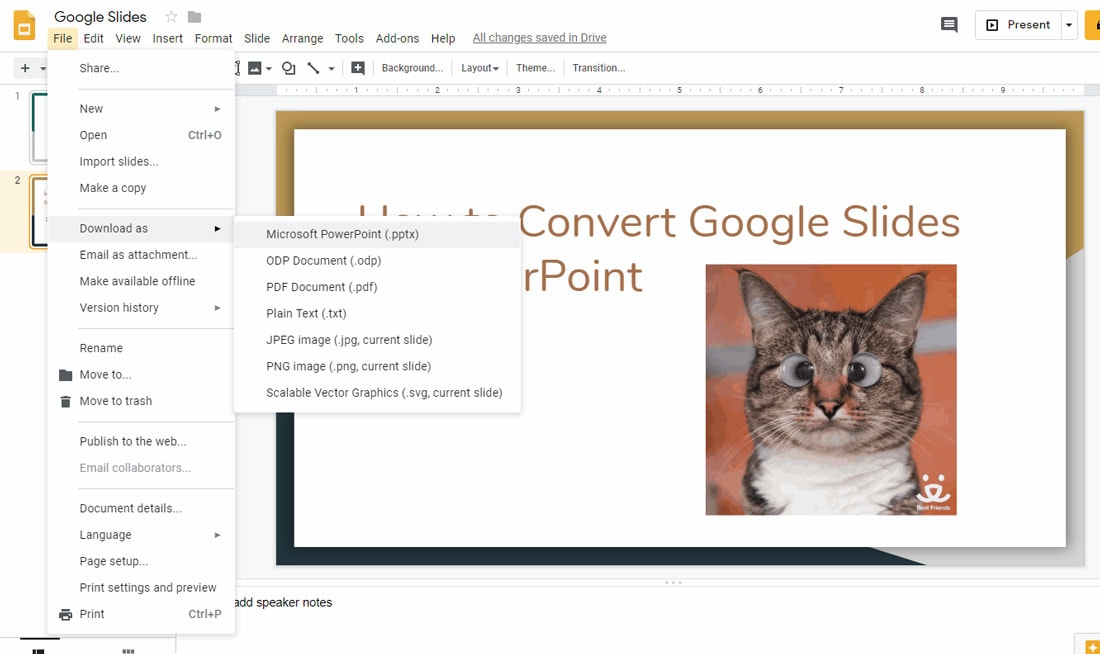
To export Google Slides to PowerPoint go to File > Download as > Microsoft PowerPoint (.ppxt). Once you click the file type – in this case PowerPoint – the download should start. It will be located in the downloads folder of your local computer unless you specify otherwise.
You can open the file in PowerPoint and make changes or run the slide show. Formatting, text and image elements, and created slides will all download in the new file. Everything is editable so you can continue to work or make changes.
It is important to skim through slides before presentation after an export. If anything funny is going to happen to the formatting – from font changes to missing images – this is where it is most likely to happen. Look at all the slides ahead of time to make sure everything in your presentation is formatted and looks like you intend.
Conclusion
Google Slides is a powerful presentation tool and although it works differently than some other software you may be more used to, it is rather intuitive and easy to manage.
Jumpstart Google Slides projects with themes from our collections here on Design Shack. Themes can be a great design starter with slide options for almost every presentation imaginable. Pair them with these tips and you’ll be creating highly-visual presentations in no time.