How to Add Page Numbers in InDesign (+ Design Tips)
Adding page numbers to your InDesign documents helps keep your layout organized and makes it easier for readers to navigate your content.
In this article, we’ll walk you through the process of adding page numbers to your InDesign projects using Master Pages and automatic page numbering.
We’ll also share four tips on how to customise and improve the page numbering in your document in a few creative ways!
Using Master Pages to Add Page Numbers
Master Pages are a powerful feature in InDesign that allows you to create consistent formatting across multiple pages in your document. To add page numbers using Master Pages, follow these steps:
- Open your InDesign document and go to the “Pages” panel (Window > Pages).
- In the “Pages” panel, you’ll see two sections: the top section contains your Master Pages, while the bottom section displays your document pages. Double-click on the Master Page (usually named “A-Master”) where you want to add the page numbers.
- Select the “Type Tool” (T) from the toolbar and create a text frame where you want the page number to appear.
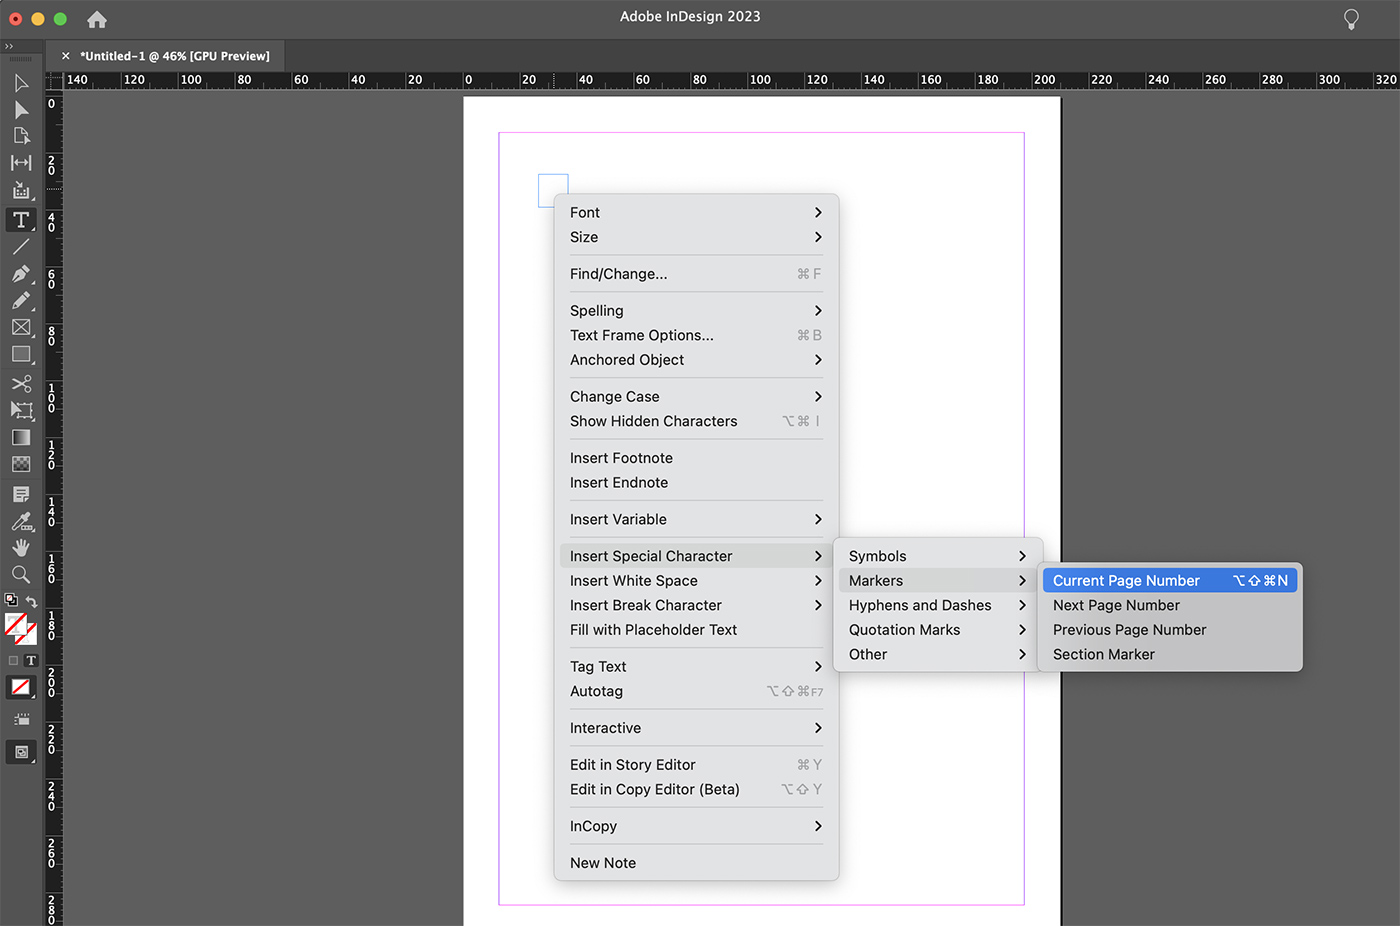
- With the text frame selected, go to the “Type” menu and choose “Insert Special Character” > “Markers” > “Current Page Number.” A placeholder letter (such as “A”) will appear in the text frame, representing the page number.
- Format the text in the text frame to match your desired style (font, size, color, etc.).
- Return to the “Pages” panel and drag the Master Page thumbnail onto the pages where you want the page numbers to appear. The page numbers will be automatically added to those pages.
Adding Page Numbers to Multiple Master Pages
In some cases, you may need to use different Master Pages for different sections of your document. To add page numbers to multiple Master Pages, follow these steps:
- Create a new Master Page by clicking the “New Master” button in the “Pages” panel or by choosing “New Master” from the panel’s dropdown menu.
- Repeat the steps outlined in the “Using Master Pages to Add Page Numbers” section for each Master Page where you want to add page numbers.
- Apply the appropriate Master Page to each document page in the “Pages” panel by dragging the Master Page thumbnail onto the corresponding pages.
Customizing Page Numbering
InDesign offers several options for customizing page numbering. Here are some common customizations you might want to apply:
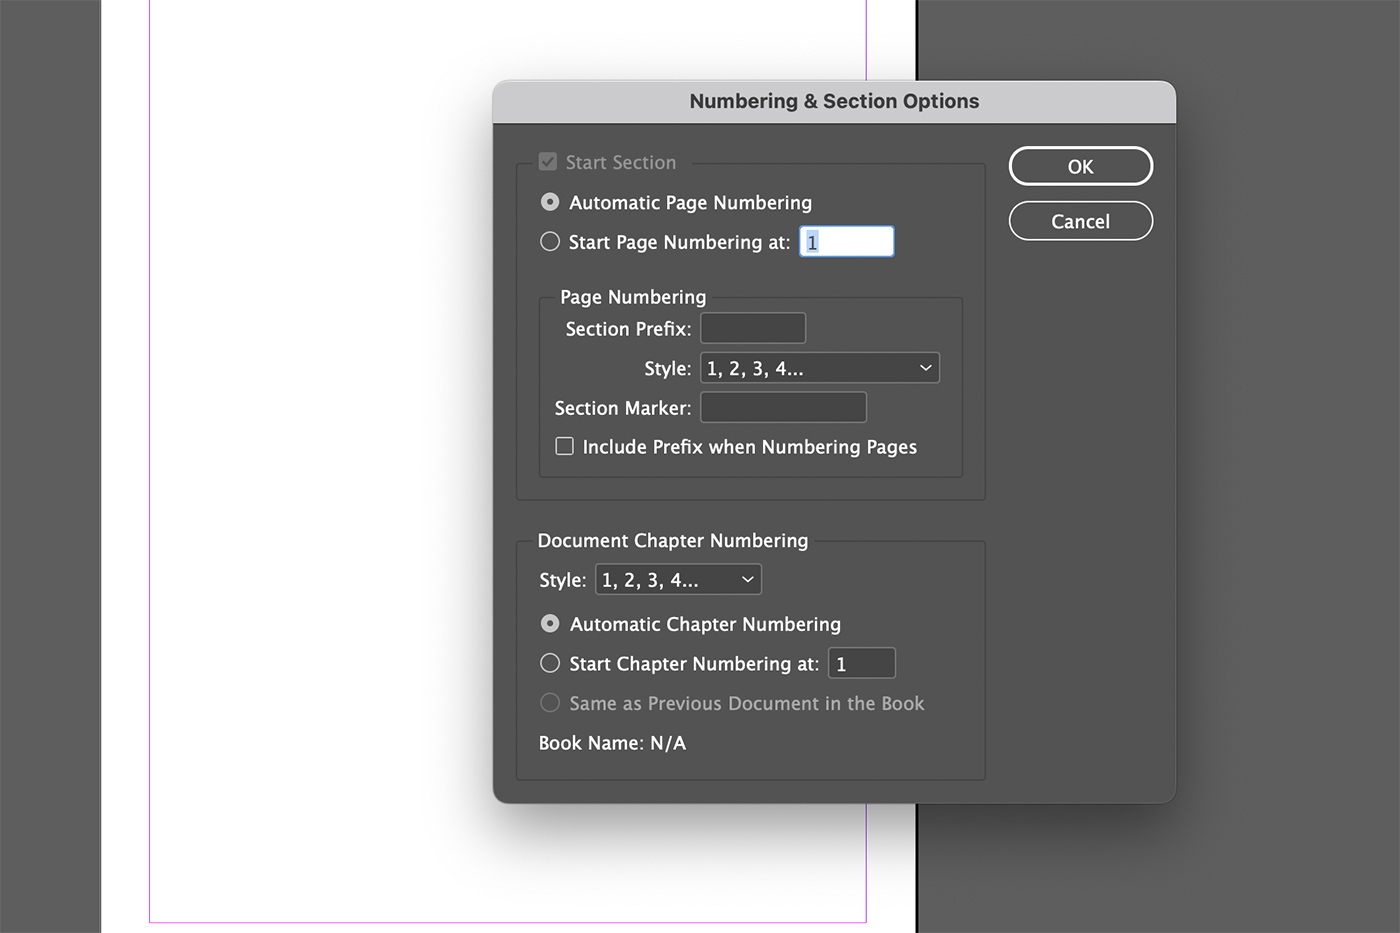
- Changing the starting page number: Go to “Layout” > “Numbering & Section Options.” In the dialog box, check the “Start Page Numbering at” box and enter the desired starting page number.
- Using different numbering styles: In the “Numbering & Section Options” dialog box, choose a different numbering style from the “Page Numbering” dropdown menu (e.g., Roman numerals, alphabetical).
- Creating sections with different numbering: To create a new section with its own numbering, select a page in the “Pages” panel, and then click the “Panel Options” menu (three lines in the top-right corner of the panel). Choose “Numbering & Section Options” and customize the settings for the new section.
4 Tips for Using Page Numbers
Tip 1: Customize Page Number Styles
Take advantage of InDesign’s Paragraph Styles and Character Styles to create a consistent and professional look for your page numbers. You can customize the font, size, color, and other formatting options to match your document’s overall design.
By using styles, you can quickly update the appearance of all page numbers throughout your document with just a few clicks.
Tip 2: Use Sections to Restart or Change Page Numbering
InDesign allows you to create sections within your document to control page numbering. This is especially helpful for documents with multiple parts, such as books or reports. By defining sections, you can restart page numbering at “1” for each part or change the numbering style (e.g., from Roman numerals to Arabic numerals).
To create a new section, select the first page of the section in the Pages panel, then choose “Numbering & Section Options” from the panel menu, and customize your settings.
Tip 3: Exclude Page Numbers from Certain Pages
There might be instances when you don’t want to display page numbers on specific pages, like the cover, table of contents, or chapter title pages. To exclude page numbers from these pages, you can use the Master Pages feature.
Create a new Master Page without page numbers, and apply it to the pages where you want to remove the numbering. This way, you can maintain a consistent design without displaying page numbers on every page.
Tip 4: Add Prefixes or Suffixes to Page Numbers
For added clarity and organization, consider using prefixes or suffixes alongside your page numbers. This can be particularly helpful in multi-part or multi-chapter documents. For example, you could add “A-” before the page numbers in the appendix or “C” before chapter numbers.
To do this, go to the “Numbering & Section Options” in the Pages panel and add the desired prefix or suffix in the “Page Numbering” section.
Conclusion
Adding page numbers in InDesign is a simple process that helps ensure your document is organized and easy to navigate. By using Master Pages and automatic page numbering, you can create a consistent look and feel across your entire project.
Additionally, InDesign’s customization options for page numbering allow you to tailor the numbering style to your specific needs, giving your document a polished and professional appearance. With these tools at your disposal, adding and managing page numbers in your InDesign projects will become second nature, allowing you to focus on creating great content for your readers.