How to Highlight Text in InDesign
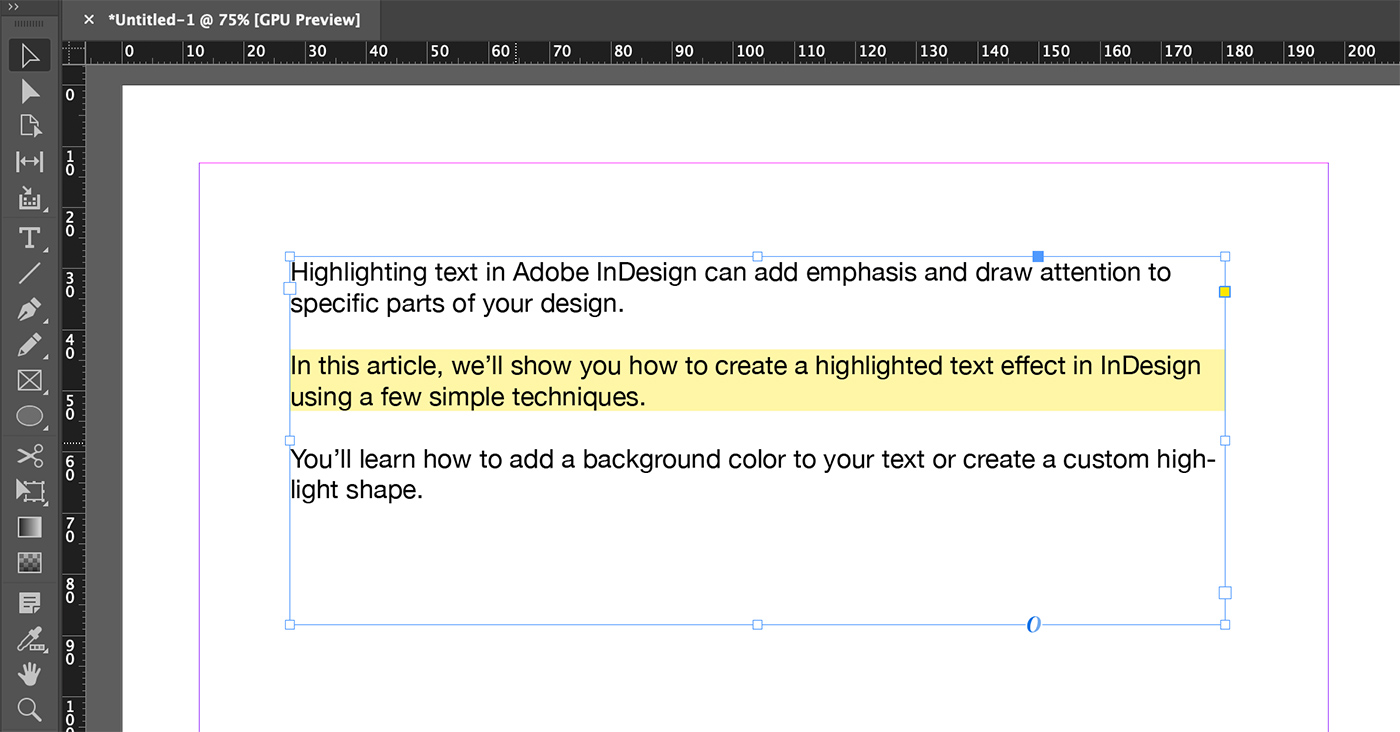
Highlighting text in Adobe InDesign can add emphasis and draw attention to specific parts of your design.
In this article, we’ll show you how to create a highlighted text effect in InDesign using a few simple techniques.
You’ll learn how to add a background color to your text or create a custom highlight shape.
Create a Paragraph Style with a Background Color
One of the easiest ways to highlight text in InDesign is by applying a background color to a paragraph style. Here’s how:
- Select the “Type Tool” (T) from the “Tools” panel and click on your text frame to start typing or select existing text.
- Go to the “Window” menu > “Styles” > “Paragraph Styles” to open the “Paragraph Styles” panel.
- Click on the “Create new style” icon at the bottom of the panel to create a new paragraph style.
- Double-click on the new style to open the “Paragraph Style Options” dialog box.
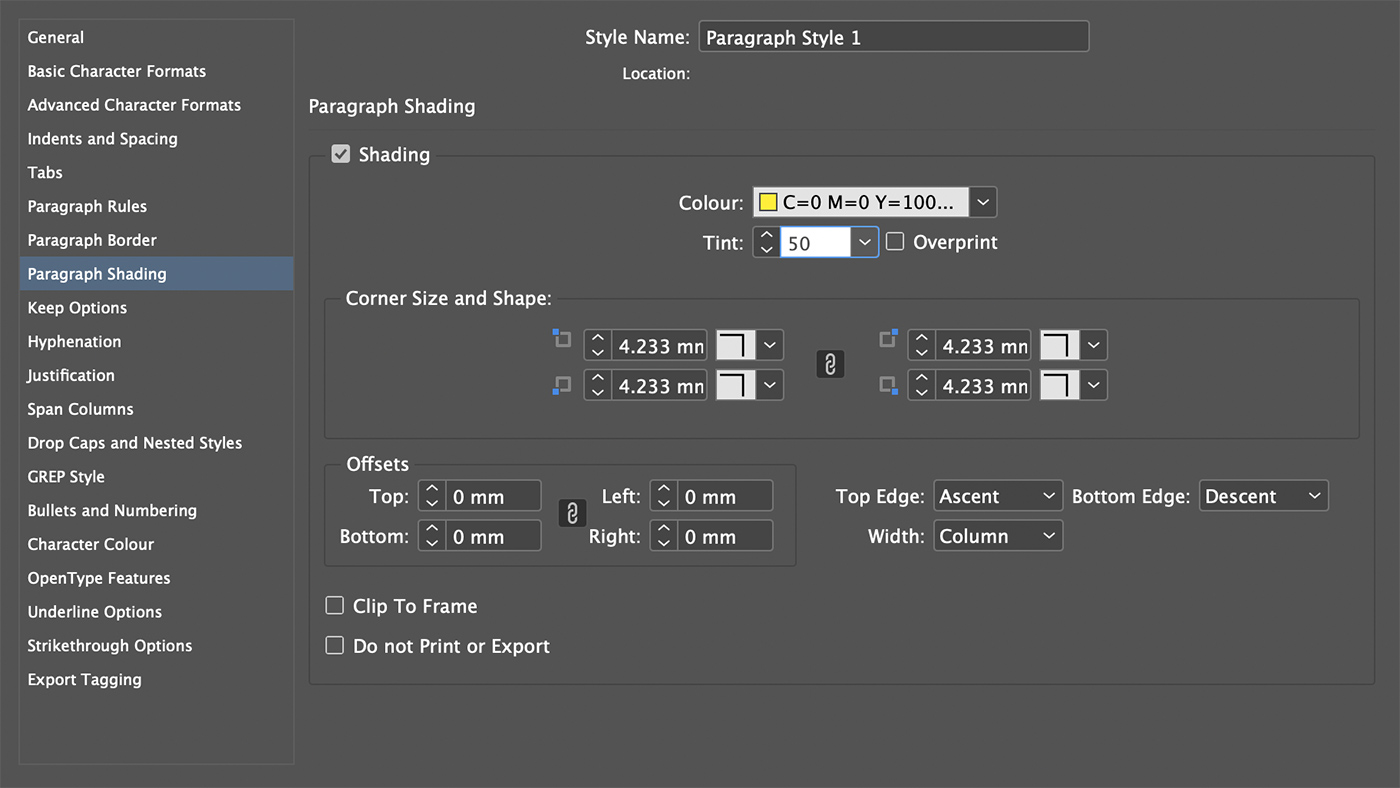
- Click on “Paragraph Shading” in the left column of the dialog box.
- Check the “Shading On” checkbox to enable paragraph shading.
- Choose a color for the shading from the “Swatches” panel or create a new color by clicking on the color box.
- Adjust the “Tint” slider to control the transparency of the shading.
- Click “OK” to apply the shading to the selected text or the new text you type with the new paragraph style applied.
Create a Custom Highlight Shape
Another way to highlight text in InDesign is by creating a custom shape behind the text. Follow these steps:
- Select the “Rectangle Tool” (M) from the “Tools” panel.
- Click and drag to draw a rectangle around the text you want to highlight. Don’t worry about the exact size and position yet.
- Select a fill color for the rectangle using the “Swatches” panel or the “Color” panel. You can adjust the transparency of the color using the “Opacity” slider in the “Effects” panel.
- With the rectangle selected, go to the “Object” menu > “Arrange” > “Send to Back” to place the rectangle behind the text.
- Use the “Selection Tool” (V) to resize and reposition the rectangle as needed to create the desired highlight effect.
Group the Text and Highlight
To keep the text and highlight together when moving or resizing, you can group them:
- Click and drag with the “Selection Tool” (V) to select both the text frame and the highlight shape.
- Go to the “Object” menu > “Group” or press “Ctrl + G” (Windows) or “Cmd + G” (Mac) to group the objects.
5 Tips for Working With Highlighted Text
Tip 1: Choose Appropriate Highlight Colors
When working with highlighted text, choose colors that create a strong contrast with the text color. This will ensure that the highlighted text remains easily readable and visually appealing.
Lighter shades, such as yellow, light green, or light blue, are often used for highlighting dark-colored text, while darker shades may be used for lighter text colors.
Tip 2: Limit the Use of Highlighted Text
Use highlighted text sparingly to emphasize important points or keywords in your document. Overusing highlights can make your design appear cluttered and detract from the overall message. Instead, use highlighting to draw attention to key information or to guide the reader’s eyes through the document in a purposeful manner.
Tip 3: Adjust Highlighted Text Size for Readability
If you’re using a particularly bold or heavy highlight color, it may impact the readability of your text. Consider adjusting the size of the highlighted text to make it more legible.
Increasing the font size can help ensure that the text remains easy to read, even with a strong highlight behind it.
Tip 4: Consider Using Different Highlight Styles
Experiment with different highlight styles to create visual interest and variety in your design. For example, you could use a solid color for some highlights, while using a pattern, gradient, or semi-transparent color for others.
This can help you create a more dynamic and engaging design, while still emphasizing the key points in your document.
Final Thoughts
Highlighting text in InDesign can help draw attention to specific words or phrases in your design. By using either paragraph shading or custom shapes, you can easily create a highlight effect that adds emphasis and visual interest.
Remember to experiment with different colors, shapes, and transparency levels to achieve the perfect highlight for your project.