How to Organize Your Shoots and Catalogs in Lightroom
Typically I stick to strictly design related topics, but today we’re going to stretch that a bit with a quick discussion on Adobe Photoshop Lightroom. Tons of designers take photos for their projects whether they consider themselves “photographers” or not so I’m sure lots of you will find this to be a useful topic.
The main struggle that I see with Lightroom users is simply organization. How can you keep multiple shoots separate? Where should you import your files? These are important questions and the answers aren’t very intuitive so today I’ll walk you through my basic process for keeping various shoots organized.
What Is a Catalog?
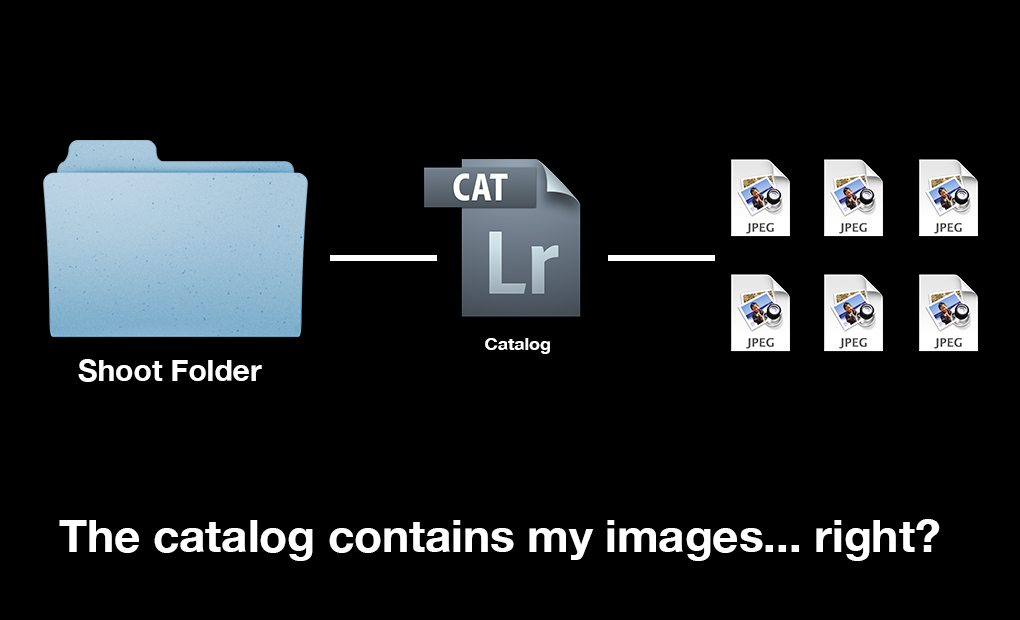
The most significant concept that you need to wrap your brain around when working with Lightroom is what a catalog is and how that relates to the photos that you take.
Instinct tells you that a Lightroom catalog is a sort of box that holds all of the photos that you throw into Lightroom. This is an entirely false misconception though that likely comes from years of Photoshop experience.
Lightroom ≠ Photoshop
In Photoshop, when you open a file, edit it, and hit the “Save” button (not “Save As” but plain old “Save”), you actually write over the file that you started with. When you close your newly update file, the version that existed before is gone forever unless you’ve made some sort of backup.
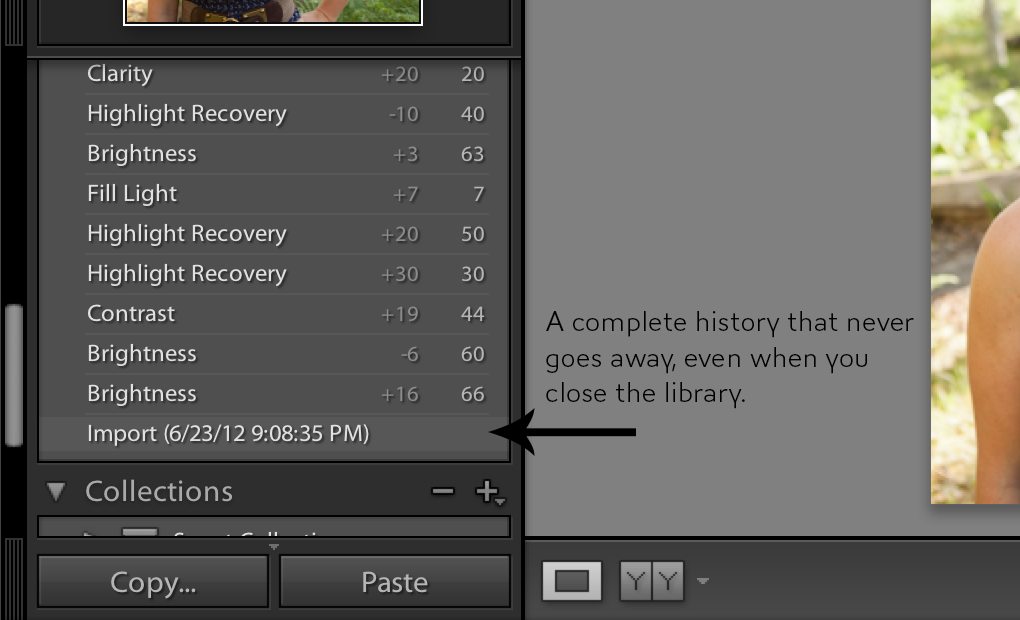
Lightroom however, performs a pretty neat trick. No matter what you do to a photo in Lightroom, even if you move every single slider and press every button to jack up the appearance of an image beyond recognition, the original file remains completely unchanged. The workflow is a purely “non-desctructive” one that always keeps your photos as they were taken completely intact.
What Voodoo Is This?
Wait a dang minute you say, how can Lightroom perform this crazy feat? The answer is that the entire application is built on a different foundation than Photoshop. In Photoshop, you open, edit and save images individually. As I just stated, the original file changes as soon as you hit that “Save” button.
Lightroom though looks at an entire folder of images all at once (or several folders of images). It’s more like Bridge in this regard than Photoshop. A catalog then is a container or database that holds information about the original images: where they’re stored, what the camera settings were when the photo was taken, metadata, etc.
The awesome part is that Lightroom can change much of this information instantly in a live setting without affecting the original source image. It stores these changes as a part of the catalog.
As an example, imagine that you took a trip to the Grand Canyon and shot three hundred full color photos. If you import these photos into a Lightroom catalog and change them all to black and white, the only thing that has been changed is the catalog’s interpretation and presentation of the photos, not the photos themselves. If you navigate your computer’s file browser to the original folder of images, you’ll find that they’re still full color photos.
If you want these changes to actually take affect on the photos, you have to perform an export action. This will effectively open each file, perform the actual destructive changes that you told Lightroom that you’d like to make, then do a “Save As” so that new files are created in the location of your choosing, still leaving your originals untouched. This all happens behind the scenes so all you see of this process is a progress bar.
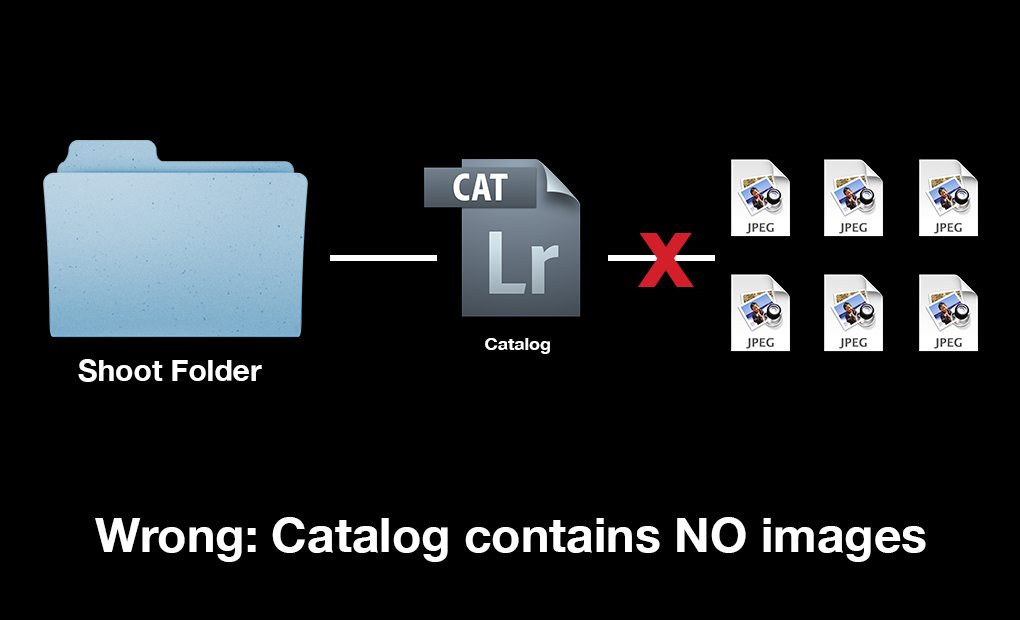
The Bottom Line: A Lightroom catalog is merely a database that holds information about your photos, not the photos themselves.
So What?
Why should you care how Lightroom works? As long as it does its job, that technical stuff is all useless information right? Wrong. This knowledge has major implications for how you organize your images.
The common expectation is that when you import photos into a Lightroom catalog, the photos will be somehow contained inside of that catalog file. The danger here is that while you might think that you’re backing up or storing your photos in an external hard drive, you could in fact merely be working with the Lightroom catalog.
If you have your catalog backed up but you lose the original files, you’re hosed. All of your hard work will be gone. Educating yourself on file organization practices could save you tons of time and frustration in the long run.
My Process for Organizing Lightroom Catalogs
Now that we have a solid grip of what a catalog is, how it’s different than the source folder and how important it is to keep track of both, let’s take a look at how I personally organize all of my photo shoots so you can get a good idea of what a professional Lightroom file organization workflow looks like.
Note: I’ll be using Lightroom 3, if you have a different version, things might look slightly different but the basic process will be virtually identical.
Step 1: Make One Directory for Everything
The very first thing that you need to do, before you even open Lightroom is to manually create a file directory, either on your computer or on an external drive.
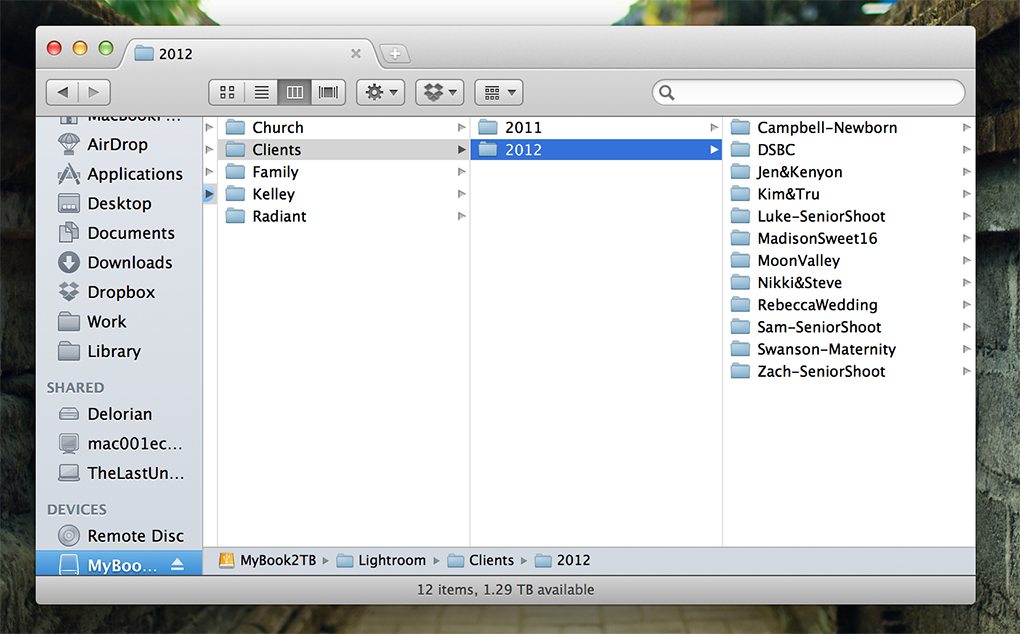
As you can see in the image above, I have a “Clients” folder inside of my Lightroom directory. Inside here, I create a new folder every single time I have a gig and name that folder after the people or subject for the shoot.
Inside of a shoot’s folder, I place literally every file relating to that shoot. The reason for this is so that everything is extremely portable and easy to find. If I click and drag the “Kim&Tru” folder shown above to an external hard drive, the shoot and associated Lightroom files are entirely copied over and can be transported to another machine or saved as a fully functioning backup.
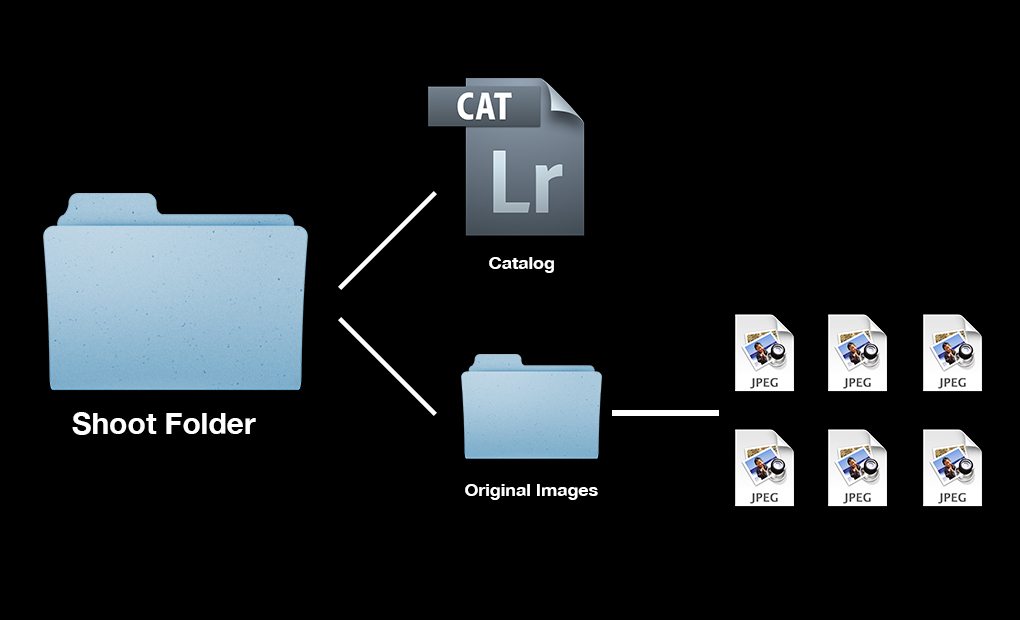
Step 2: Create a New Catalog
Once you’ve created the empty folder for a shoot in your photography directory, then it’s time to launch Lightroom and create a new catalog. This command can be found under the “File” menu item.
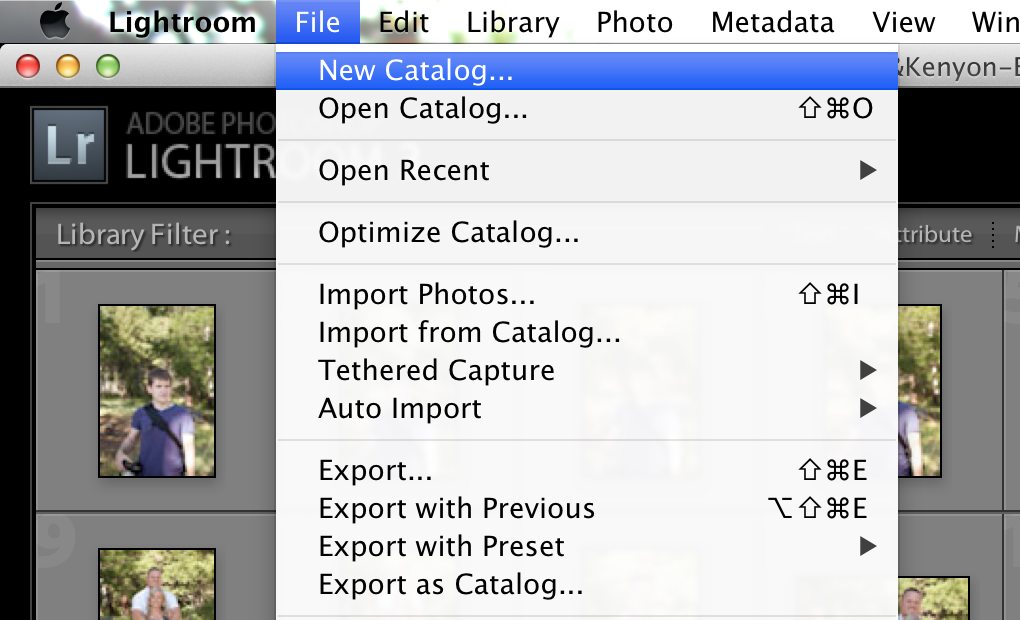
It’s very important that you place this new catalog inside of the folder that you already created for the shoot. Once again, the goal that we’re shooting for is everything related to a shoot resting in one convenient location.
Every Stinking Time?
You may be scratching your head at this point wondering if you really have to create a different catalog for every shoot. The easy thing to do is import everything into one huge catalog, so why not do that?
The answer is easy: If you take lots of photos, throwing everything into one massive catalog is a horrible, messy way to work. Not only will you toss out the benefits of having individual shoots that are easy to move around and back up, you’ll also cause your main Lightroom catalog to become bloated and slow. Keeping your shoots organized into individual catalogs ensures a lean, speedy working environment.
Step 3: Import Your Photos
Now you’re finally ready to import your photos. To do this, go to File>Import Photos…
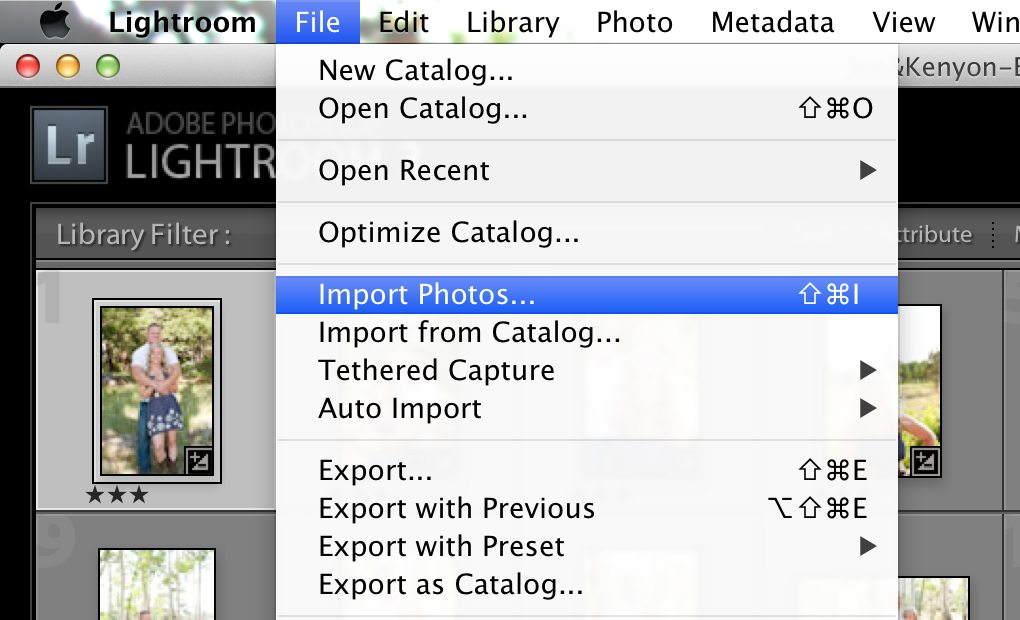
This will bring up the Lightroom Import Dialog. On the left side, you’ll choose your source. This is wherever the images are coming from. Typically, this will be your camera or card reader (this dialog often pops up automatically when plugging in a card reader) but can really be any drive that holds photos.
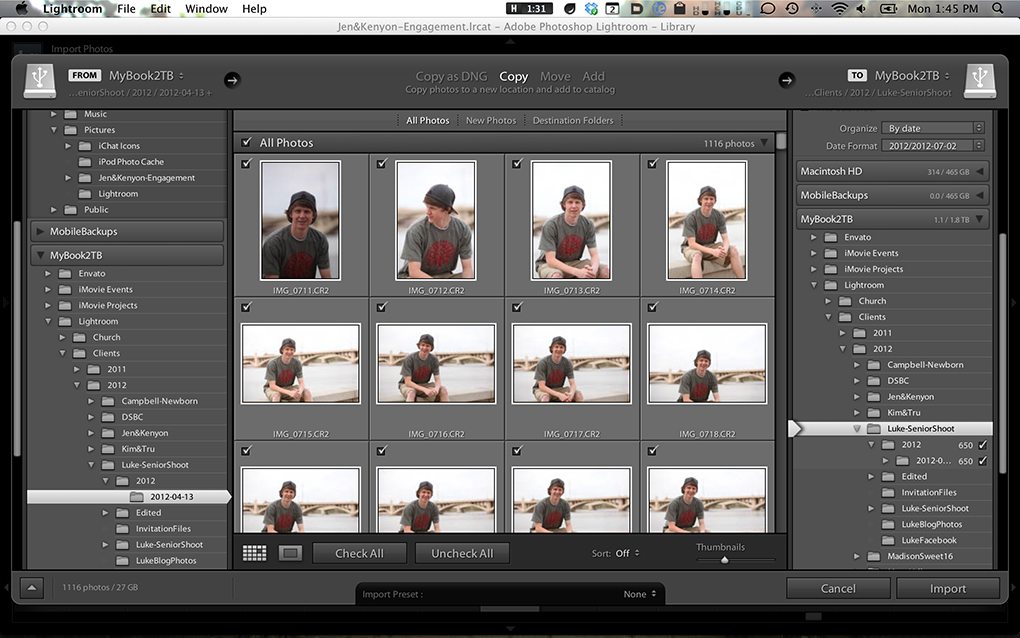
Once you find the photos that you want to import, your instinct will be simply to hit the “Import” button and be finished, but you’re not done yet!
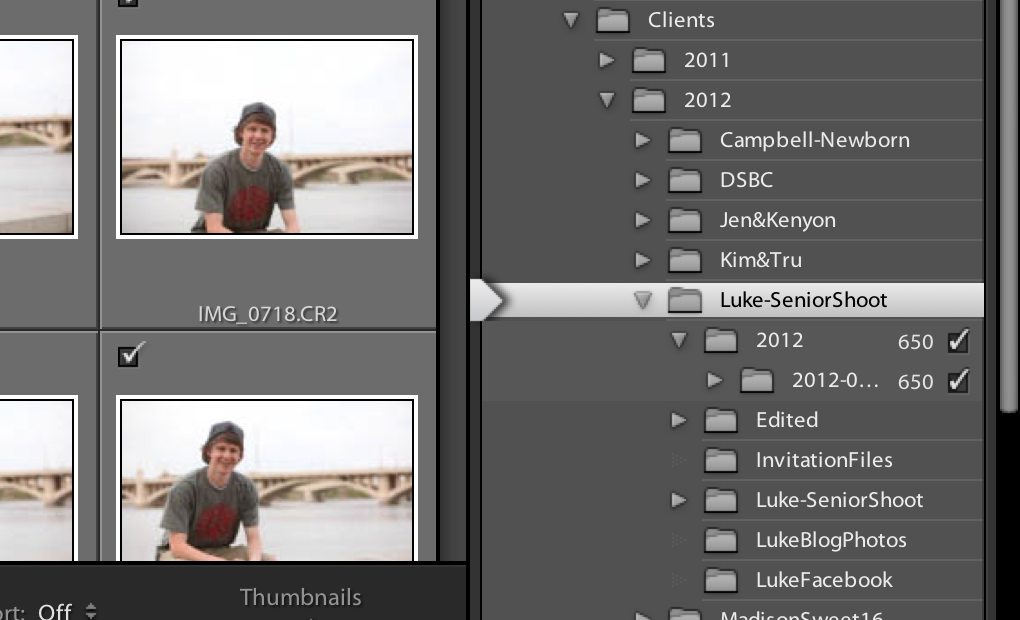
It seems logical that your photos would automatically be imported to wherever your catalog has been created, but that’s not the case at all. By default, Lightroom will import photos into its own self-created directory. To fix this, make sure you set your destination folder in the column on the far right (you’ll have to do this every time you import a shoot).
Just like before when we created the catalog, it’s absolutely critical that you choose the folder from step one that you created for this shoot. When I shot “Luke’s Senior Session” I created a “Luke-SeniorShoot” folder in my clients directory, then I put the “Luke-SeniorShoot” catalog in this folder and chose it as the destination for my import. Keep in mind that Lightroom will typically create a subdirectory or two when performing these actions.
Step 4: Edit and Export
From here you can perform all of your typical organization and editing. I typically go through a five step editing process:
- Browse through all of the photos I took and apply a single star to those that I like (just hit 1).
- Create a Smart Collection of single star photos.
- Edit the single star photos, applying a second star to each once it’s finished.
- Create a Smart Collection of two star photos.
- Export the two star photos.
Once you reach the export step, once again you’ll return to that one folder that you’ve placed your entire shoot in up to this point. In this folder I create an “edited” subfolder where I place my finished images.
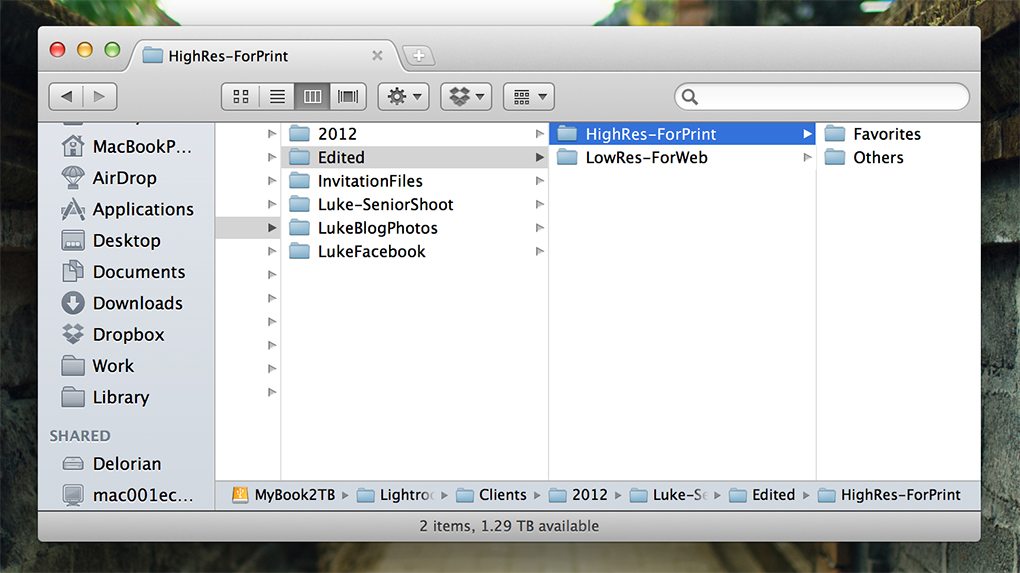
As a completely optional step, I choose some “favorites” that I spend some extra time working with in Photoshop.
Step 5: Changing Catalogs
Using the process outlined above, we’ve met our goal: the entire shoot is wrapped up nicely in one parent folder and all of our shoots are contained in a single directory. At this point, you might be wondering how to close one shoot and open another in Photoshop.
The answer here is simple, navigate to that shoot’s folder and find the file with the “.lrcat” file extension. This is the Lightroom catalog file. To launch it, just give it a double click.
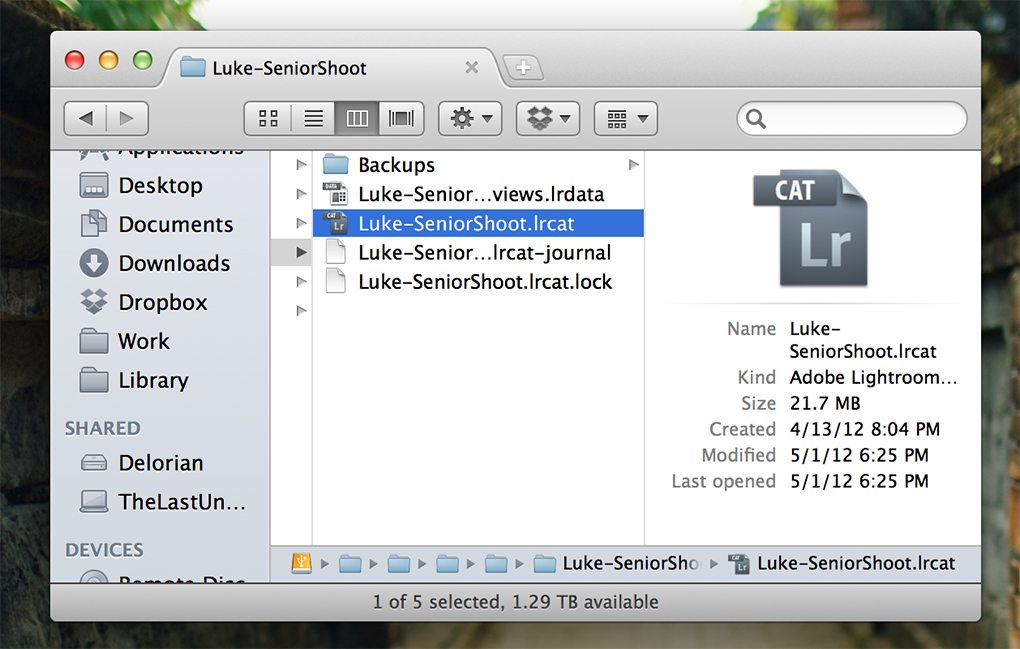
You can also open Catalogs right from Lightroom through the “Open Catalog” option in the file menu. I particularly like to use the “Open Recent” menu any time I want to open something that I’ve recently worked on.
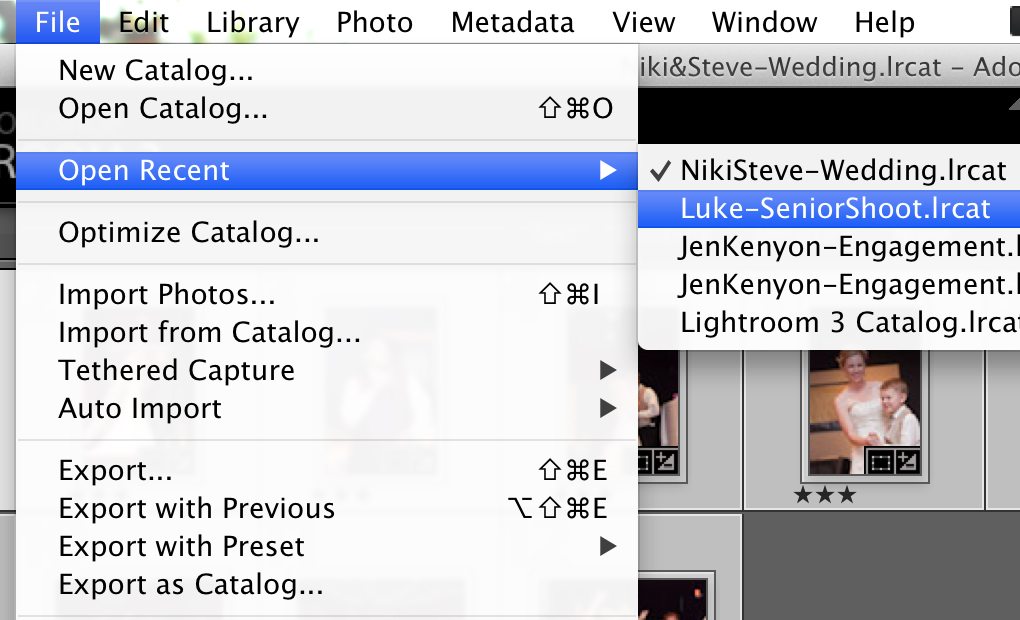
Changing catalogs requires a Lightroom relaunch so it can redirect all of the connections to where they’re supposed to go, but this should only take a few seconds.
Stay Organized and Never Lose Files
Reading through this tutorial makes it seem like managing Lightroom catalogs is an awful lot of work. In reality though, it’s actually really simple. Keep in mind that what takes you minutes to read about can be accomplished in seconds.
Besides, the payoff is worth any extra effort. If people pay you to take photographs that you then take into Lightroom, then you simply can’t afford to not understand how the application works with your files so you can set up a system that’s clearly organized and easy to backup/transfer.
Several parts of my process can be performed differently, it’s the ultimate goal that you really want to keep in mind. If you have a different or better way of achieving the same results, I’d love to hear about it. Leave a comment below and explain how you organize your Lightroom files.