A Beginner’s Guide to Using Google Web Fonts
When Google Web Fonts was first released, we wrote up a quick walkthrough. Since then, the service has been completely overhauled and it’s high time for a thorough walkthrough from scratch.
Join us as we start at the very beginning and discuss what the Google Web Fonts service is and how to get it up and running on your site today.
Give us a few minutes of your time and we’ll open you up to the awesome world of awesome free web fonts.
Why Google Web Fonts?
One upon a time, the web was filled with boring, standard fonts. In order to ensure compatibility across the greatest number of users, web designers were forced to limit their live text font choices to those typefaces commonly found on most machines.
“Font licensing can really be a mess so directly embedding random fonts into a web page isn’t always a good idea.”
This wasn’t the worst thing in the world for the sake of consistency and readability, but it really limited the typographical creativity of the web as a whole. With CSS3, most browsers started supporting @font-face, a way to serve up custom fonts to a web page. Unfortunately, font licensing can really be a mess so directly embedding random fonts into a web page isn’t always a good idea.
Web Font Services

As a solution, a number of @font-face web font services rose up, the best and most famous of which is likely Typekit. Typekit had a beautiful solution: browse through their extensive library of fonts, then just copy and paste some code to implement them on your site.
“Typekit had a beautiful solution: browse through their extensive library of fonts, then just copy and paste some code to implement them on your site. ”
The only problem with services like this is that the cost structure, $49-$99 if you want more than two sites, prohibits many designers from using them. Google came along and did what they always do: took a premium service and offered it up free.
The quality and variety of the typefaces that you’ll find on premium services like Typekit are understandably much better than what you can get for free, but if they’re just not in the budget then Google Web Fonts is absolutely your best bet.
The Bottom Line
Here’s the gist: Google Web Fonts is a completely free and super easy way to implement non-standard fonts on your website in a properly licensed and widely supported fashion.
Meet Google Web Fonts
Now that you get the idea, it’s time to head over and take a look at the Google Web Fonts page.
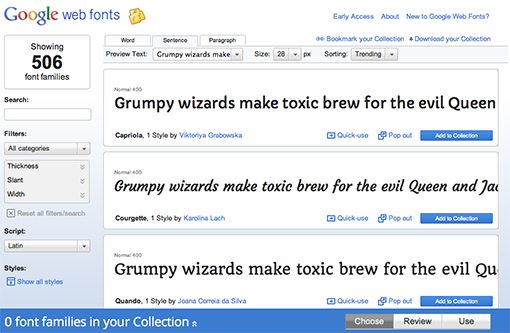
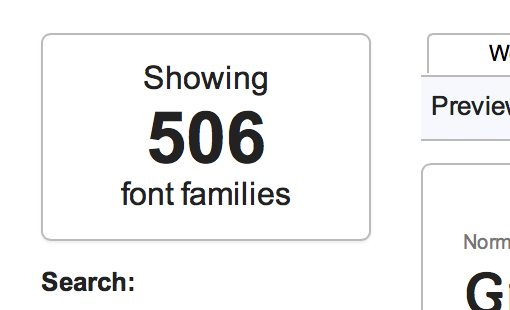
What you’re seeing here is a lot like a standard font application. It’s basically a huge list of all of the available fonts with various previewing and filtering features. Note that, as of the time of this writing, there are 506 separate font families in the library. Not bad for a free service!
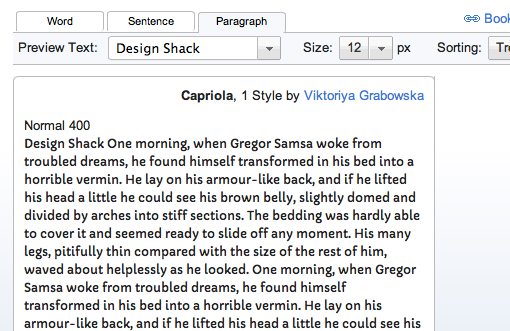
Customizing Your Preview
The largest portion of this page is taken up by the font previews. When you’re choosing a font, it’s absolutely crucial to view it in a similar fashion to how you’re going to implement it. Some fonts look great for headlines but absolutely horrid as body copy.
“When you’re choosing a font, it’s absolutely crucial to view it in a similar fashion to how you’re going to implement it. “
Fortunately, Google Web Fonts allows you to customize your preview to match your use case. You can enter custom preview text, and change your preview size.
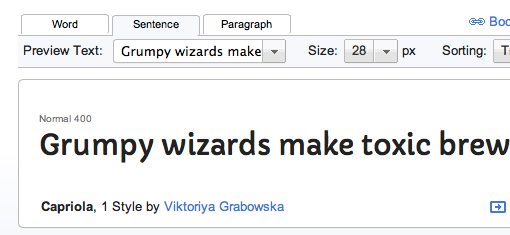
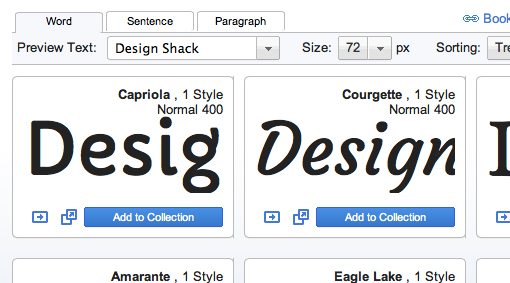
When I want to really get a good look at a font that I’m going to use for a headline, I like to use the “Word” view. The grid layout here is also the best way to browse through lots of fonts quickly.
The most important part is to make sure to preview any body copy that you’re going to use in paragraph view. It’s honestly a good idea avoid using a custom font if you have a lot of body copy, but there are plenty of legitimate use cases here, so just use caution.
Sorting and Filtering
As we saw above, there are over five hundred font families to sift through. That can be a brutal task if you’re simply scrolling through them one by one, but the filtering and sorting options here can dramatically simplify this process and help you hone in on exactly what you need.
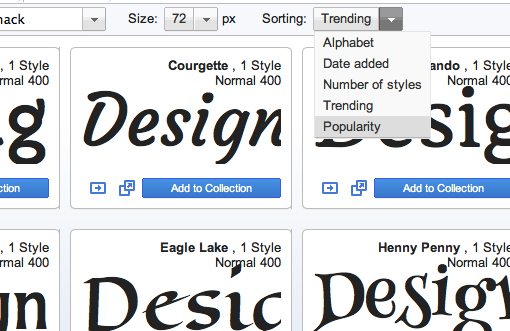
Sorting by Popularity and Date Added
One quick thing that you can do right away is to change the sorting method. I like to see what’s popular or recently added. It’s also helpful that you can easily sort by how many styles are in the family. This allows you to grab a versatile family that can be used in various widths and styles.
Filtering by Characteristics and Style
By far, the most helpful way to improve your results is to use the filtering options. This is especially useful if you know the type of typeface that you’re looking to implement. For instance, if you know that you want a handwritten font, then you can disable all of the other types from the results.
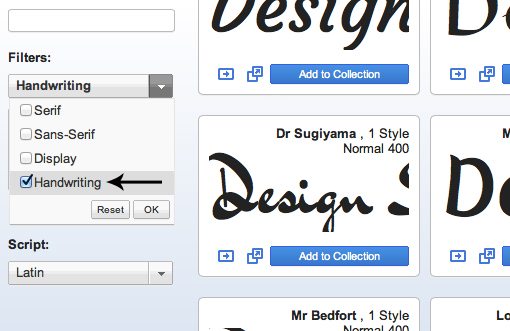
It doesn’t stop there, Google goes even further by allowing you to tweak the results based on the thickness, slant and width of the characters. That’s a really cool feature that I’ve never seen anywhere else.

Choosing Fonts
Google has set up a pretty versatile system for choosing and implementing various fonts, meaning that there are a number of ways to go about various tasks. There’s no right or wrong here, only what works best for you and your unique workflow.
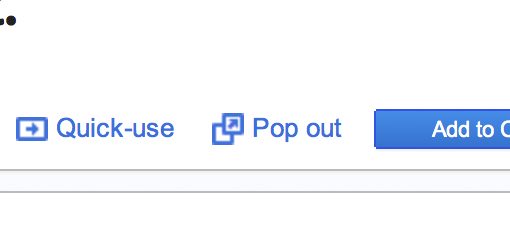
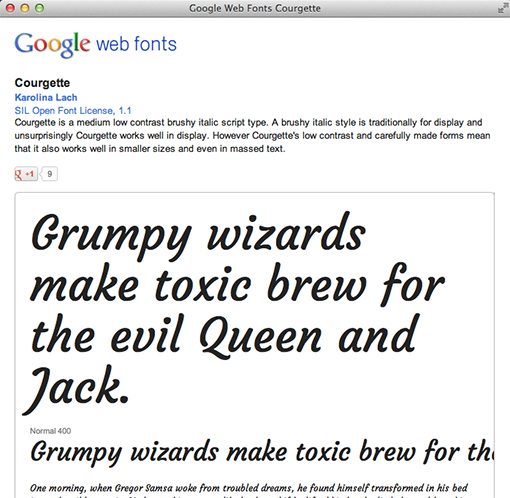
One way to work is to go through and hit the “Quick Use” button when you see a font that you like. This will take you to a page that shows you how to use that font, which we’ll see later. You can also use the “Pop out” button to see an informational window that tells you more about the font.
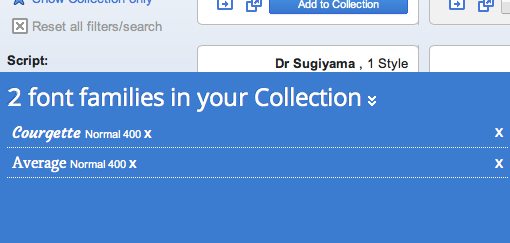
If you’re going to use multiple fonts, then the most efficient way to work will be to use the “Collection” feature. As you find different fonts that you’d like to use, hit the “Add to Collection” button to see the font added to your list at the bottom of the screen.
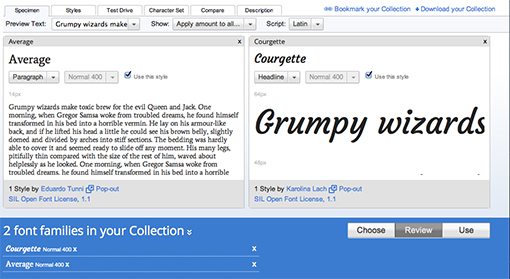
From here, you can “Bookmark” or “Download” your collection using the controls at the top of the screen, or choose between the “Review” and “Use” buttons at the bottom of the screen.
Using Fonts
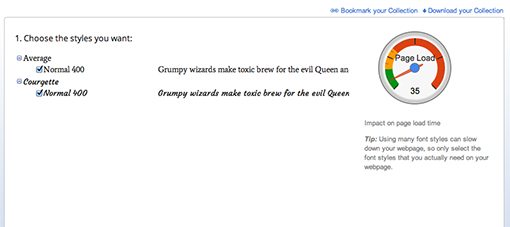
Once you’re ready to see these fonts in action, jump over to the “Use” tab. The first thing you’ll see here is a list of the fonts in your collection with the ability to activate and deactivate your various choices. There’s also a handy meter that estimates the impact these fonts will have on your page load time.
From here, implementing the fonts is as simple as copying and pasting some code. You’ll have three options to choose from for the initial embed: Standard, @import and JavaScript.
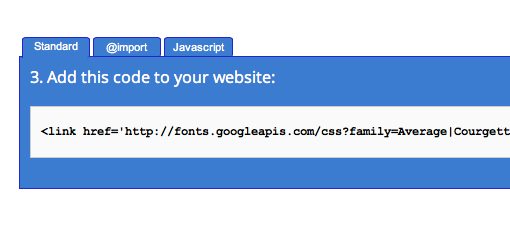
- Standard – This is a standard stylesheet link that you’ll place in the head portion of your HTML file. This saves you the step of adding the @import rule to your CSS file because you’re essentially adding in a stylesheet that already has it thrown in.
- CSS – If you don’t want to link to the auto-generated stylesheet in your header, then use the CSS @import rule shown in the second tab.
- JavaScript – The code in here is part of the WebFont Loader, which is a JavaScript library that was actually developed by both Google and Typekit that will give you more control over font loading. You can read more about it here.
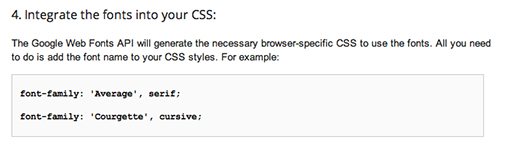
Once you’ve imported the fonts correctly, then all that’s left is to implement the fonts in your CSS font family just like you always would. The snippet for this is near the bottom:
An Example
Now that we understand all of the various snippets and what they do, I’ll walk you through how I usually implement a collection of fonts. The first thing that you’ll want to do is grab the HTML snippet and toss near the top of your HTML like so:
<!DOCTYPE html>
<html>
<head>
  <meta charset=utf-8 />
  <meta name="description" content="description">

  <title>Page Title</title>
  <link href='http://fonts.googleapis.com/css?family=Average|Courgette' rel='stylesheet' type='text/css'>
</head>
Next, jump over to the CSS. What we’re going to do here is pretty different than what we saw above. Here’s the code:
h1 {
  font: 400 45px/0.5 'Courgette', Helvetica, sans-serif;
}

p {
  font: 400 14px/1.5 'Average', Times, serif;
}
First, I used the CSS font shorthand to save some room. This allows us to type in all of the characteristics of our font on a single line which is great.
The first value you see is “400” in both the h1 and the paragraph. I inserted this to make sure that the browser is showing these fonts at the weights that they were meant to be displayed at, and we saw earlier that the intended weight is 400.
Next, I set the font size followed but the line height. Notice that I didn’t use any sort of units for the line-height, this is a neat trick that will apply a relative line-height that changes with the font-size.
Finally, I insert the Google fonts and use my own backups because I don’t think you should ever use the default browser choices for “cursive,” which is what Google uses in its snippet.
That’s really all we need to do. Load up your live preview in a browser and you should see your custom fonts being perfectly displayed.

Go Use It!
You’ve just learned all about how to use Google Web Fonts, now it’s time to get out there and put this knowledge to use in your own site. Browse through the available fonts and think about how you can improve the typography in your projects. Always remember that, with custom fonts, less is more. Go easy and use this tool selectively.
If you’re having trouble choosing, be sure to check out our collection of 10 Great Google Font Combinations You Can Copy (also hit up part two!).