How to Add Fonts to Photoshop (Mac and Windows)
There’s no need to be intimidated when it comes to adding fonts to Adobe Photoshop for use in projects. Whether you’re on a Mac or Windows, adding a font to Photoshop can be a straight-forward process.
Any designer will regularly need to be working with new fonts and typography, and knowing how to quickly get them working in your design app is a key part of your workflow.
Today, we’ll walk you through how to add fonts to Photoshop (using a few different methods) so that you can speed up your workflow like a pro.
Add to Add Fonts to Photoshop
While Adobe Photoshop isn’t the first choice for design software when it comes to documents with a lot of text, font use and manipulation is an important part of this design tool.
Whether you are creating something from scratch or opening a document from somewhere else, the ability to add fonts to Photoshop is important. Thankfully, it’s also pretty easy. (The hardest part might be finding the font file you need to install.)
Note that all of the instructions that follow will add fonts to Photoshop and your computer as a whole. Font installation is a universal process on both Macs and PCs, so fonts will be available for use in all software.
Fonts do not carry from file to file or device to device, so having fonts that you need for projects installed is a necessity. If this is new to you, here are a few different ways to do it.
Add Fonts from Adobe Fonts
Adobe Fonts, which was recently rebranded from Adobe Typekit, is a collection of licensed fonts that’s included with every Adobe Creative Cloud plan. (This is probably how you are using Photoshop.)
Every Adobe Font can be used for personal or commercial use and there are thousands of fonts available in the collection. (They do change from time to time, so be aware that a font can disappear.)
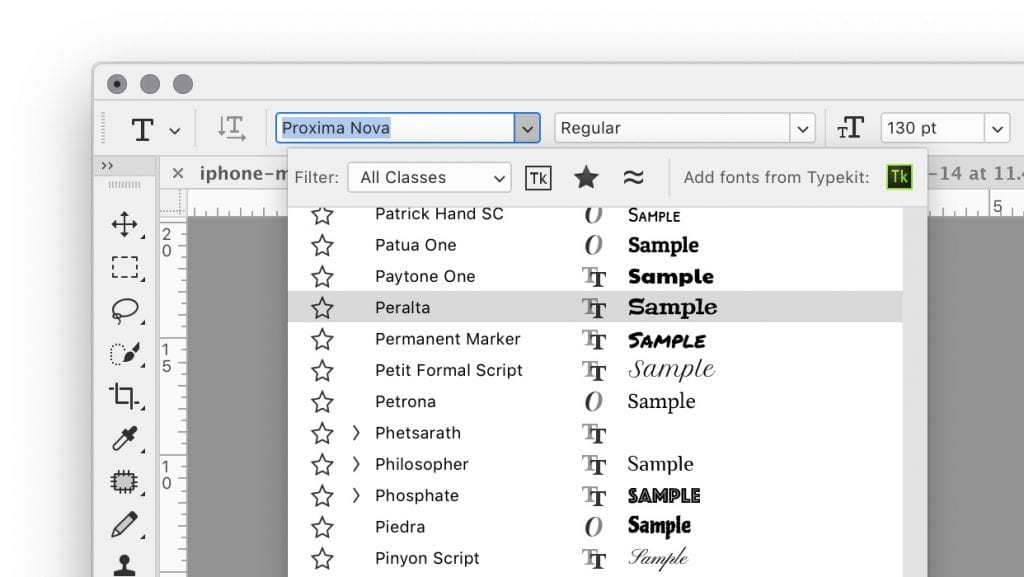
Adding a font from Adobe Fonts is easy. While logged in to Photoshop, click the Add Fonts button in the Character Menu. Make sure you are logged in to Creative Cloud and then select the fonts you want to use.
Click the toggle button to active fonts and those typefaces will appear in Photoshop (and other Adobe software) for immediate use.
Note: Typekit is not dead. It’s just been rebranded as the type solution for web fonts from Adobe. Most designers are still using Adobe Fonts and Typekit interchangeably and you might still have a Typekit icon if you haven’t taken recent software updates.

Add Fonts from a Package File
It’s pretty common to open a design file where fonts are missing. Package files are an easy solution to this dilemma. (Note that if you didn’t already have a license for a font from a package file, permission for use only extends to the design it was packaged with.)
To access these typefaces, open the package file and look for the “Document fonts” folder. Install needed fonts from the package using the Mac or Windows instructions below.
How to Install Fonts on Mac
Mac OS has native support for Type 1, TrueType and OpenType fonts. Before installing a font, make sure to close all open applications.
- Locate the file you want to install. (Common files types for fonts include .TTF and.OTF.) Make sure the font file is unzipped.
- Option 1: Copy or move all the font files into following location. Fonts must be loose in the destination folder, not in a subfolder. For all computer users put the fonts in this destination: /Library/Fonts/. To install fonts for a single user: /Users//Library/Fonts/
- Option 2: Double click the font name. It will open in a new window in the Font Book application. Click install font.
You can find instructions for installing fonts to Photoshop from earlier versions of Mac OS here.
How to Install Fonts on Windows
Windows supports OpenType fonts, and PostScript Type 1, and TrueType. Before installing a font, make sure to close all open applications.
- Locate the file you want to install. Make sure the font file is unzipped. To install multiple files at once, control-click or shift-click all desired fonts.
- Right-click the single font or font group and choose Install.
You can find instructions for installing fonts to Photoshop from earlier versions of Windows here.
Conclusion
Adding fonts is generally an easy process. Just make sure that before you add any new typeface that you are sure you have an appropriate license for use. (Many free font options are only available for personal use, and not commercial projects.)
The biggest difference between adding fonts from an included tool such as Adobe Fonts and another source is how you click to install. There are also some limits on the number of Adobe Fonts typefaces you can have installed at any one time.